Say goodbye to disappointing gluten-free bread forever! We all know the struggle: loaves that are too dense, too crumbly, or just don’t taste right.
Table of Contents

This gluten free sandwich bread recipe changes all of that. It bakes up incredibly soft, holds together beautifully for any sandwich, and has a rich, brioche-like flavor. Get ready to enjoy real, satisfying sandwiches again.
A Little Story About This Dish
For years after going gluten-free, the one thing I missed the most was a simple, classic sandwich. I craved that soft, squishy bread perfect for a piled-high turkey club or a simple PB&J. The store-bought options just never cut it.
So, I made it my mission to create the perfect loaf. After countless tests, this gluten free sandwich bread was born. The moment I took my first bite of a sandwich made with this bread, I knew my mission was a success. It’s a joy I’m so excited to share with you.
Get Ready to Cook! (A Quick Overview)
What to Expect
Making amazing gluten free sandwich bread from scratch is a rewarding process. While the recipe requires a bit of time—mostly for proofing and baking—the active prep is straightforward. Expect a very soft dough, a proofing time of about 90 minutes, and a bake time of just over an hour.
Before You Begin
We highly recommend using a stand mixer with a dough hook for this recipe. The dough is intentionally very soft and sticky, which is the secret to its light texture.
When it’s time to shape the loaf, don’t be shy with the flour! A generously floured surface and floured hands will make handling the sticky dough much easier. Also, resist the temptation to add extra flour to the dough itself, as this can make your final loaf dense. If you need more gluten-free meal inspiration, here are a few other ideas for you: Gluten-Free Street Corn Chicken Bowl, Gluten-Free Angel Food Cake.
Print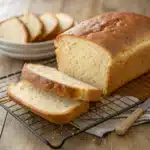
Gluten Free Sandwich Bread
- Total Time: 180
- Yield: 16 1x
Description
This is the best gluten free sandwich bread recipe you will ever make! It bakes up incredibly soft and fluffy with a rich, brioche-like flavor. It holds together perfectly for any sandwich, from a simple PB&J to a piled-high club. Say goodbye to dense, crumbly gluten-free bread forever.
Ingredients
For the Gluten Free Brioche Dough:
20 g (4 tbsp) whole psyllium husk
280 g (1 cup + 2½ tbsp) lukewarm water
230 g (2 cups) tapioca starch
135 g (1 cup) millet flour, plus extra for flouring
60 g (⅓ cup + 2 tbsp) sorghum flour
50 g (¼ cup) caster/superfine or granulated sugar
8 g (2½ tsp) instant yeast
8 g (2 tsp) baking powder
7 g (2¾ tsp) xanthan gum
12 g (2 tsp) salt
120 g (½ cup) whole milk, lukewarm
2 large eggs, room temperature
25 g (2 tbsp) sunflower oil, or other neutral-tasting oil
For the Egg Wash:
1 large egg white, whisked
Instructions
Step 1. Make the Psyllium Gel: In a bowl, mix together the psyllium husk and lukewarm water. Let stand for 30-45 seconds until a gel forms.
Step 2. Combine Dry Ingredients: In a stand mixer bowl, whisk together the tapioca starch, millet flour, sorghum flour, sugar, instant yeast, baking powder, xanthan gum and salt.
Step 3. Mix Wet Ingredients: Add the milk, eggs, and oil to the psyllium gel and mix well to combine.
Step 4. Knead the Dough: Pour the wet mixture into the dry ingredients. Using a dough hook, knead until smooth, then continue kneading for another 4-5 minutes. The dough will be very soft and sticky.
Step 5. Shape the Loaf: Turn the dough onto a generously floured surface. With floured hands, gently shape it into a log that fits snugly in a 9×5-inch loaf pan.
Step 6. Pan and Score: Carefully transfer the dough into the loaf pan. Use a sharp knife to make 3 diagonal slashes across the top.
Step 7. Proof the Dough: Cover lightly with plastic wrap and proof in a warm spot until doubled in size, about 1 hour 15 minutes to 1 hour 30 minutes.
Step 8. Preheat Oven: About 45 minutes into proofing, place a baking steel or heavy baking sheet on the lowest rack and preheat the oven to 400°F (200°C).
Step 9. Bake the Bread: Gently brush the proofed loaf with the whisked egg white. Place the pan directly on the hot baking steel and bake for 60-70 minutes, until deep golden brown. Cover with foil if it browns too quickly.
Step 10. Cool Completely: Immediately transfer the bread from the pan to a wire rack to cool completely before slicing. This step is crucial for the bread’s structure.
Notes
Working with the Dough: The dough is meant to be very soft and sticky! Use a generously floured surface and floured hands to make it manageable. Do not add more flour to the dough itself.
Stand Mixer Recommended: Due to the sticky nature of the dough, a stand mixer fitted with a dough hook is highly recommended.
Proofing Tip: If your kitchen is cold, create a warm proofing box by placing a cup of boiling water inside your (turned-off) oven along with the loaf.
Storage: Store the cooled loaf in a sealed container at room temperature for up to 4 days. It toasts beautifully!
- Prep Time: 20
- Cook Time: 70
- Category: Bread
- Method: Baking
- Cuisine: American
Nutrition
- Serving Size: 1 slice
- Calories: 175
- Sugar: 4 g
- Sodium: 310 mg
- Fat: 4 g
- Saturated Fat: 0.5 g
- Unsaturated Fat: 3 g
- Trans Fat: 0 g
- Carbohydrates: 30 g
- Fiber: 2 g
- Protein: 3 g
- Cholesterol: 23 mg
The Heart of the Dish: Ingredients You’ll Need
For the Gluten Free Brioche Dough

| Amount | Ingredient |
| 20 g (4 tbsp) | whole psyllium husk |
| 280 g (1 cup + 2½ tbsp) | lukewarm water |
| 230 g (2 cups) | tapioca starch |
| 135 g (1 cup) | millet flour |
| 60 g (⅓ cup + 2 tbsp) | sorghum flour |
| 50 g (¼ cup) | caster/superfine or granulated sugar |
| 8 g (2½ tsp) | instant yeast |
| 8 g (2 tsp) | baking powder |
| 7 g (2¾ tsp) | xanthan gum |
| 12 g (2 tsp) | salt |
| 120 g (½ cup) | whole milk, lukewarm |
| 2 large | eggs, at room temperature |
| 25 g (2 tbsp) | sunflower oil, or other neutral-tasting oil |
You’ll Also Need
| Amount | Ingredient |
| 1 large | egg white, whisked, for brushing |
Let’s Get Cooking! Step-by-Step Guide
Making the Dough
Step 1: Create the Psyllium Gel
In a small bowl, whisk together the whole psyllium husk and the lukewarm water. Set it aside for about 30 to 45 seconds. You’ll see it thicken into a gel-like consistency. This is a crucial binder for our gluten free sandwich bread.
Step 2: Combine the Dry Ingredients
In the large bowl of your stand mixer, add the tapioca starch, millet flour, sorghum flour, sugar, instant yeast, baking powder, xanthan gum, and salt. Make sure all the ingredients are mixed well by whisking them together completely.
Step 3: Mix the Wet Ingredients
Add the lukewarm milk, room-temperature eggs, and oil directly to the psyllium gel. Whisk this mixture well until it’s fully combined.
Step 4: Knead the Dough
Pour the wet ingredient mixture into the center of your dry ingredients. Using the dough hook attachment on your stand mixer, knead the dough until it becomes smooth. Once combined, continue to knead for an additional 4 to 5 minutes. This extra kneading is the secret to an extra-smooth dough and a beautifully structured loaf. Remember to scrape down the sides of the bowl occasionally. The final dough will be very soft and sticky—this is exactly what you want!

Shaping the Loaf
Step 5: Flour Your Surface and Shape
Turn the sticky dough out onto a generously floured work surface. Sprinkle a little more flour on top of the dough and on your hands. Gently knead the dough for a moment and form it into a smooth ball. Then, use the palms of your hands to gently press and shape the dough into a log that will fit snugly inside a 9×5-inch loaf pan.
Step 6: Pan and Score the Dough
Carefully lift your shaped loaf and place it into the loaf pan. There’s no need to grease the pan. Using a sharp knife or a bread lame, make three decisive diagonal slashes across the top of the dough. Scoring the dough now allows it to rise evenly without cracking.
Proofing the Bread
Step 7: Let the Dough Rise
Lightly cover the loaf pan with plastic wrap to keep the dough from drying out. Place it in a warm, draft-free spot to proof for about 1 hour and 15 minutes to 1 hour and 30 minutes. The dough should double in size. If your kitchen is cool, you can create a warm environment by placing a cup of boiling water in your turned-off oven.
Baking the Sandwich Bread
Step 8: Preheat the Oven
About 45 minutes into the proofing time, prepare your oven. Place a baking steel, stone, or a heavy-duty baking sheet on the lowest oven rack and preheat it to 400°F (200°C).
Step 9: Brush and Bake
Once the dough has doubled, gently brush the top with the whisked egg white. Place the loaf pan directly onto the hot baking steel in the oven. Bake for 60 to 70 minutes. The finished loaf will be a deep golden brown, and the crust will be crisp. If the top begins to brown too quickly, you can cover it loosely with a piece of aluminum foil.
Step 10: Cool Completely
As soon as the bread is done, remove it from the loaf pan and transfer it to a wire rack. It is essential to let the gluten free sandwich bread cool completely to room temperature before slicing. This allows the internal structure to set properly.
Mastering the Dish: Pointers for Perfection & How to Store
This gluten free sandwich bread keeps beautifully. Store the completely cooled loaf in a sealed container in a cool, dry place for up to 4 days. It stays soft and delicious without needing to be reheated, but it also makes incredible toast.
For an extra crisp crust on your freshly baked loaf, you can perform an optional final step. After you remove the bread from the loaf pan, place it directly back on the oven rack for an extra 5 to 10 minutes. This will help crisp up the sides and bottom even further. Looking for more gluten-free meal ideas? Take a look at these suggestions: Homemade Gluten Free Gnocchi, Gluten-Free Pie Crust.

Your Burning Questions Answered!
What can I replace bread with for a sandwich?
You have many creative and healthy options! Large, crisp lettuce leaves like romaine or iceberg are popular for making wraps. You can also use sliced and roasted sweet potatoes, bell peppers, or even large cucumber slices as a base. For a more traditional feel, gluten-free tortillas or rice cakes work wonderfully.
What breads are naturally gluten-free?
Breads that are naturally gluten-free are made from flours that do not contain wheat, barley, or rye. Common examples include breads made from rice flour, tapioca flour, almond flour, millet flour, and buckwheat flour. Some traditional breads, like Ethiopian injera (made from teff flour) or Indian bhakri (often made from millet or rice), are also naturally gluten-free.
Which gluten-free bread does Jersey Mike’s use?
Jersey Mike’s offers gluten-free sub rolls made by Udi’s. The rolls are baked and individually packaged off-site to minimize the risk of cross-contamination and are opened only when a customer places an order.
Dig In & Enjoy!
You did it! You’ve created a gorgeous, soft, and flavorful loaf of gluten free sandwich bread right in your own kitchen. This bread isn’t just a substitute; it’s a true upgrade that will revolutionize your lunch game. Get ready to enjoy the simple pleasure of a delicious, satisfying sandwich once again.
We would be thrilled to hear how your gluten free sandwich bread turned out! Let us know what amazing sandwiches you create by leaving a comment and a rating below. Your stories and feedback make our baking community stronger. Happy baking. You can discover more of my gluten-free recipes by connecting with me on Facebook and Pinterest.