The First Loaf That Changed Everything
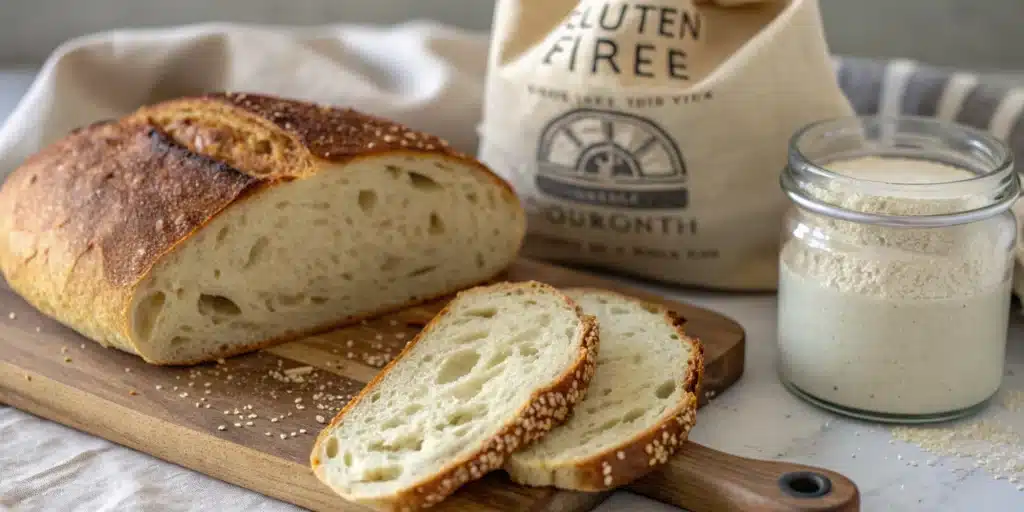
It was a humid July afternoon when I decided I wasn’t going to give up on sourdough, no matter what my new gluten-free lifestyle threw at me. I had already said goodbye to pasta, pizza crust, and my favorite sandwich bread, but sourdough? That was my comfort, my weekend ritual. I couldn’t imagine life without it.
So, I rolled up my sleeves, gathered my gluten-free flours, and fed my starter one more time. Hours later, after careful folds, a long, patient rise, and fingers crossed in the oven, I pulled out a loaf of summer gluten-free sourdough that looked—dare I say it—perfect. It had the crackle, the tang, and that airy, open crumb I’d been chasing for months. It wasn’t just a win for my kitchen—it was a win for my confidence.
That loaf reminded me why I started Recipes of Me in the first place: to prove that eating gluten-free doesn’t mean sacrificing flavor, joy, or the foods that bring us together. And now, I’m sharing that same summer gluten-free sourdough recipe with you—a loaf that’s not only gluten-free but also full of heart, history, and homemade magic.
Table of Contents
Why This Summer Gluten-Free Sourdough Recipe Works
If you’ve ever tried making sourdough without gluten, you know the challenges: dense crumb, lack of rise, or a gummy texture that just doesn’t cut it. I know that feeling all too well—it’s happened to me countless times. But over the years, I’ve fine-tuned this summer gluten-free sourdough recipe to work beautifully, every time, without the guesswork.
One of the biggest breakthroughs came when I learned how gluten-free flours behave differently from wheat. Unlike traditional bread flour, which has the structure-building proteins glutenin and gliadin, gluten-free flours need help holding together. That’s where the right blend of flours and the addition of psyllium husk come in. They mimic the elasticity of gluten and help the dough rise properly, giving you that light, airy texture you’re after.
Another key to success? Temperature. Summer baking means a warmer kitchen, which speeds up fermentation. That’s why this recipe is designed to work beautifully in a hot environment without overproofing. I’ve included visual cues—like the dough’s volume increase and bubbly surface—to help you know exactly when it’s ready to shape.
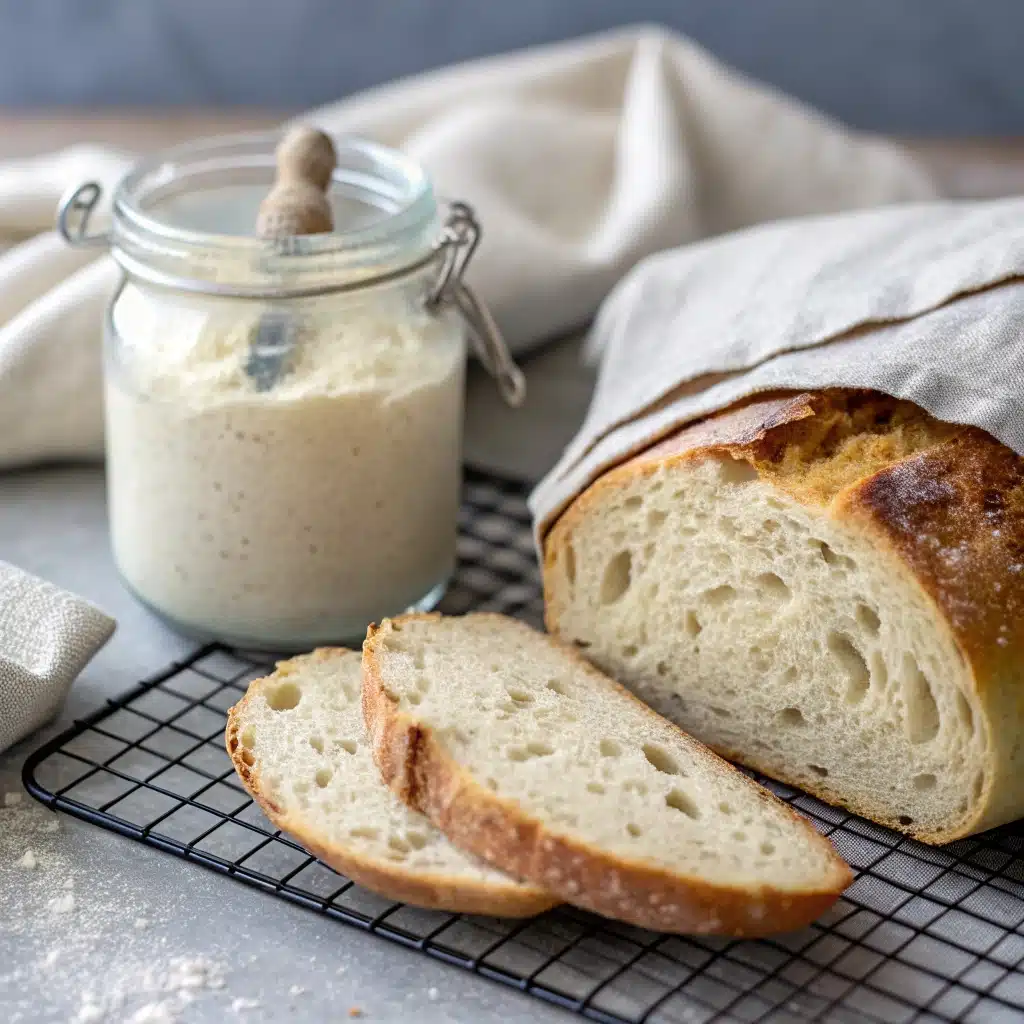
And let’s not forget the starter. A bubbly, active starter is your best friend in sourdough baking. I always use 100 grams of starter in this recipe because it gives the dough a strong fermentative boost without overpowering the flavor. If your starter is sluggish, give it an extra feeding or two before beginning. A happy starter equals a happy loaf.
This recipe isn’t just about technique—it’s about bringing the joy of homemade bread back into your kitchen. With the right ingredients, a little patience, and some good old-fashioned love, you’ll be slicing into your own summer gluten-free sourdough in no time.
Now that you’re ready to dive into the actual baking process, let’s break down the ingredients and steps you’ll need to make a perfect summer gluten-free sourdough loaf. This recipe is designed to be approachable for home bakers of all skill levels, while still delivering that artisan-style result we all crave.
This recipe pairs beautifully with our decadent Gluten-Free Potato Buns for your next baking adventure.
Ingredients for Summer Gluten-Free Sourdough
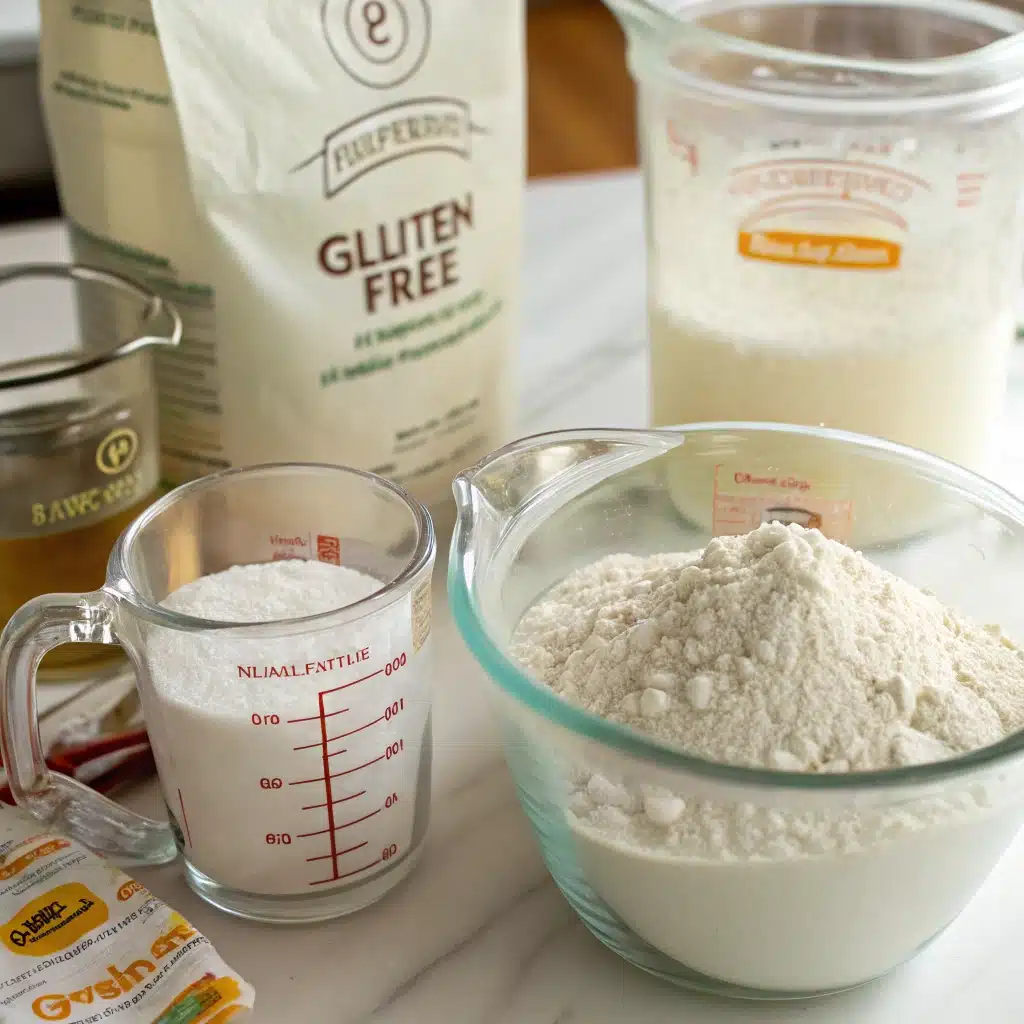
Here’s what you’ll need to make one beautiful loaf:
| Ingredient | Quantity | Notes |
|---|---|---|
| Active gluten-free sourdough starter | 100g (about 1/2 cup) | Fully bubbly and fed within 4–6 hours |
| Warm water | 375g (1 1/2 cups + 1 tbsp) | Lukewarm, not hot |
| Gluten-free bread flour blend | 500g (4 cups + 2 tbsp) | Use a high-quality blend with xanthan gum or add separately |
| Fine sea salt | 9–12g (1.5–2.5 tsp) | Adjust to taste |
Step-by-Step Instructions
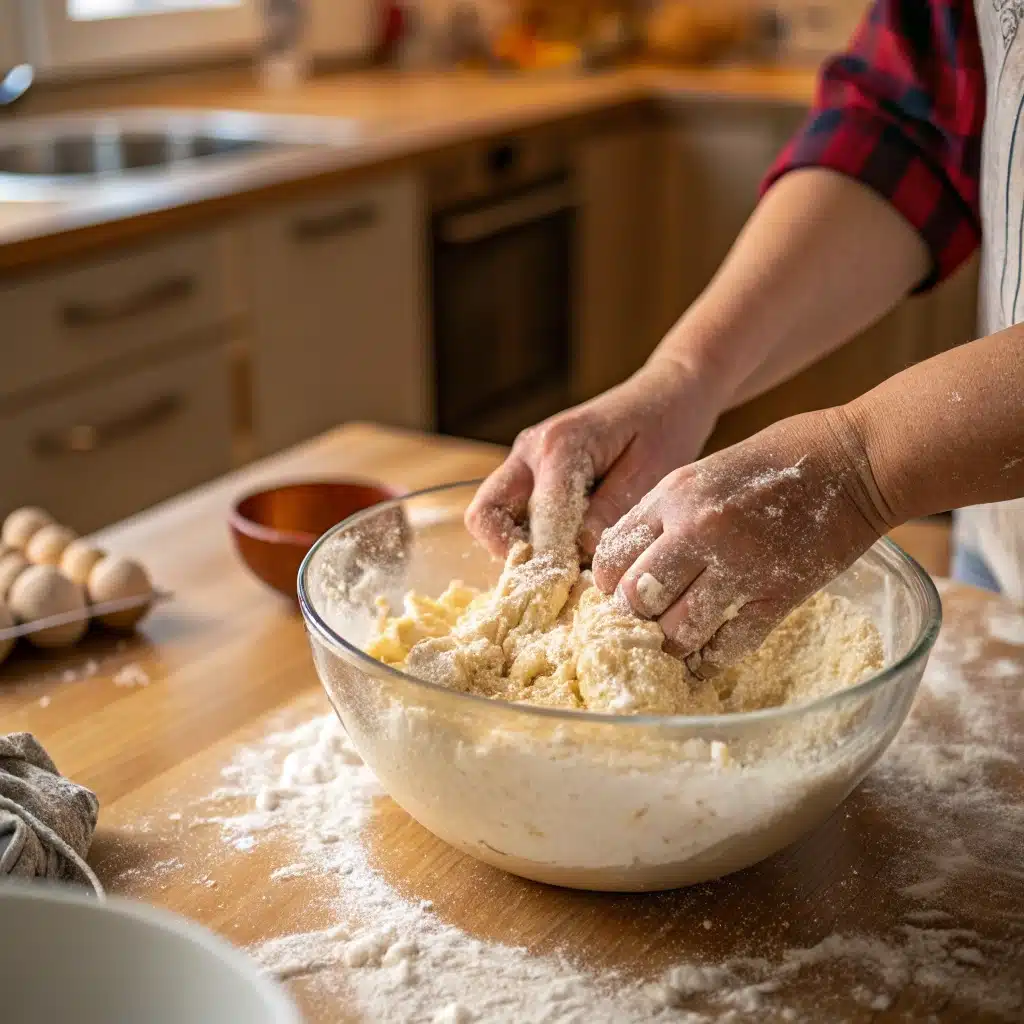
Mix the Dough: Using a large bowl, thoroughly whisk the starter with warm water. Fold in the flour and salt, mixing just until a sticky, uneven dough develops. Use a spatula or your hands to bring everything together. Place a moistened towel over the bowl and let the dough relax for a full 30 minutes. This rest period helps hydrate the flour and kickstart gluten-free structure development.
Begin Stretch and Folds: After the initial rest, start the folding sequence. Grip one side of the dough firmly, pull it upward with controlled pressure, and fold it over to meet the middle.
Repeat this on all four sides. Repeat this process every 30 minutes during the initial 2-hour period. No need to stress if you skip a few sessions—just one round of folds will meaningfully enhance your dough’s development.
Bulk Fermentation: Cover the bowl and let the dough ferment at room temperature for 6–10 hours, depending on how warm your kitchen is. The dough is ready when it’s visibly puffed (about 50% increase in volume) and has small bubbles on the surface.
Shape the Dough: Transfer the dough onto a lightly floured work surface. Create a round loaf by gently folding the edges toward the center while slowly rotating the dough. Let your bench scraper be your guide, helping you lift and tuck the dough as you create the final shape. Transfer the formed dough to a well-floured proofing basket or a bowl prepared with a flour-dusted kitchen towel.
Final Proof: Cover the shaped dough and place it in the refrigerator for 1–24 hours to develop flavor and structure. A cold proof enhances flavor and improves oven spring. If you’re short on time, a 1-hour room temperature proof works too.
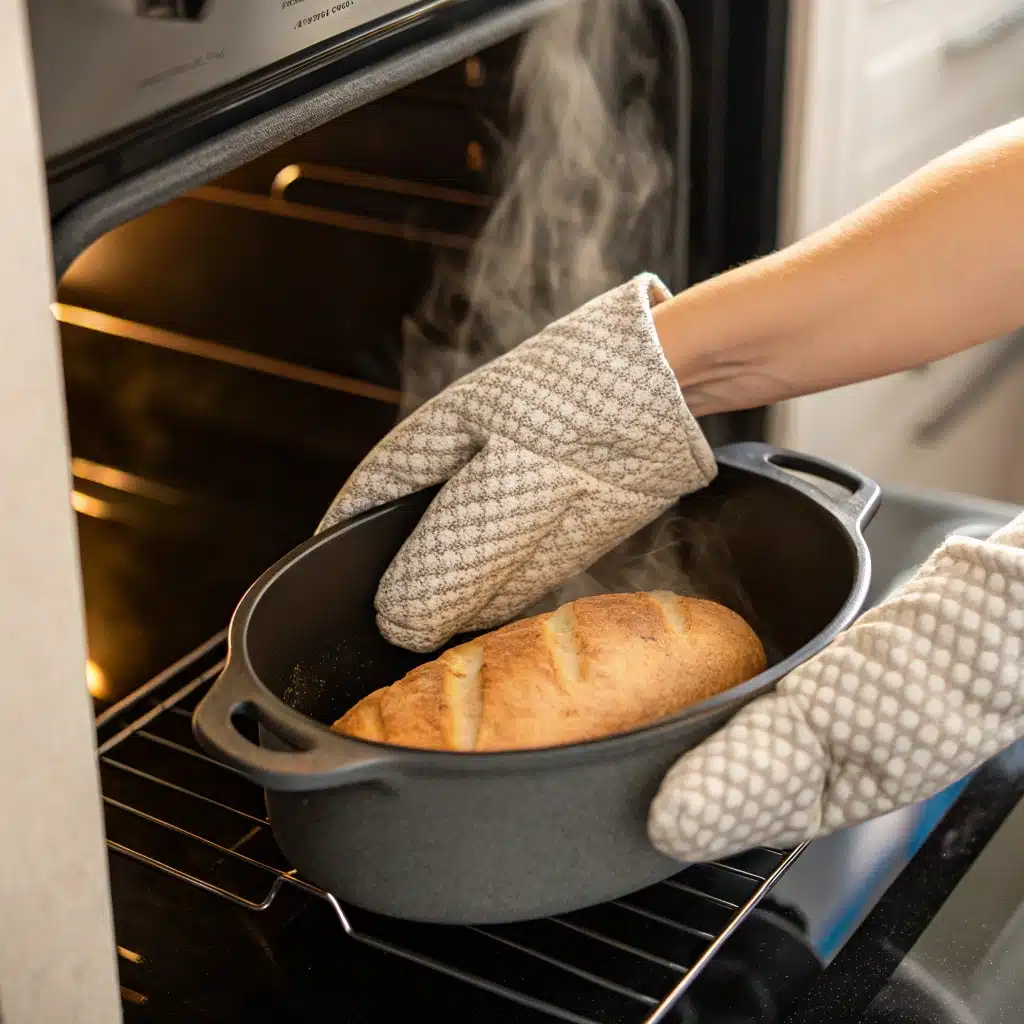
Preheat and Score: Place a Dutch oven in your oven and preheat to 550°F (290°C). Once preheated, carefully transfer the dough into the hot pot using parchment paper. Create decorative cuts across the top using a sharp blade or razor, then secure the lid in place.
Bake the Bread: Begin with a covered bake for 30 minutes, then uncover and lower the oven temperature to 450°F (230°C). Bake an additional 10–15 minutes until the crust achieves a rich, golden-brown color. For extra crispiness, remove the bread from the pot and bake directly on the rack for the last 5 minutes.
Cool and Slice: Allow the bread to cool completely on a wire rack for a minimum of 1 hour before cutting—this prevents a gummy texture. This allows the crumb to set and prevents gummy results.

Our convenient Gluten Free Red Velvet Brownies mix delivers bakery-quality results with minimal effort for busy bakers.
Troubleshooting and Storage Tips for Summer Gluten-Free Sourdough
Even the best summer gluten-free sourdough recipes can run into a few hiccups along the way. Whether your loaf didn’t rise as expected or the crust didn’t turn out as crisp as you hoped, the good news is that most issues have simple fixes.
One of the biggest challenges with gluten-free sourdough is achieving the right rise. Without gluten to provide structure, dough can spread out instead of rising up. If your loaf turns out flat or dense, check your starter first. A bubbly, active starter is essential for good fermentation. If yours is sluggish, give it an extra feeding or two before beginning your dough. Also, make sure you’re using a flour blend that includes structure-supporting ingredients like xanthan gum or psyllium husk.
Another common issue is overhydration. Gluten-free flours absorb water differently than wheat flour, and too much liquid can lead to a batter-like dough that’s hard to shape. If your dough feels excessively wet, try adding a bit more flour during mixing or adjusting the hydration level in future batches. You can also perform extra stretches and folds during bulk fermentation to help strengthen the dough’s structure.
Master this technique with a new twist using our Gluten-Free Sopapilla Cheesecake that showcase the same foolproof method.
Storing and Freezing Your Loaf
Once your summer gluten-free sourdough has cooled completely, store it in a paper or linen bread bag to keep the crust crisp. Skip plastic bags entirely—they create moisture buildup that ruins your crispy crust. For bread you’ll consume within two to three days, this storage approach delivers excellent results.
For longer storage, slice the loaf and freeze it in an airtight container or zip-top bag. Reheating is easy—just pop slices in the toaster or warm them in a 350°F (175°C) oven for 10–15 minutes. This technique delivers better preservation of both texture and taste than room-temperature storage as time passes.
Expand your baking collection with our irresistible Gluten Free Cinnamon Coffee Cake—another crowd-pleasing favorite.
Frequently Asked Questions (FAQ)
Is sourdough okay if you are gluten-free?
Traditional sourdough is made with wheat flour, so it’s not gluten-free by default. However, you can absolutely make gluten-free sourdough by using a starter fed with gluten-free flour and a gluten-free flour blend for the dough. This allows you to enjoy the signature tang and chew of sourdough without any gluten-containing ingredients.
Is there a sourdough that is gluten-free?
Yes! Many bakers—including myself—successfully make gluten-free sourdough using alternative flours like rice, buckwheat, and sorghum. The key is to maintain a gluten-free sourdough starter and use a well-balanced flour mix that mimics the structure of traditional wheat flour. With the right techniques, you can enjoy a loaf that rivals any wheat-based sourdough.
Which gluten-free flour is best for sourdough?
There’s no one-size-fits-all answer, but a combination of white rice flour, sorghum flour, and a touch of buckwheat flour works well for sourdough. These flours provide structure, flavor, and a good rise.
Can gluten-free sourdough overproof?
Yes, gluten-free sourdough can overproof just like regular sourdough. Because gluten-free dough lacks the elastic structure of wheat dough, it’s more prone to collapse if left to rise too long. To avoid this, use visual cues like volume increase and bubbling on the surface to determine when your dough is ready. A slow, cold proof in the refrigerator for 12–24 hours regulates the fermentation process while developing superior texture and deeper flavors.
Conclusion
Making summer gluten-free sourdough is more than just baking bread—it’s about reclaiming the joy of homemade food without compromise. From the first time I pulled a golden, crackling loaf from the oven to the countless loaves I’ve baked since, this journey has been filled with discovery, flavor, and the pure satisfaction of demonstrating that gluten-free can be just as delicious and flavorful.
Whether you’re new to sourdough or looking to perfect your gluten-free baking skills, this recipe gives you the tools to succeed. With the right flour blend, a strong starter, and a few simple techniques, you’ll be enjoying bakery-quality bread from your own kitchen.
So, don’t let gluten intolerance or dietary restrictions hold you back. Embrace the process, celebrate the flavors, and most importantly, enjoy every bite of your summer gluten-free sourdough.
For more Gluten-Free recipes, follow me on Facebook and Pinterest.
Print
Summer Gluten-Free Sourdough: Heat Makes It Better
- Total Time: 750
- Yield: 1 loaf 1x
- Diet: Gluten Free
Description
A light, airy summer gluten-free sourdough with a crisp, golden crust and tangy flavor. Perfect for sandwiches, avocado toast, or enjoying with butter. This recipe proves that gluten-free bread can rise beautifully and taste incredible.
Ingredients
50–100g (1⁄4–1⁄2 cup) active gluten-free sourdough starter (fed and bubbly)
375g (1 1/2 cups + 1 tbsp) warm water (about 80°F/27°C)
500g (4 cups + 2 tbsp) gluten-free bread flour blend (with xanthan gum or add 1 tsp separately)
9–12g (1.5–2.5 tsp) fine sea salt
Instructions
1. In a large bowl, whisk together the starter and warm water until fully combined and slightly bubbly.
2. Add the gluten-free flour and salt. Mix with a spatula or hand until a sticky, shaggy dough forms.
3. Cover with a damp towel and let rest for 30 minutes to allow the flours to hydrate.
4. Perform a series of stretch and folds: grab one side of the dough, stretch it upward, and fold it into the center. Rotate and repeat 4 times. Do this every 30 minutes for 2 hours (4 rounds total).
5. Cover and let the dough undergo bulk fermentation at room temperature for 6–10 hours, depending on your kitchen temperature. The dough is ready when it has increased by 50%, is bubbly, and jiggles when nudged.
6. Turn the dough onto a lightly floured surface. Gently shape into a round by folding edges into the center and rotating. Use a bench scraper to help tighten the surface.
7. Place the shaped dough into a floured proofing basket or bowl lined with a floured towel, seam side up.
8. Cover and refrigerate for 12–24 hours for cold fermentation (retards fermentation and enhances flavor).
9. Place a Dutch oven in your oven and preheat to 550°F (290°C).
10. Score the top of the dough with a sharp knife or razor blade, then use parchment paper to transfer it into the hot Dutch oven.
11. Bake covered for 30 minutes. Then remove the lid, reduce heat to 450°F (230°C), and bake for another 10–15 minutes until deeply golden brown.
12. For extra crispness, remove the loaf from the pot and bake directly on the rack for the last 5 minutes.
13. Cool completely on a wire rack for at least 1 hour before slicing to prevent gummy texture.
Notes
Use a strong, bubbly starter for best rise and flavor development.
Flour blends with psyllium husk or xanthan gum help mimic gluten’s elasticity.
For a lighter crumb, a 24-hour cold proof is highly recommended.
Store in a paper or linen bread bag for up to 3 days. Avoid plastic to keep the crust crisp.
Freeze sliced bread in an airtight bag for up to 3 months. Reheat in a toaster or oven.
- Prep Time: 30
- Cook Time: 45
- Category: Bread
- Method: Baking
- Cuisine: American
Nutrition
- Serving Size: 1 slice
- Calories: 220
- Sugar: 1
- Sodium: 350
- Fat: 2
- Saturated Fat: 0.5
- Unsaturated Fat: 1
- Trans Fat: 0
- Carbohydrates: 45
- Fiber: 3
- Protein: 4
- Cholesterol: 0