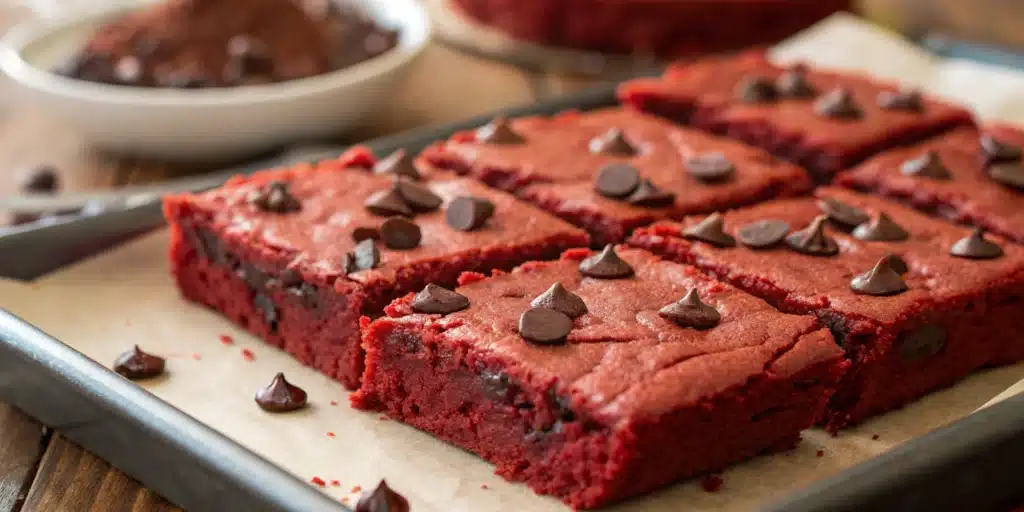
There’s something magical about red velvet—it’s not just a flavor, it’s an experience. I still remember the first time I made gluten free Red Velvet Brownies. It was a rainy afternoon, and I wanted to recreate a dessert that reminded me of my childhood: soft, rich, and full of warmth. But back then, gluten-free baking felt like a guessing game. My early attempts were either too dense, too dry, or, worst of all, colorless. It took weeks of tweaking ratios, trying different flours, and experimenting with food coloring before I finally got it right.
Now, every bite of these gluten free Red Velvet Brownies feels like a victory—not just over gluten, but over the idea that dietary restrictions should ever mean settling for less. These brownies are proof that you can have everything you love about classic red velvet: the deep cocoa flavor, the vibrant color, and that melt-in-your-mouth texture—all without gluten.
Table of Contents
Why This Recipe Works for Everyone
Whether you’re gluten-sensitive, celiac, or simply exploring healthier alternatives, this recipe is designed to work for everyone. The secret lies in using the right blend of ingredients that mimic traditional baking results. And because I’ve been where you are—wondering if gluten-free desserts will ever live up to the real thing—I crafted this recipe with simplicity in mind. No fancy tools, no hard-to-find ingredients—just everyday items that come together quickly and reliably.
What makes these gluten free Red Velvet Brownies truly special is how they bring people together. Whether it’s a family gathering, a school bake sale, or just a cozy evening treat, these brownies are always a hit. And best of all? No one will guess they’re gluten-free!
One of the most important steps in making perfect gluten free Red Velvet Brownies is selecting the right flour. Unlike traditional all-purpose flour, gluten-free blends lack the protein structure that gives baked goods their elasticity and chew. That’s why I always recommend using a high-quality gluten-free all-purpose flour blend like Bob’s Red Mill or King Arthur. These blends are carefully formulated with a mix of rice flour, potato starch, and tapioca flour to mimic the texture of wheat-based doughs.
If you’re new to gluten-free baking, it’s tempting to just use one type of flour—like almond or coconut flour—but those behave very differently and can easily ruin your results. For optimal effects, stick to a 1-to-1 substitution. And if you’re wondering whether you can skip xanthan gum, don’t! It acts as a binder and helps give these brownies that soft, fudgy texture we all love.
The Science Behind Perfect Texture
Getting the right texture in gluten-free baking can feel tricky, but once you understand how ingredients interact, it becomes much easier. In this recipe, the combination of butter, sugar, and eggs creates a rich base that supports the structure. Since there’s no gluten to provide elasticity, mixing time becomes crucial. Overmixing can lead to tough brownies, so stop once everything is just combined.
Another key player in achieving that signature moistness is the red gel food coloring. Unlike liquid food coloring, which adds extra moisture and may dilute flavor, gel coloring keeps the batter thick while delivering vibrant color. And of course, folding in the chocolate chips at the end ensures they stay intact and add bursts of melty goodness throughout each bite.
By understanding these small but powerful details, even beginner bakers can create gluten free Red Velvet Brownies that taste just like the classic version—only better because they’re made without compromise.
What You’ll Need for These Gluten Free Red Velvet Brownies
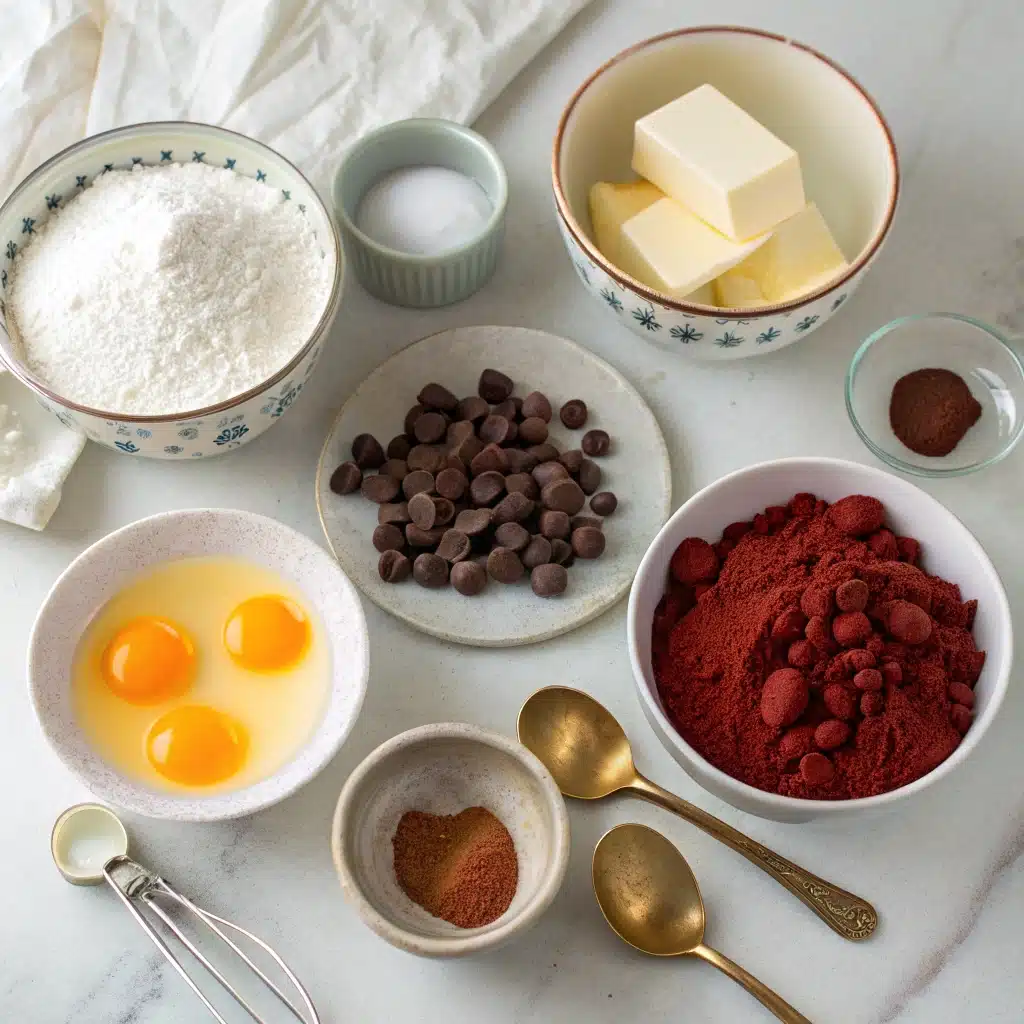
To make these rich, fudgy gluten free Red Velvet Brownies, you’ll need the following ingredients. All measurements are clearly listed to help you bake with confidence:
Gluten-Free Chocolate Cake Ingredients
Wet Ingredients & Dry Mix
Amount
Ingredient
¾ cup
butter, dairy-free or regular
1¼ cups
granulated sugar
2 large
eggs
1 teaspoon
vanilla extract
1½ cups
gluten-free all-purpose flour can substitute regular all-purpose flour if not gluten-free
3 tablespoons
cocoa powder
¼ teaspoon
salt
1 teaspoon
red gel food coloring
⅔ cup
chocolate chips
These simple ingredients come together beautifully to create a soft, moist brownie with that classic red velvet flavor—minus the gluten.
Follow these easy steps to make your own batch of gluten free Red Velvet Brownies at home:
Preheat oven to 350°F (175°C). Put parchment paper on an 8 x 8-inch baking tray and set it aside.
Microwave the butter for about 30 seconds until softened but not fully melted.
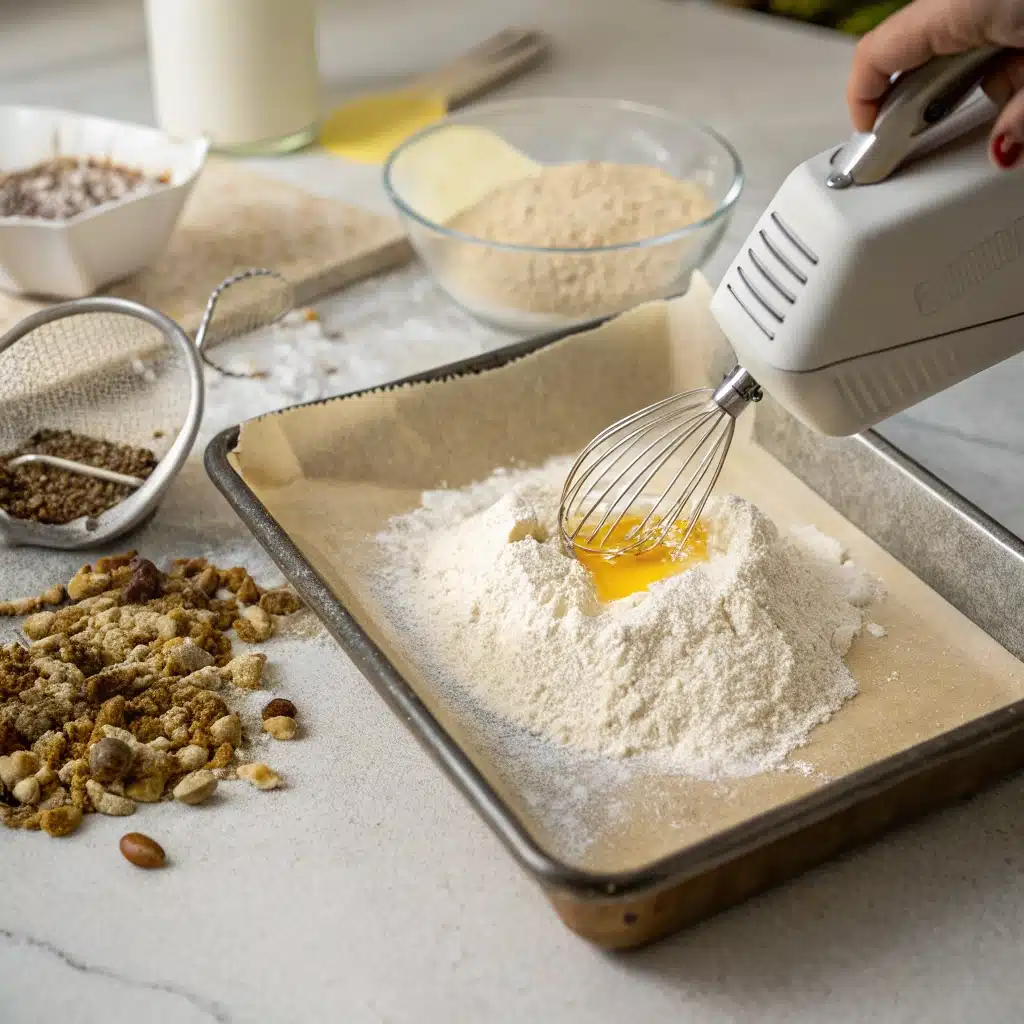
For one minute, in a mixing bowl, beat the sugar and butter until smooth and creamy.
Add the eggs and vanilla extract, then beat again until well combined.
Mix in dry ingredients: Add gluten-free flour, cocoa powder, and salt. Beat until smooth and evenly mixed.
Stir in the red gel food coloring. Mix thoroughly. Add a bit more if you want a deeper red color.
Using a spatula, carefully fold in the chocolate chips until they are uniformly distributed.
Smoothly spread out the batter after pouring it into the prepared pan. Press down lightly and top with extra chocolate chips if desired.
Bake for 30–38 minutes, depending on how fudgy or cakey you like your brownies. It should come out clean or with only a few crumbs when a toothpick is placed in the center.
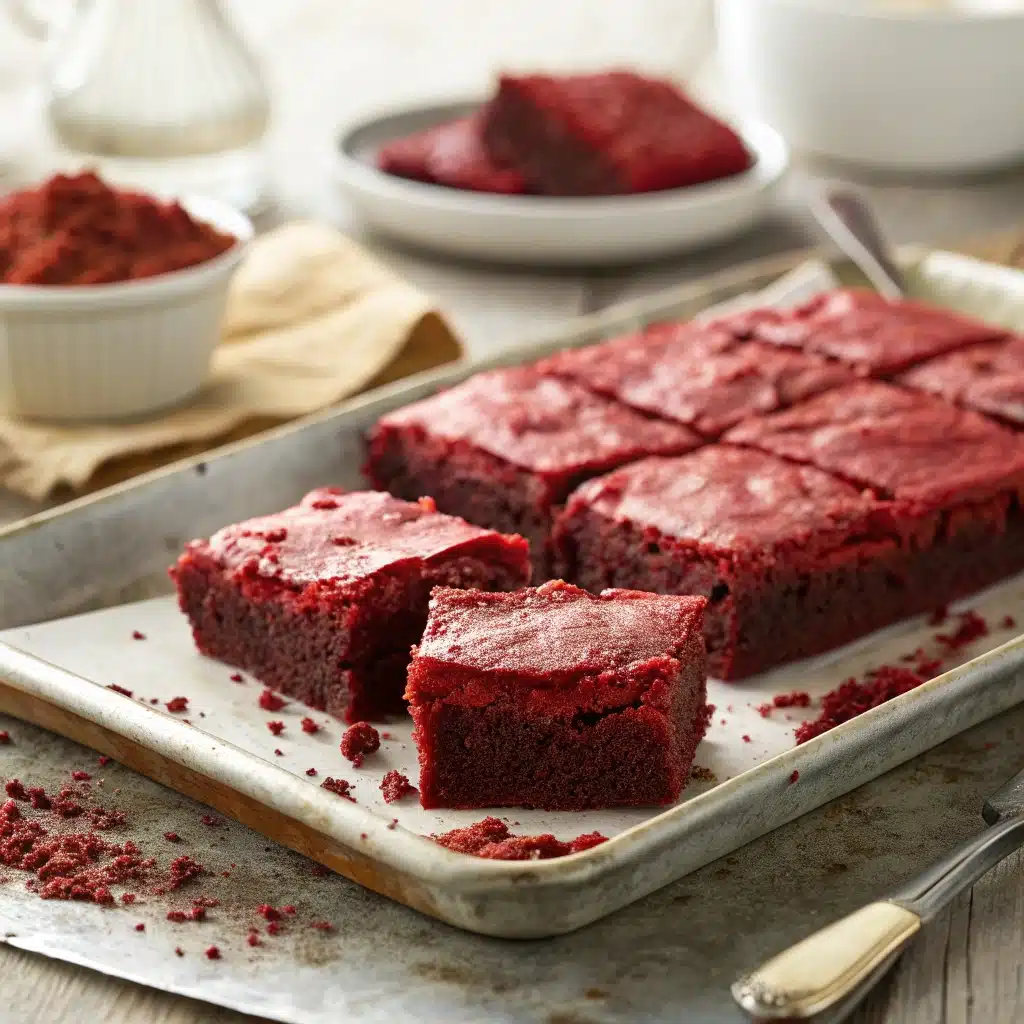
Let cool in the pan for about 20 minutes before lifting the parchment paper out and placing the brownies on a wire rack to cool completely.
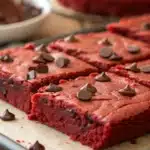
Slice into 16 squares and serve.
These gluten free Red Velvet Brownies are perfect for any occasion—from school lunches to holiday gatherings. They’re soft, chewy, and full of that classic red velvet flavor we all love.
To ensure your gluten free Red Velvet Brownies turn out perfectly every time, keep these helpful tips in mind:
This recipe works best with white granulated sugar for the classic red velvet look and taste. However, you can use coconut sugar as a refined sugar-free alternative. Keep in mind that coconut sugar will darken the batter, so you may need to add more red gel food coloring to achieve the vibrant hue.
Always use gel-based food coloring instead of liquid. Liquid coloring adds moisture and may affect texture. If you must use liquid coloring, add it slowly and be prepared to adjust the amount.
If you’re not going gluten-free with this recipe, you can simply use regular all-purpose flour instead of the gluten-free blend. The rest of the instructions remain the same.
Store leftover brownies in an airtight container at room temperature for up to 3 days or refrigerate for longer freshness.
Now that you’ve got the full recipe and tips for success, you’re ready to enjoy these delicious gluten-free treats! In the next section, we’ll explore how to customize this recipe and pair it with different flavors.
Putting Your Personal Touch on Delicious Gluten Free Red Velvet Brownies
Creative Ways to Personalize This Recipe
Once you’ve mastered the basic gluten free Red Velvet Brownies, you can have fun customizing them to suit different tastes and occasions. These brownies are incredibly versatile, making them a great base for creative twists that elevate both flavor and presentation.
For a luxurious twist, top each brownie with a dollop of dairy-free or regular cream cheese frosting before serving. The delightful tanginess blends perfectly with the rich chocolate flavor and hints of red. You can also drizzle melted white chocolate over the top for a festive look—perfect for holidays or special celebrations.
Want to make these brownies even more indulgent? Try adding chopped pecans or walnuts along with the chocolate chips for extra crunch. If you’re feeling adventurous, swirl in a few tablespoons of peanut butter or Nutella into the batter before baking for a marbled effect that adds depth and richness.
Perfect Pairings: What to Serve With These Brownies
Gluten free Red Velvet Brownies shine when paired with the right beverage or side dish. Whether you’re enjoying one as a midday treat or serving them at a gathering, thoughtful pairings can enhance the overall experience.
A tall glass of cold almond milk or oat milk complements the rich chocolate flavor and helps balance the sweetness. For adults, a bold cup of coffee or a smooth red wine like Merlot brings out the earthy notes in the cocoa, making each bite feel even more decadent.
If you’re hosting a dessert night, consider serving these brownies with a scoop of vanilla bean ice cream or coconut-based chocolate sorbet. You won’t be able to resist the delicious combination of a warm brownie paired with a cold, creamy topping!
Looking for something lighter? Add fresh berries like strawberries or raspberries on the side—they provide a refreshing tartness that cleanses the palate after every rich bite.
These gluten free Red Velvet Brownies aren’t just a dessert; they’re a canvas for creativity. With a few small tweaks and thoughtful pairings, you can turn this simple recipe into a standout treat that everyone will love—no matter their dietary needs.
Can I make these gluten free Red Velvet Brownies dairy-free?
Yes, you can easily make this recipe dairy-free. Simply use a dairy-free butter alternative like vegan margarine or coconut oil in place of regular butter. For the best results, choose a brand that closely mimics the texture and moisture content of real butter. Additionally, ensure your chocolate chips are dairy-free by selecting a certified option or using dark chocolate chips that contain no milk solids.
Can I freeze these brownies for later?
Absolutely! These gluten free Red Velvet Brownies freeze very well. Once completely cooled, wrap them tightly in plastic wrap or store them in an airtight freezer-safe container. They will keep in the freezer for up to 3 months. When ready to enjoy, thaw them at room temperature for about an hour or gently warm them in the microwave for 10–15 seconds for a fresh-out-of-the-oven feel.
Why did my brownies turn out dry?
Dryness in gluten free baked goods often comes down to overbaking or improper ingredient ratios. Make sure not to bake the brownies longer than recommended—start checking at the 30-minute mark. Also, avoid substituting the flour with almond or coconut flour unless the recipe specifically calls for it. Stick to a high-quality 1-to-1 gluten-free flour blend for best results.
Can I use liquid food coloring instead of gel?
You can use liquid food coloring, but be aware that it contains more moisture than gel coloring. This may affect the batter’s consistency and potentially lead to a cakey texture. If you must use liquid coloring, add it gradually and consider reducing other liquids slightly to compensate.
Conclusion: A Gluten-Free Treat Everyone Will Love
Gluten free Red Velvet Brownies prove that you don’t need gluten to enjoy a rich, fudgy, and beautifully colored dessert. Whether you’re baking for yourself, a loved one with dietary restrictions, or simply looking for a new twist on a classic favorite, this recipe delivers every time. With the right ingredients, a few simple techniques, and a little creativity, you can make brownies that are just as soft, moist, and indulgent as their traditional counterparts.
I hope this recipe brings as much joy to your kitchen as it has to mine. From my home to yours—happy baking!
Indulge in rich, fudgy gluten-free Red Velvet Brownies—moist, vibrant, and full of flavor. Perfect for dessert lovers and those avoiding gluten. Easy to make with simple ingredients and no compromise on taste!
Ingredients
Scale
¾ cup butter, dairy-free or regular
1 ¼ cup granulated sugar
2 large eggs
1 teaspoon vanilla extract
1 ½ cups gluten-free all-purpose flour (can substitute regular flour if not gluten-free)
3 tablespoons cocoa powder
¼ teaspoon salt
1 teaspoon red gel food coloring (adjust for deeper color)
⅔ cup chocolate chips
Instructions
1. Preheat oven to 350°F (175°C). Line an 8×8-inch baking pan with parchment paper and set aside.
2. Microwave the butter for about 30 seconds until softened (not fully melted).
3. Beat the butter and sugar together for 1 minute until smooth and creamy.
4. Add the eggs and vanilla extract. Beat until well combined.
5. Add the gluten-free flour, cocoa powder, and salt. Mix until smooth and no lumps remain.
6. Beat in the red gel food coloring. Add more if you prefer a deeper red hue.
7. Gently fold in the chocolate chips using a spatula.
8. Pour the batter into the prepared pan and spread evenly. Top with extra chocolate chips if desired.
9. Bake for 30–38 minutes, or until a toothpick inserted in the center comes out clean or with a few moist crumbs.
10. Let cool in the pan for 20 minutes, then lift out using the parchment paper and cool completely on a wire rack.
11. Slice into 16 squares and serve.
Notes
For best results, use granulated white sugar. Coconut sugar can be used as a refined sugar-free alternative, but it will darken the color significantly.
Red gel food coloring is recommended over liquid to avoid adding extra moisture to the batter.
Store in an airtight container at room temperature for up to 3 days, or refrigerate for up to 1 week.
These brownies freeze well—wrap tightly and store for up to 3 months. Thaw at room temperature before serving.