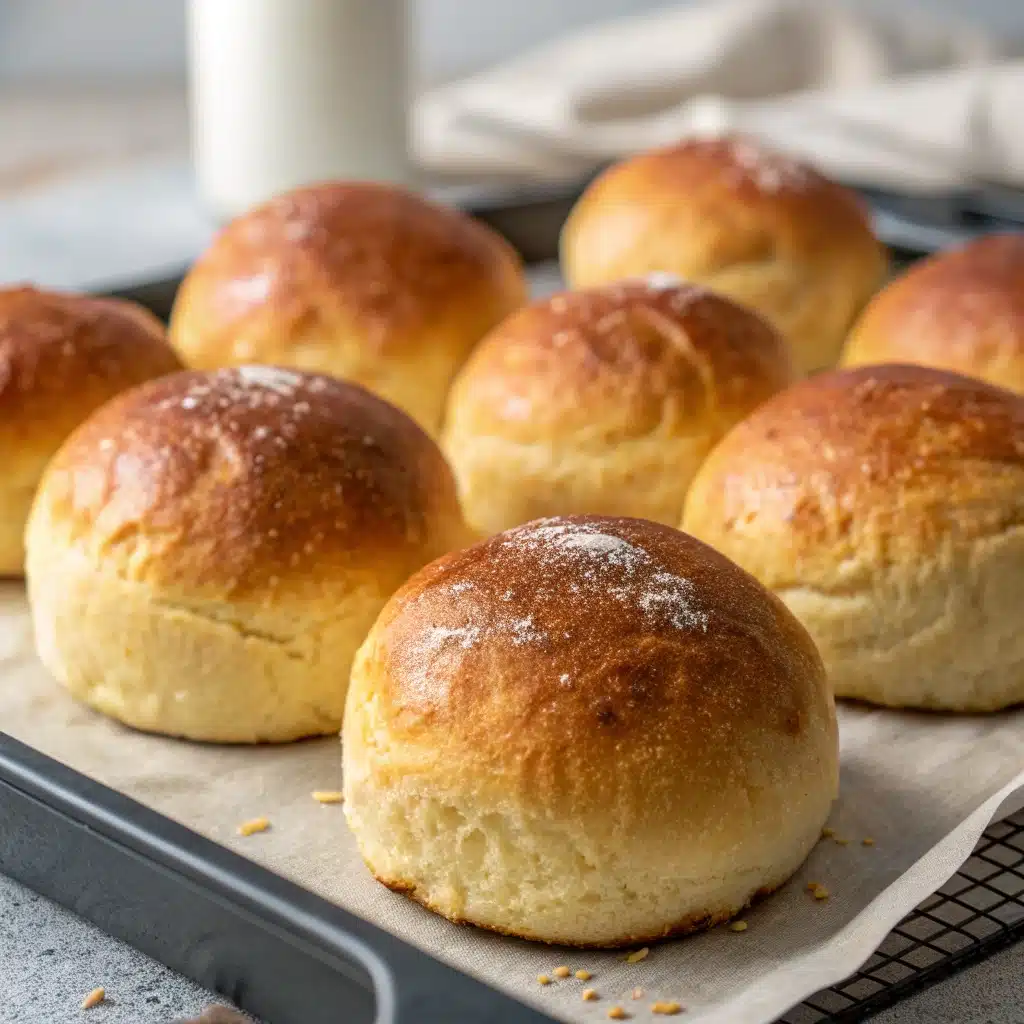
Transitioning to a gluten-free lifestyle can feel daunting, especially when it comes to recreating the comfort of classic dishes like potato buns. But with Helen Tois’s expertise as your guide, you’ll discover how simple and satisfying gluten-free cooking can be. These Gluten-Free Potato Buns are soft, flavorful, and perfect for burgers, sandwiches, or sliders. Whether you’re new to gluten-free cooking or an experienced home chef, this recipe ensures success without compromising taste or texture.

In this article, we’ll explore Helen’s personal journey into gluten-free cooking, share tips to simplify your experience, and provide a foolproof recipe for these delicious buns. You’ll also find answers to frequently asked questions about gluten-free options at popular restaurants, helping you navigate dining out confidently. Let’s get started!
Table of Contents
The Story Behind Gluten-Free Potato Buns
Why Potato Buns?
Potato buns have long been cherished for their tender crumb and subtle sweetness. When Helen finally mastered gluten-free potato buns, it became the breakthrough that changed everything in her kitchen. Eight years ago, she embarked on a mission to recreate the comforting flavors of her favorite breads safely, without gluten. After countless experiments—and a few less-than-perfect loaves—she discovered the perfect balance of ingredients that deliver both flavor and texture.
Her dedication to creating approachable recipes comes alive in every tender, flavorful bite of these exceptional buns. They celebrate the joy of gluten-free cooking while honoring the nostalgia of classic American flavors. If homemade bread has always seemed intimidating, this recipe will become your first step toward fearless baking.
Tips for Success
Before diving into the recipe, here are some essential tips to keep in mind:
- Use certified gluten-free flour blends.
- Avoid cross-contamination by using separate utensils and prep surfaces.
With these basics covered, you’re ready to create buns that rival any store-bought option.
Try our Gluten Free Red Velvet Brownies if you’re looking for more sweet treats!
Mastering Ingredients and Substitutions
Key Ingredients for Gluten-Free Potato Buns
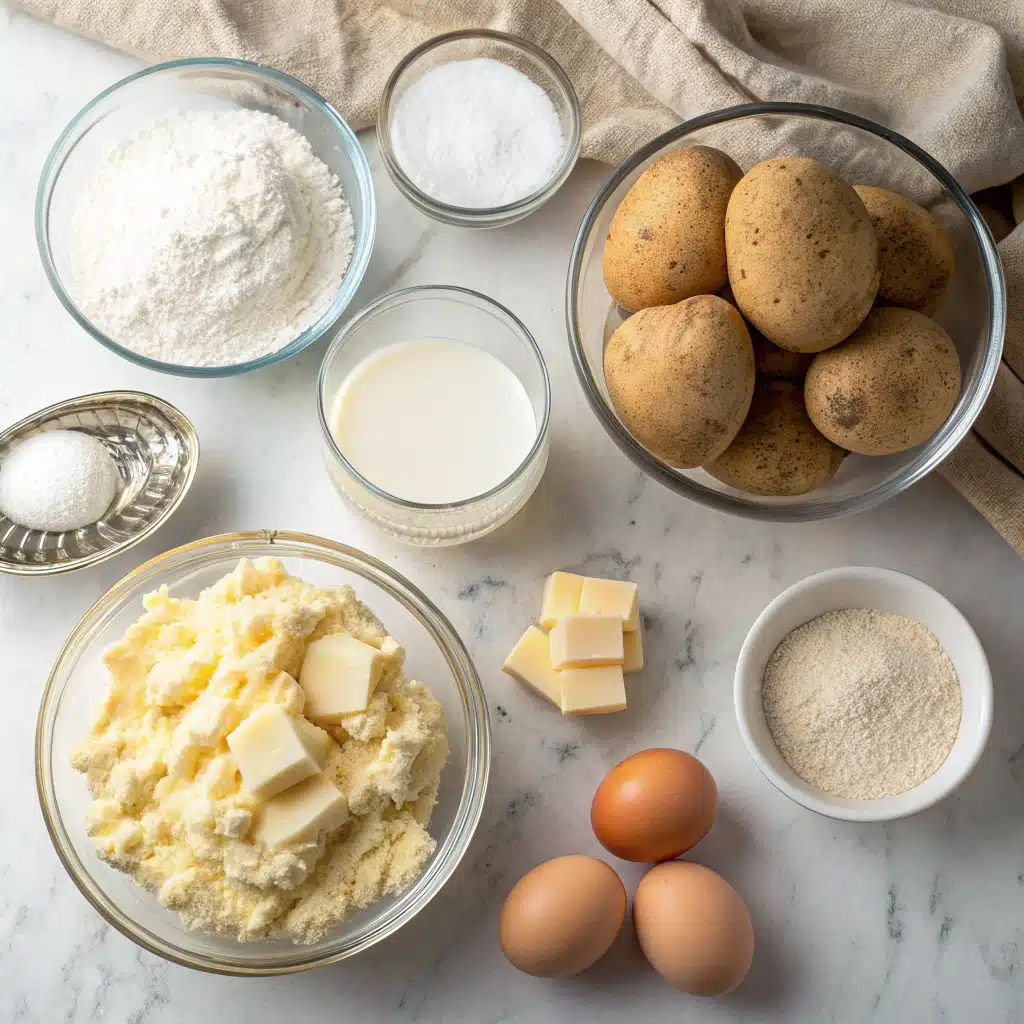
Creating gluten-free buns requires a thoughtful selection of ingredients that work together to mimic the texture and structure of traditional bread. Here’s what you’ll need to make these Gluten-Free Potato Buns successfully:
| Ingredient | Quantity | Role in the Recipe |
| Brown Rice Flour | 2 cups | Forms the base of the gluten-free flour blend. |
| Potato Starch | ½ cup | Adds lightness and a tender crumb to the buns. |
| Tapioca Flour | ½ cup | Provides chewiness and helps with browning. |
| Xanthan Gum | 1 ½ tsp | Acts as a binder, replacing the elasticity of gluten. |
| Mashed Russet Potatoes | 1 cup | Adds natural moisture, softness, and a subtle sweet flavor. |
| Instant Yeast | 1 tbsp + ¾ tsp | Leavens the dough, creating a light and airy texture. |
| Whole Psyllium Husks | 1 tbsp | Improves dough elasticity and moisture retention. |
| Light Brown Sugar | ½ cup | Feeds the yeast, adds moisture, and offers a hint of molasses flavor. |
| Fine Sea Salt | 1 ¼ tsp | Balances the sweetness and enhances the overall flavor. |
| Cultured Butter | 6 tbsp | Adds a richer, slightly tangy flavor and creates a tender texture. |
| Buttermilk | 1 cup | Hydrates the dough and its acidity contributes to a softer crumb. |
| Whole Eggs | 2 | Provide structure, richness, and binding. |
| Egg Yolks | 4 | Add extra fat and color for a rich, golden, and moist bun. |
These ingredients work together to create a soft, pillowy bun that’s perfect for sandwiches, burgers, or even as dinner rolls.
Smart Swaps for Your Dietary Needs
Adapting this recipe is simple if you have specific dietary requirements. Here are a few reliable substitutions you can make:
- For a Dairy-Free Option: The rich flavor of cultured butter can be replaced with a high-quality vegan butter block. For the buttermilk, simply mix one cup of your favorite unsweetened plant-based milk with one teaspoon of lemon juice or apple cider vinegar, and let it sit for five minutes to curdle before using.
- For an Egg-Free Option: This recipe relies heavily on eggs for richness and structure. While a direct substitute is challenging, you can try a commercial powdered egg replacer formulated for baking. Please note that using an egg substitute will result in a different final texture.
- Active Dry Yeast vs. Instant: If you only have active dry yeast, you’ll need to wake it up first. Gently warm the buttermilk (to about 110°F or 43°C), dissolve the light brown sugar in it, and then sprinkle the yeast on top. Let it stand for 5-10 minutes until it becomes foamy before adding it to the other ingredients.
With these adjustments in mind, you can confidently create buns that suit your needs. Now, let’s get to the main process.
Looking for more baking inspiration? Check out our Gluten-Free Sopapilla Cheesecake .
Step-by-Step Instructions for Perfect Buns
1. Mixing the Dough
In the bowl of a stand mixer, combine the dry ingredients: brown rice flour, potato starch, tapioca flour, light brown sugar, xanthan gum, instant yeast, whole psyllium husks, and fine sea salt. Whisk them together for a moment to ensure everything is evenly incorporated.
Next, add the wet ingredients: the mashed Russet potatoes, 2 whole eggs, 4 egg yolks, softened cultured butter, and buttermilk. Secure the dough hook attachment and mix on low speed until a shaggy, cohesive dough begins to form. Increase the speed to medium and let it knead for about 5 minutes. The dough should become smoother but will remain quite soft and slightly sticky—this is the ideal consistency for tender gluten-free bread.
2. The First Rise (and Chill)
Cover the mixing bowl with plastic wrap or a clean kitchen towel. Let the dough rise in a warm, draft-free spot for 1 to 2 hours, or until it has visibly puffed up and increased in volume. After this initial rise, place the covered bowl in the refrigerator to chill for a minimum of 6 hours, or preferably overnight. This crucial chilling period allows the flours to fully hydrate, which develops a richer flavor and creates a more manageable dough with a superior texture.
3. Shaping and Baking
When you are ready to bake, take the dough out of the refrigerator. Let it rest at room temperature for about 30 minutes to take the chill off.
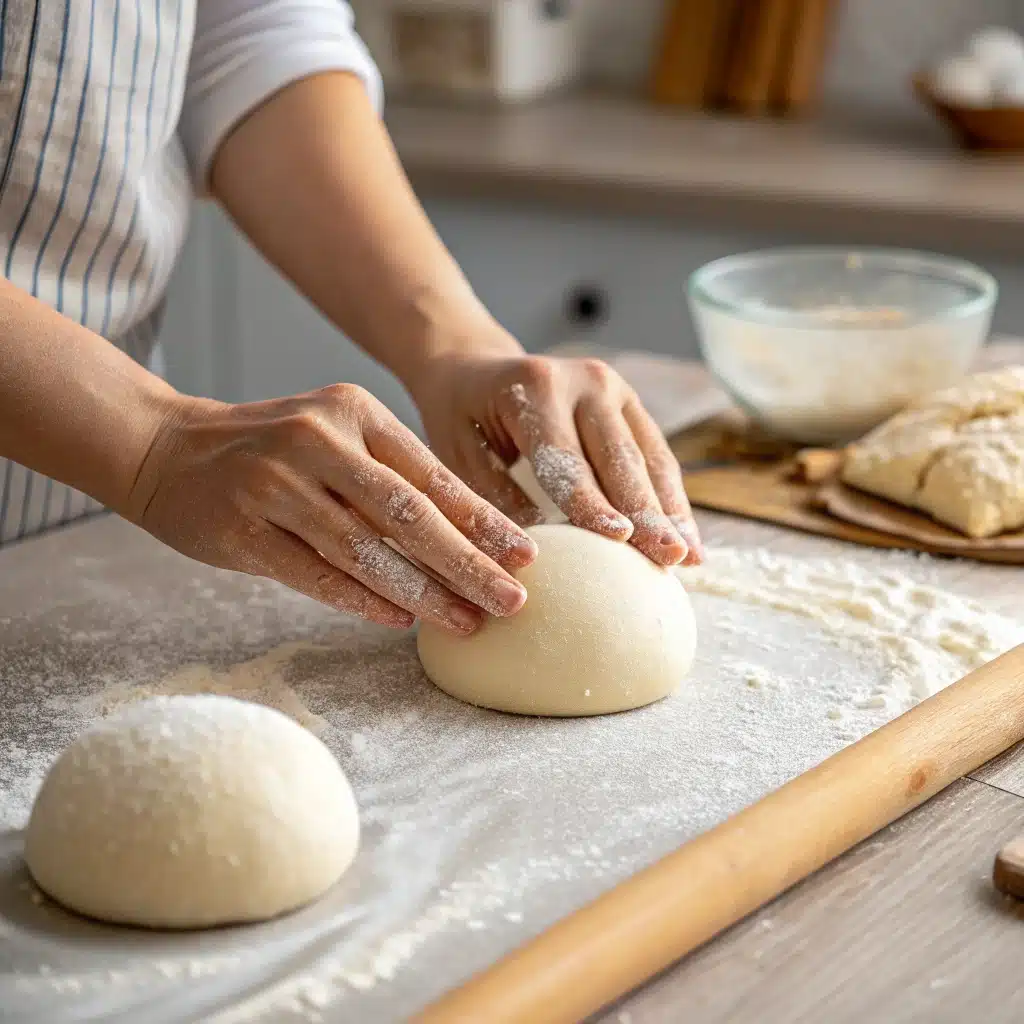
Lightly dust a clean work surface with a little extra potato starch or brown rice flour. Turn the dough out onto the surface and gently knead it a few times until it is smooth. Using a bench scraper or knife, divide the dough into 8 equal pieces.
To shape the buns, take one piece of dough and gently stretch the edges downward, tucking them underneath to create a taut surface. Place the dough seam-side down on your work surface and cup your hand around it. Roll the dough in a circular motion to create a smooth, round ball.
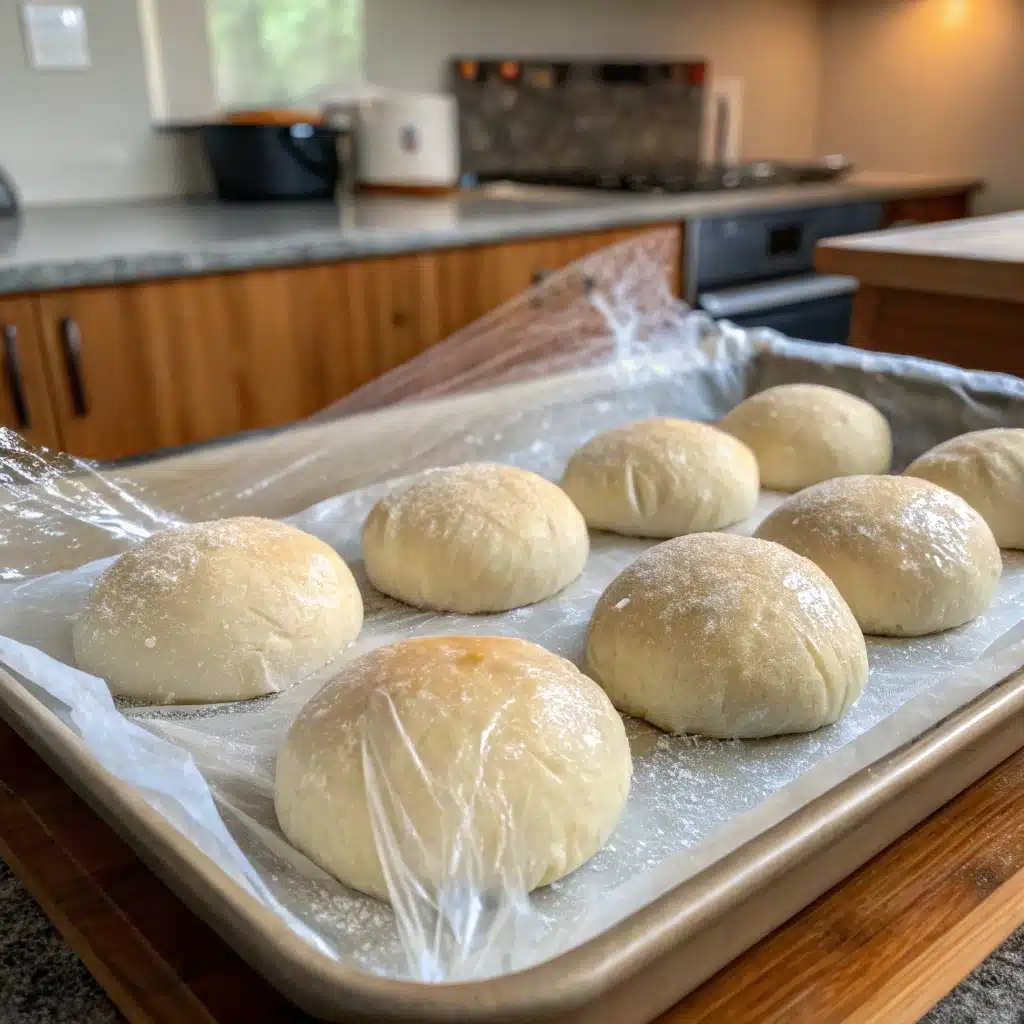
Arrange the shaped buns on a baking sheet lined with parchment paper, leaving an inch or two between them for even baking. For pull-apart style buns, you can place them a bit closer together.
4. The Final Rise and Bake
Loosely cover the buns with plastic wrap and let them rest in a warm place for a final rise of about 25–30 minutes, until they look puffy. While they rise, preheat your oven to 375°F (190°C).
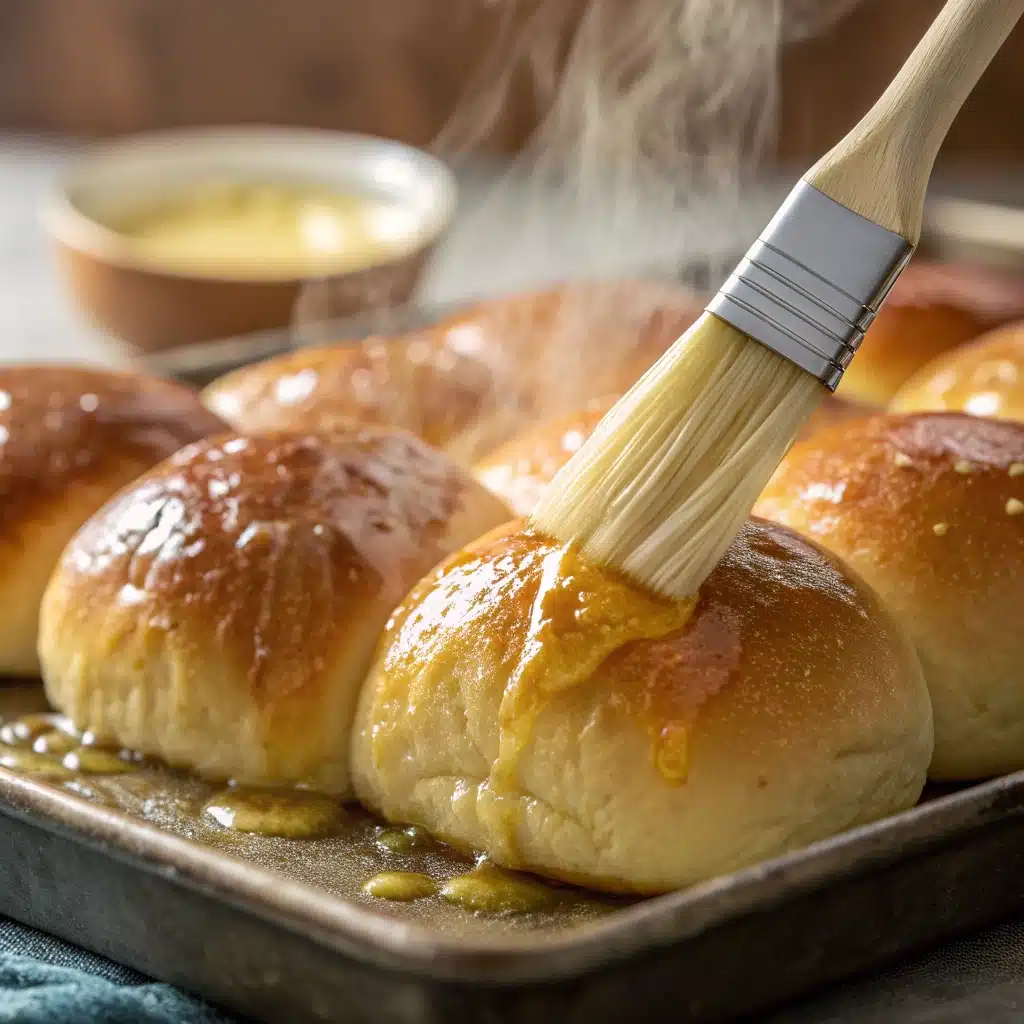
Once risen, bake the buns for 15-20 minutes. They are done when they are a beautiful golden-brown on top and sound hollow when you tap the bottom. For an extra touch of richness and a soft crust, you can brush the tops with melted butter as soon as they come out of the oven.
Allow the buns to cool on a wire rack before serving. They are best enjoyed fresh but can be stored in an airtight container at room temperature for up to 3 days.
If you enjoy this recipe, you might also love our Summer Gluten-Free Sourdough .
Baking with Confidence and Joy
Why This Recipe Works for Beginners
One of the biggest challenges in gluten-free baking is achieving the right texture—soft, springy, and not crumbly. What makes these Gluten-Free Potato Buns so reliable is the combination of mashed potatoes and psyllium husk. The potatoes add natural moisture and tenderness, while the psyllium acts as a binder that mimics gluten’s elasticity. Together, they create a dough that’s easy to handle and rises beautifully, even for first-time bakers.
If you’ve ever felt intimidated by yeast-based recipes, this is a great one to build your confidence. The steps are clear, the ingredients are forgiving, and the results speak for themselves. Plus, once you master this base recipe, you can easily adapt it into burger buns, sandwich rolls, or even mini slider buns for parties.
Serving Ideas and Storage Tips
These soft, golden buns are incredibly versatile. Use them for juicy beef burgers, grilled chicken sandwiches, or even lobster rolls—they hold up well without getting soggy. For a breakfast twist, slice one open, toast it lightly, and fill it with eggs, bacon, and avocado. Their subtle sweetness pairs perfectly with both savory and slightly spicy flavors.
To store, place cooled buns in an airtight container at room temperature for up to 3 days. If you want to keep them longer, freeze them individually in zip-top bags for up to 3 months. When ready to eat, thaw at room temperature or warm them in a toaster or oven for a freshly baked taste.
Looking for more easy gluten-free recipes? Try our Gluten Free Cinnamon Coffee Cake
FAQs About Gluten-Free Potato Buns
Is McDonald’s potato bun gluten-free?
Despite their name, McDonald’s potato buns include wheat flour and are not gluten-free. While McDonald’s offers some gluten-free menu items, their buns—including the potato variety—are not safe for people with celiac disease or gluten sensitivity. Always check with your local restaurant for updated allergen information.
Are Pepperidge Farm potato buns gluten-free?
No, Pepperidge Farm potato buns are not gluten-free. They contain wheat flour and other gluten-containing ingredients. However, Pepperidge Farm does offer a gluten-free bread line, which may be a suitable alternative if stored separately to avoid cross-contact.
Who has the best gluten-free buns?
Many home cooks agree that homemade gluten-free buns often taste better than store-bought versions. That said, top-rated brands like Udi’s, Canyon Bakehouse, and Schar are widely available and praised for their texture and flavor. Still, nothing beats the freshness and customization of baking your own, like this recipe proves.
Is Sonic potato bun gluten-free?
Sonic’s regular potato bun is not gluten-free. Sonic has not yet introduced certified gluten-free buns as part of their standard offerings.
If you’re dining out, always ask about preparation practices to avoid cross-contamination, especially in fast-food environments.
Conclusion
These Gluten-Free Potato Buns stand as delicious evidence that you can embrace gluten-free living without compromising on comfort, flavor, or excellence. With simple ingredients, a few smart techniques, and a little patience, you can bake buns that are soft, satisfying, and perfect for any meal. Whether you’re new to gluten-free cooking or looking for a reliable go-to recipe, this one delivers every time.
Thanks to Helen Tois’s years of kitchen testing and passion for accessible cooking, you now have a trusted method to bring joy back to your table—one delicious bun at a time..
For more Gluten-Free recipes, follow me on Facebook and Pinterest.
Print
Gluten-Free Potato Buns: A Beginner’s Guide to Flavorful, Easy Cooking
- Total Time: 85
- Yield: 8 buns
- Diet: Gluten Free
Description
Soft, fluffy gluten-free potato buns made with mashed potatoes and psyllium husk for perfect texture. Ideal for burgers, sandwiches, or dinner rolls.
Ingredients
2 cups (280 g) Brown Rice Flour
½ cup (60 g) Potato Starch
½ cup (60 g) Tapioca Flour
1 ½ teaspoons Xanthan Gum
1 cup (220 g) Mashed Russet Potatoes, cooled
½ cup (110 g) packed Light Brown Sugar
1 ¼ teaspoons Fine Sea Salt
1 tablespoon + ¾ teaspoon (12 g) Instant Yeast
1 tablespoon Whole Psyllium Husks
6 tablespoons (85 g) Cultured Butter, very soft
1 cup (240 ml) Buttermilk
2 large Whole Eggs, room temperature
4 large Egg Yolks, room temperature
For the finish: 2 tablespoons Melted Butter (optional)
Instructions
Combine Dry Ingredients: In the bowl of a stand mixer, add the brown rice flour, potato starch, tapioca flour, xanthan gum, light brown sugar, fine sea salt, instant yeast, and whole psyllium husks. Whisk briefly to combine.
Add Wet Ingredients: Add the mashed potatoes, whole eggs, egg yolks, softened cultured butter, and buttermilk to the dry ingredients.
Mix and Knead: Using the dough hook attachment, mix on low speed until a shaggy dough forms. Increase the speed to medium and knead for 5 minutes. The final dough will be very soft and slightly sticky.
First Rise: Scrape down the sides of the bowl, cover it with plastic wrap or a clean towel, and let it rise in a warm, draft-free place for 1–2 hours, until noticeably puffed up.
Chill the Dough: After the first rise, place the covered bowl in the refrigerator to chill for at least 6 hours, or ideally overnight. This step is crucial for flavor and texture.
Prepare for Baking: When ready to bake, remove the dough from the fridge and let it rest at room temperature for 30 minutes. Preheat your oven to 375°F (190°C) and line a baking sheet with parchment paper.
Shape the Buns: Lightly dust a work surface with rice flour. Turn the chilled dough out and knead it gently a few times. Divide the dough into 8 equal portions (about 90-95 g each). To shape, tuck the edges of each portion underneath itself to form a taut surface, then roll it into a smooth ball.
Second Rise: Place the shaped buns on the prepared baking sheet, leaving about 1-2 inches between them. Cover loosely with plastic wrap and let them rise in a warm spot for 25–30 minutes, until they look puffy.
Bake: Bake for 15–20 minutes, or until the tops are a deep golden brown and the buns sound hollow when tapped on the bottom.
Add the Finishing Touch: For a soft, rich crust, brush the tops of the hot buns with melted butter as soon as they come out of the oven (optional).
Cool: Transfer the buns to a wire rack to cool completely before slicing and serving.
Notes
Dairy-Free Version: Use a high-quality vegan butter block. To make dairy-free “buttermilk,” mix 1 cup of unsweetened plant-based milk with 1 teaspoon of lemon juice and let it rest for 5 minutes before using.
Active Dry Yeast: If using active dry yeast, warm the buttermilk to about 110°F (43°C), dissolve the sugar in it, and sprinkle the yeast on top. Let it stand for 5-10 minutes until foamy, then proceed with the recipe.
Storage: Keep cooled buns in an airtight container at room temperature for up to 3 days.
Freezing: These freeze wonderfully. Place them in a sealed freezer bag for up to 3 months.
Pull-Apart Buns: For soft, pull-apart sides, place the shaped buns just close enough to touch on the baking sheet before the final rise.
- Prep Time: 20
- Cook Time: 15
- Category: Bread
- Method: Baking
- Cuisine: American
Nutrition
- Serving Size: 1 bun
- Calories: 240
- Sugar: 12
- Sodium: 320
- Fat: 9
- Saturated Fat: 5
- Unsaturated Fat: 3
- Trans Fat: 0
- Carbohydrates: 36
- Fiber: 4
- Protein: 6
- Cholesterol: 135