Table of Contents
Discover the easiest way to make delicious Gluten Free No Knead Bread at home! This recipe is perfect for those who want fresh, homemade bread without the hassle of kneading. With simple ingredients and straightforward steps, you’ll have a golden, crusty loaf ready in no time. Whether you’re new to gluten-free baking or a seasoned pro, this Gluten Free No Knead Bread is sure to impress.
I remember the first time I tried making gluten-free bread. It was a disaster—dense, crumbly, and nothing like the bread I missed. But after experimenting with different flours and techniques, I finally found the perfect combination. This Gluten Free No Knead Bread recipe is the result of that journey, and I’m thrilled to share it with you. It’s become a staple in my kitchen, and I hope it will in yours too.
Ready to get started? Let’s dive into the recipe and make some amazing Gluten Free No Knead Bread!
What to Expect
- Time: Approximately 6 hours (including resting time)
- Difficulty: Easy
Before You Begin
Before you start, make sure your yeast is fresh and active. The water should be lukewarm—too hot or too cold can prevent the yeast from activating. Also, ensure your gluten-free flour is suitable for bread-making. I’ve had great success with Caputo’s Gluten-Free Flour, but feel free to experiment with other brands.
Ingredients You’ll Need
| Activate The Yeast | ▢1.5 cups warm water |
|---|---|
| ▢1 teaspoon sugar | |
| ▢½ teaspoon active dry yeast | |
| Dry Ingredients | ▢3 cups gluten-free flour, I used Caputo |
| ▢1 teaspoon salt |
Step-by-Step Guide
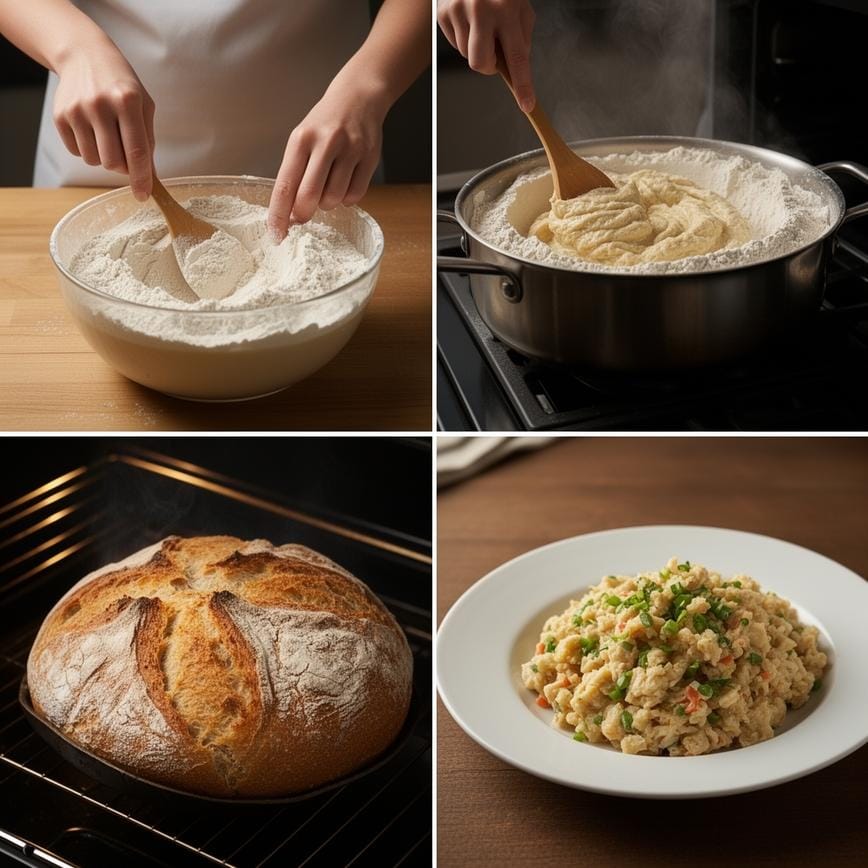
- Start by adding the warm water, sugar, and active dry yeast to a bowl. Stir well and wait for five minutes. If the yeast does not activate, start this step over. Ensure the water is lukewarm.
- In a separate large bowl, combine the gluten-free flour and salt. Stir to mix.
- Slowly add the activated yeast mixture to the dry ingredients. Stir until you achieve a thick, sticky dough. The consistency should be neither too wet nor too dry.
- Cover the bowl and let the dough rest at room temperature, away from drafts, for 5 hours.
- Once the dough has risen, flour your counter and pour out the dough. Flour the top of the dough and shape it into an oval or round loaf. No kneading is required.
- Transfer the shaped dough into a baking dish lined with parchment paper. Cover with a lid or double foil.
- Place the bread in a cold oven, then turn the oven to 450°F (230°C). Bake for 40 minutes. Do not pre-heat the oven.
- After 40 minutes, uncover the bread and bake for another 30 minutes or until it is light and golden all over.
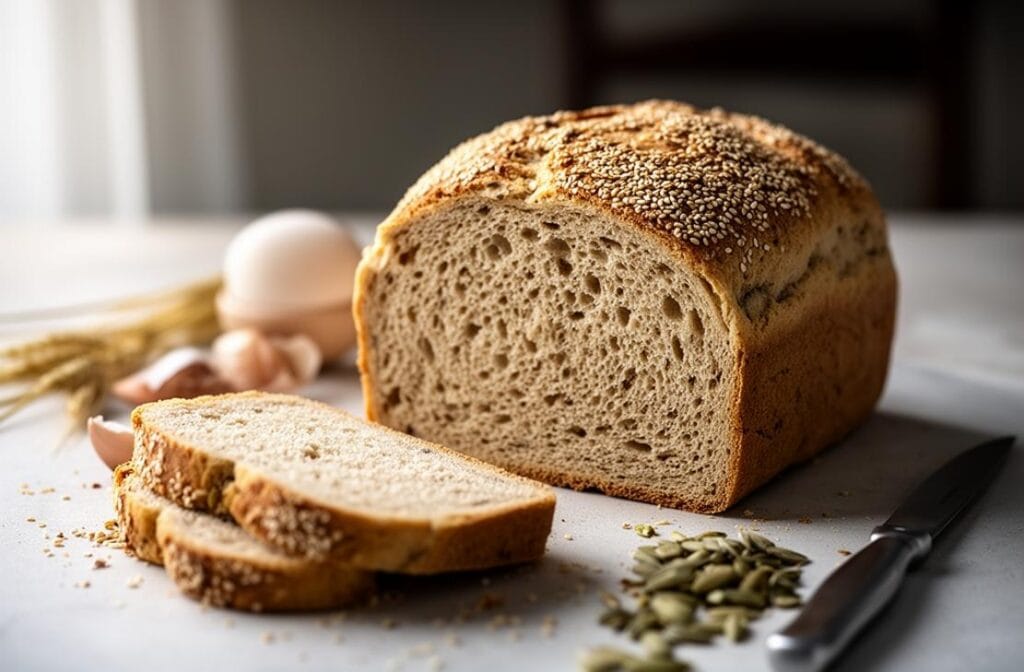
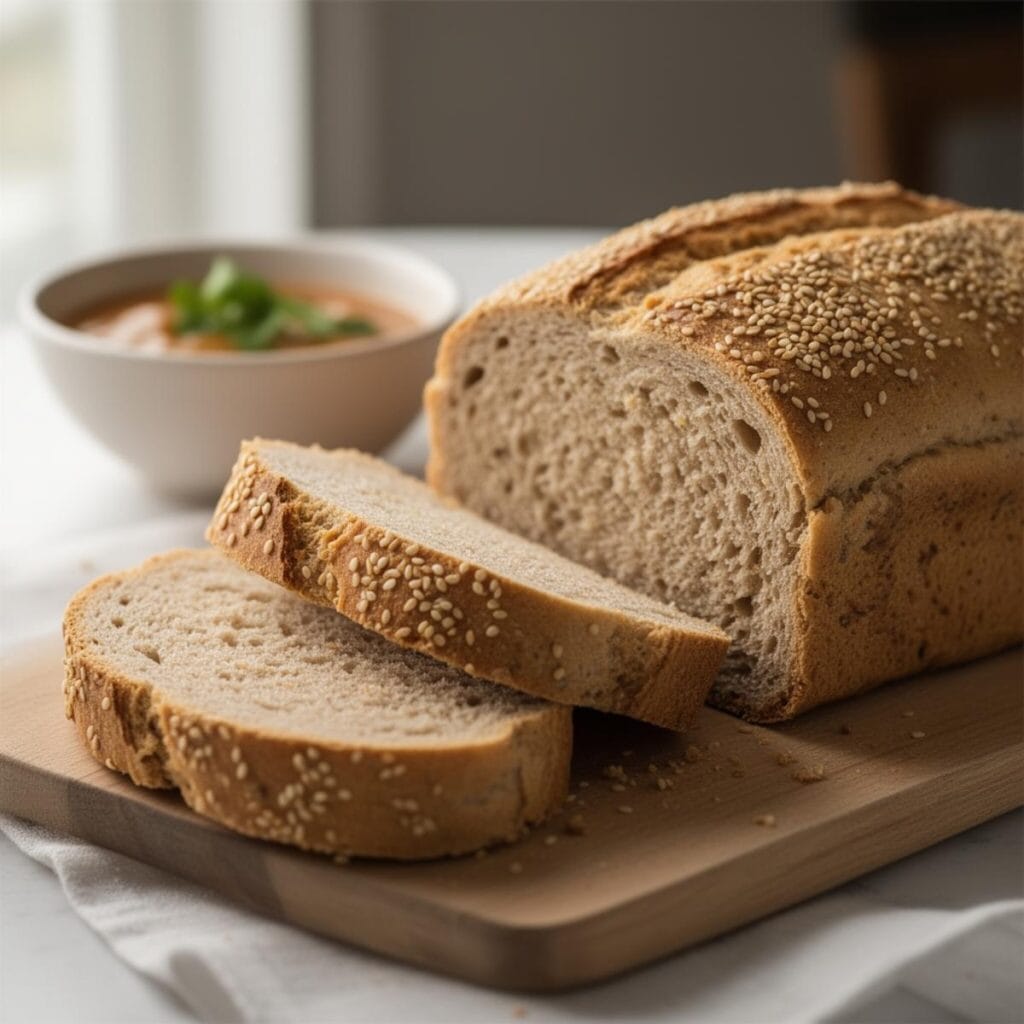
- Let the bread cool for 5 to 10 minutes before slicing and serving. Enjoy your Gluten Free No Knead Bread!
Pointers for Perfection & How to Store
For the best results, ensure your yeast is fresh and the water is at the right temperature. If you want to add some extra flavor, consider mixing in herbs like rosemary or thyme, or spices such as garlic powder or onion powder. You can also sprinkle sesame seeds, poppy seeds, or chopped nuts on top before baking. To store, keep the bread in an airtight container at room temperature for up to 3 days, or freeze for longer storage.
If you enjoyed this recipe, you might also love my Crispy Fluffy Gluten Free Fry Bread.
Print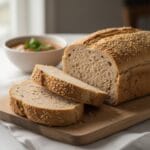
Gluten Free No Knead Bread: Artisan Loaf
- Total Time: 180
- Yield: 1 loaf (10 slices) 1x
- Diet: Gluten Free
Description
This Gluten-Free No-Knead Bread is the artisan loaf you’ve been dreaming of. With a golden, crackling crust and a soft, open crumb, it rivals any bakery sourdough. The secret lies in a high-hydration dough and a hot Dutch oven, creating steam to lift the loaf without any difficult kneading or complex shaping techniques.
Ingredients
— The Dough —
3 cups gluten-free all-purpose flour blend (bread-friendly blend like Caputo Fioreglut, Cup4Cup, or King Arthur)
1 packet (2 ¼ teaspoons) instant yeast (rapid rise)
1 ½ teaspoons salt
1 tablespoon granulated sugar or honey (to feed the yeast)
1 ½ cups warm water (approx. 110°F/43°C)
1 teaspoon apple cider vinegar (helps with rise and structure)
2 tablespoons olive oil
— For Baking —
Extra gluten-free flour for dusting
Cornmeal (optional, for the bottom of the pan)
Instructions
1. Activate Yeast: In a small bowl or measuring cup, mix the warm water and sugar. Stir in the yeast and let it sit for 5–8 minutes until foamy. (Even with instant yeast, this ensures it’s active).
2. Mix Dry Ingredients: In a large bowl, whisk together the gluten-free flour and salt.
3. Combine: Pour the yeast mixture, apple cider vinegar, and olive oil into the dry ingredients. Stir with a sturdy spoon or Danish dough whisk until a shaggy, sticky dough forms. Ensure there are no pockets of dry flour. (Gluten-free dough will look more like thick batter than wheat dough—this is normal!).
4. The Rise: Scrape down the sides of the bowl. Cover tightly with plastic wrap and place in a warm, draft-free spot. Let it rise for 1 ½ to 2 hours, or until doubled in size and bubbly.
5. Preheat Dutch Oven: About 30 minutes before the rise is done, place a 4-to-6 quart Dutch oven (with the lid on) into your oven. Preheat the oven to 450°F (230°C). The pot needs to be screaming hot.
6. Shape: Lay a large piece of parchment paper on the counter and dust generously with GF flour. Scrape the risen dough onto the parchment. Gently use the paper or floured hands to nudge the dough into a round mound. Do not knead it! Just shape it gently.
7. Score: Dust the top of the loaf with flour. Use a sharp knife or lame to slash a shallow ‘X’ or line across the top (this helps the steam escape).
8. Bake Covered: Carefully remove the hot Dutch oven from the oven. Lift the dough by the parchment paper edges and drop it into the hot pot (paper and all). Cover with the hot lid immediately.
9. Bake for 30 minutes covered. (The steam trapped inside creates the crust).
10. Bake Uncovered: Remove the lid. Reduce oven temperature to 400°F (200°C). Bake for another 15–20 minutes, or until the crust is deep golden brown and the loaf sounds hollow when tapped.
11. Cool (Crucial!): Lift the bread out using the parchment paper. Transfer to a wire rack. You MUST let the bread cool completely (at least 2 hours) before slicing. Cutting it hot will result in a gummy texture.
Notes
Flour Matters: For the absolute best ‘crusty bread’ results, blends containing gluten-free wheat starch (like Caputo Fioreglut) work wonders. If you are wheat-intolerant, King Arthur Bread Flour is a great wheat-free alternative.
Dutch Oven Substitute: If you don’t have a Dutch oven, you can use a pizza stone with a metal bowl inverted over the bread, or a heavy roasting pan with a foil lid.
Sticky Dough: Do not be tempted to add more flour to dry out the dough. High hydration (water content) is what creates the steam and the open crumb structure.
Storage: Store wrapped in a paper bag or bread box for 2 days. To refresh the crust, toast slices or pop the whole loaf in a 350°F oven for 10 minutes.
- Prep Time: 15
- Cook Time: 45
- Category: Bread
- Method: Baking
- Cuisine: European-Style
Nutrition
- Serving Size: 1 slice
- Calories: 160
- Sugar: 1
- Sodium: 290
- Fat: 3
- Saturated Fat: 0
- Unsaturated Fat: 2
- Trans Fat: 0
- Carbohydrates: 32
- Fiber: 3
- Protein: 3
- Cholesterol: 0
Your Burning Questions Answered!
- Can I use a different gluten-free flour?
- While I’ve only tested this recipe with Caputo’s Gluten-Free Flour, you can experiment with other brands. Keep in mind that the texture and rise may vary.
- Why didn’t my yeast activate?
- The water temperature is crucial. Make sure it’s lukewarm, not too hot or too cold. Also, check the expiration date on your yeast.
Can I add mix-ins to the dough?
Absolutely! Feel free to add herbs, spices, or seeds to customize your Gluten Free No Knead Bread.
Dig In & Enjoy!
There you have it—your very own Gluten Free No Knead Bread! This recipe is a game-changer for anyone looking to enjoy fresh, homemade bread without the fuss. Whether you’re making it for yourself or sharing with loved ones, I hope this bread brings joy to your table. For more delicious ideas, follow me on Pinterest.