Table of Contents
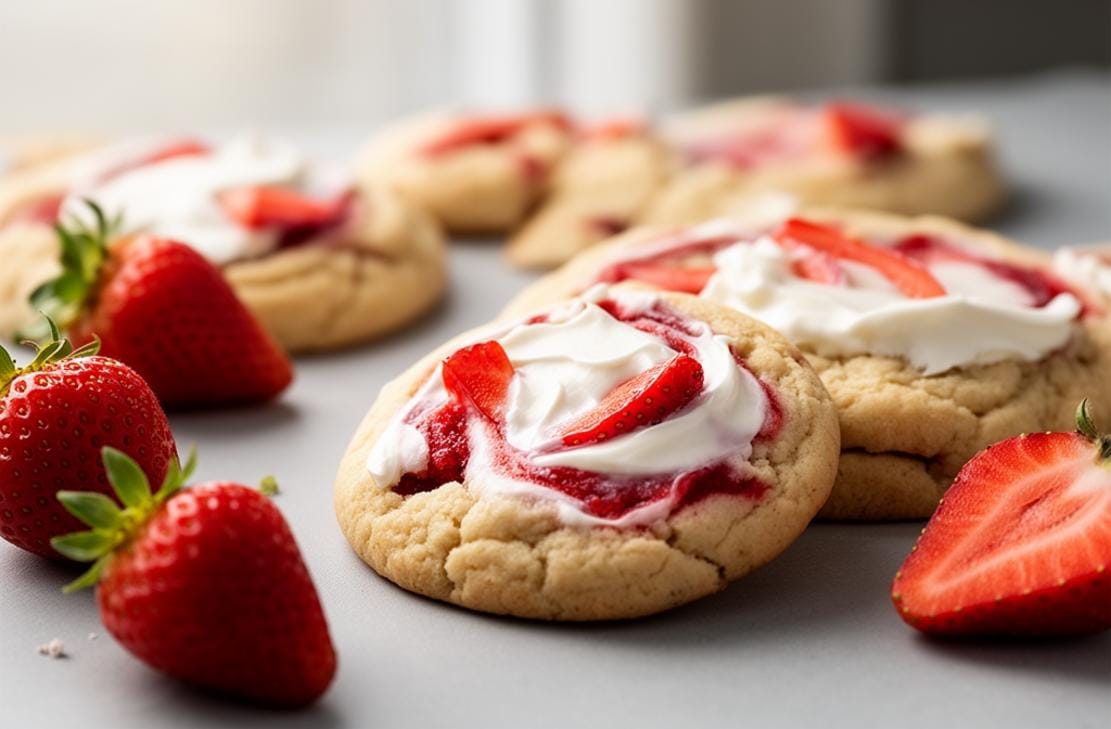
These Strawberries and Cream Cookies combine sweet white chocolate chunks with the tangy crunch of freeze-dried berries. The perfect balance of textures in every gluten-free bite!
These Strawberries and Cream Cookies always remind me of lazy summer picnics. My grandmother would make similar treats using fresh berries from her garden, but this version uses freeze-dried fruit for intense flavor that won’t create soggy dough.
Ready to bake cookies that taste like sunshine? Let’s start mixing!
What to Expect
Time: 25 minutes (10 prep + 12 baking + 3 cooling)
Difficulty: Beginner-friendly
Before You Begin
- Let butter soften at room temperature for 30 minutes
- Crush freeze-dried strawberries with your hands for rustic chunks
- Use a #40 cookie scoop for perfectly portioned treats
Ingredients You’ll Need
| Ingredient | Quantity |
|---|---|
| Butter, softened | 1/2 cup |
| White sugar | 3/4 cup |
| Egg | 1 |
| Vanilla extract | 1 tbsp |
| Gluten-free all purpose flour (or regular flour) | 1 1/2 cups |
| Cornstarch | 2 tsp |
| Baking soda | 1/2 tsp |
| Salt | 1/4 tsp |
| White chocolate chips | 3/4 cup |
| Freeze dried strawberries, chopped | 1 cup |
Step-by-Step Guide
- Preheat oven to 350°F (175°C). Line baking sheets with parchment.
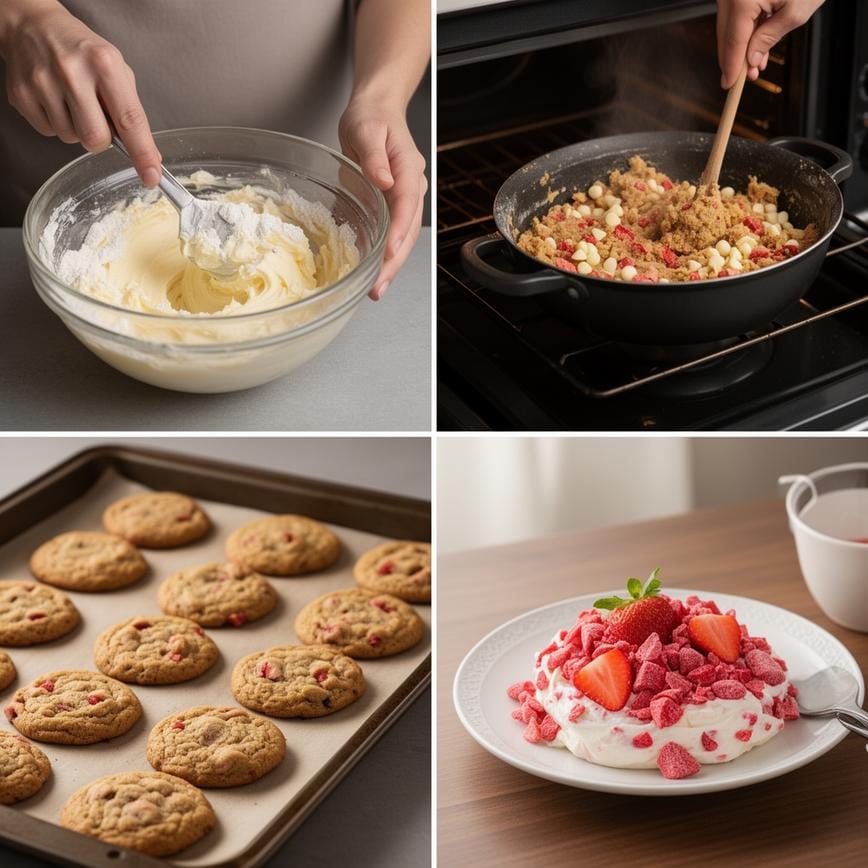
- Cream butter and sugar with hand mixer for 2 minutes until fluffy.
- Mix in egg and vanilla until just combined.
- Add flour, cornstarch, baking soda, and salt. Stir until dough forms.
- Gently fold in white chocolate chips and strawberries.
- Scoop dough balls (1 tbsp size) spacing 2” apart on sheets.
- Bake 10-12 minutes until edges set but centers look slightly wet.
- Cool cookies 10 minutes on pan before transferring to rack.
Pointers for Perfection & How to Store
Pro Tip: For extra-puffy Strawberries and Cream Cookies, chill dough 30 minutes before baking! Store cooled cookies in airtight container for up to 5 days, or freeze dough balls for 3 months.
If you enjoyed this recipe, try our Sweet Strawberry Shortcake Cake next!
Print
Strawberries and Cream Cookies
- Total Time: 35
- Yield: 12 cookies 1x
- Diet: Gluten Free
Description
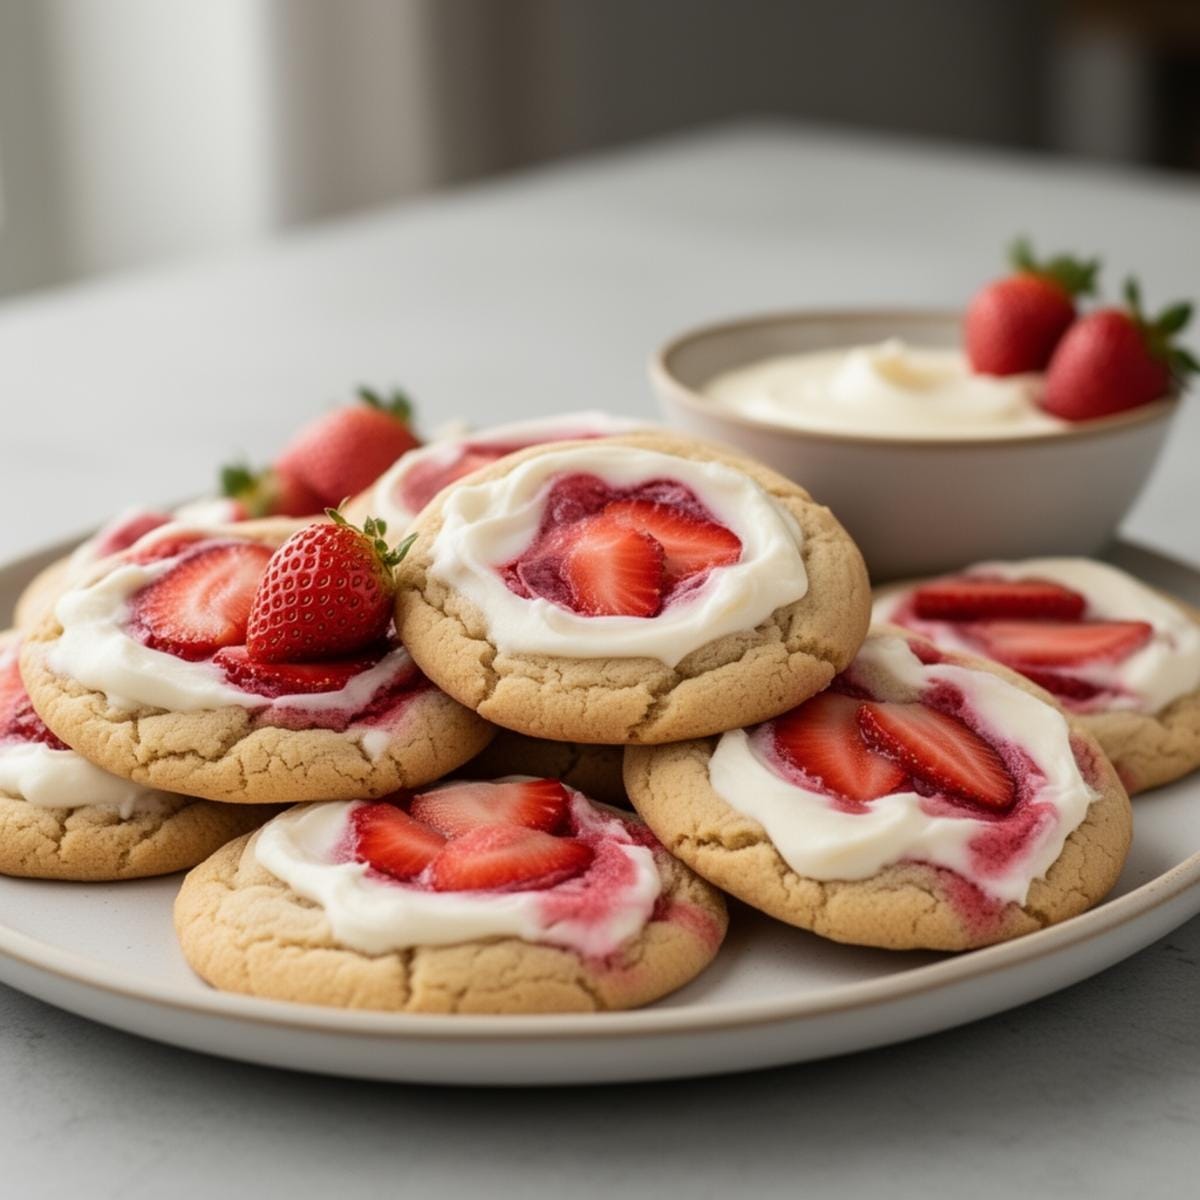
These Gluten Free Strawberries and Cream Cookies are soft, chewy, and bursting with fresh summer flavor. Made with melted butter for a dense, fudgy texture, they are packed with sweet white chocolate chips and topped with fresh strawberries. The combination of the creamy white chocolate and tart berries creates the perfect ‘strawberries and cream’ bite.
Ingredients
1/2 cup salted butter, melted
1/2 cup granulated sugar
1/4 cup light brown sugar, packed
1 large egg, room temperature
1 teaspoon vanilla extract
1 1/2 cups gluten free 1-to-1 flour blend (ensure it contains xanthan gum)
1/2 teaspoon baking soda
1/4 teaspoon salt
1/2 cup white chocolate chips
1/3 cup fresh strawberries, chopped into small pieces
Instructions
1. Preheat & Prep: Preheat oven to 350°F (175°C). Line a large baking sheet with parchment paper.
2. Prep Strawberries: Chop the strawberries into small pieces. Pat them dry with a paper towel to remove excess moisture. Set aside.
3. Mix Butter & Sugars: In a large bowl, whisk together the melted salted butter, granulated sugar, and brown sugar until smooth and combined (about 1 minute).
4. Add Wet Ingredients: Whisk in the egg and vanilla extract until fully incorporated.
5. Add Dry Ingredients: Add the gluten free flour, baking soda, and salt. Use a spatula to mix until a soft dough forms and no dry flour streaks remain.
6. Fold Chocolate: Fold in the white chocolate chips.
7. Scoop: Scoop the dough into balls (approx. 2 tablespoons per cookie) and place them on the prepared baking sheet, spaced about 2 inches apart.
8. Add Strawberries: *Important Step:* Instead of mixing the strawberries into the dough (which makes it soggy), gently press the chopped strawberry pieces into the tops and sides of the dough balls.
9. Bake: Bake for 9–11 minutes. The edges should be set, but the centers may still look slightly underdone.
10. Cool: Allow the cookies to cool on the baking sheet for at least 10 minutes to set before transferring to a wire rack. They will firm up as they cool.
Notes
Strawberry Moisture: It is crucial to pat the strawberries dry and press them into the outside of the dough rather than mixing them inside. This prevents the cookies from spreading too much or becoming mushy.
Butter: Melting the butter gives these cookies a chewier, fudgier texture compared to using softened butter.
Storage: Because of the fresh fruit, these cookies are best eaten within 1-2 days and should be stored in the refrigerator in an airtight container.
- Prep Time: 15
- Cook Time: 10
- Category: Dessert
- Method: Baking
- Cuisine: American
Nutrition
- Serving Size: 1 cookie
- Calories: 210
- Sugar: 18
- Sodium: 140
- Fat: 10
- Saturated Fat: 6
- Unsaturated Fat: 3
- Trans Fat: 0
- Carbohydrates: 29
- Fiber: 1
- Protein: 2
- Cholesterol: 35
Your Burning Questions Answered!
1. Can I use fresh strawberries instead?
No – fresh berries release too much moisture. Freeze-dried fruit maintains the perfect cookie texture.
2. What makes these Strawberries and Cream Cookies gluten-free?
Using gluten-free all purpose flour blend (with xanthan gum) creates safe treats for sensitive diets.
3. Can I freeze baked cookies?
Absolutely! Layer between parchment in airtight containers. Thaw at room temperature when craving strikes.
Dig In & Enjoy!
These Strawberries and Cream Cookies deliver that magical combo of sweet creaminess and fruity tartness in every bite. Perfect with afternoon tea or packed in lunchboxes!