Saturday mornings demand waffles. Not the frozen toaster kind that tastes like cardboard, but real, homemade waffles.
Table of Contents
Finding a reliable gluten free waffle recipe that delivers that crucial crunch on the outside and a fluffy, steaming center can be a nightmare. Most are dense, gummy, or fall apart the moment you lift the lid.
This recipe changes the game.
It is foolproof, quick, and creates golden, crispy grids that hold tiny pools of syrup perfectly.
A Little Story About This Dish
I went through three different waffle irons before I realized the iron wasn’t the problem—my batter was.
I was trying to use complex flour blends and separating eggs to whip whites. Who has time for that at 8 AM?
I went back to basics. I found that using vegetable oil instead of butter ensures a crispier edge, and a generous amount of baking powder gives them that “diner-style” lift. Now, this gluten free waffle recipe is the only one I use. My family can’t even tell the difference.

Get Ready to Cook!
What to Expect:
This is a “one-bowl” style batter. It is slightly thinner than pancake batter, which allows it to spread into the waffle iron grooves easily.
Before You Begin:
Preheat your waffle iron before you start mixing. A cold iron equals soggy waffles. Also, measure your flour correctly using the “spoon and level” method. Scooping directly from the bag packs the flour down and makes the waffles dry.
The Heart of the Dish: Ingredients You’ll Need
We keep it simple with pantry staples.
| Quantity | Ingredient | Note |
| 2 large | Eggs | Or egg replacer |
| 1/4 cup | Granulated Sugar | For crispness |
| 2 tsp | Vanilla Extract | Pure is best |
| 1/2 cup | Vegetable Oil | Key for texture |
| 2 cups | GF All-Purpose Flour | With xanthan gum |
| 1/2 tsp | Xanthan Gum | Omit if blend has it |
| 4 tsp | Baking Powder | This provides the lift |
| 1/4 tsp | Salt | |
| 1 3/4 cup | Milk | Dairy or almond milk |
Let’s Get Cooking! Step-by-Step Guide
Follow these steps for the perfect gluten free waffle recipe.
Phase 1: Make the Base
1. Whisk the basics
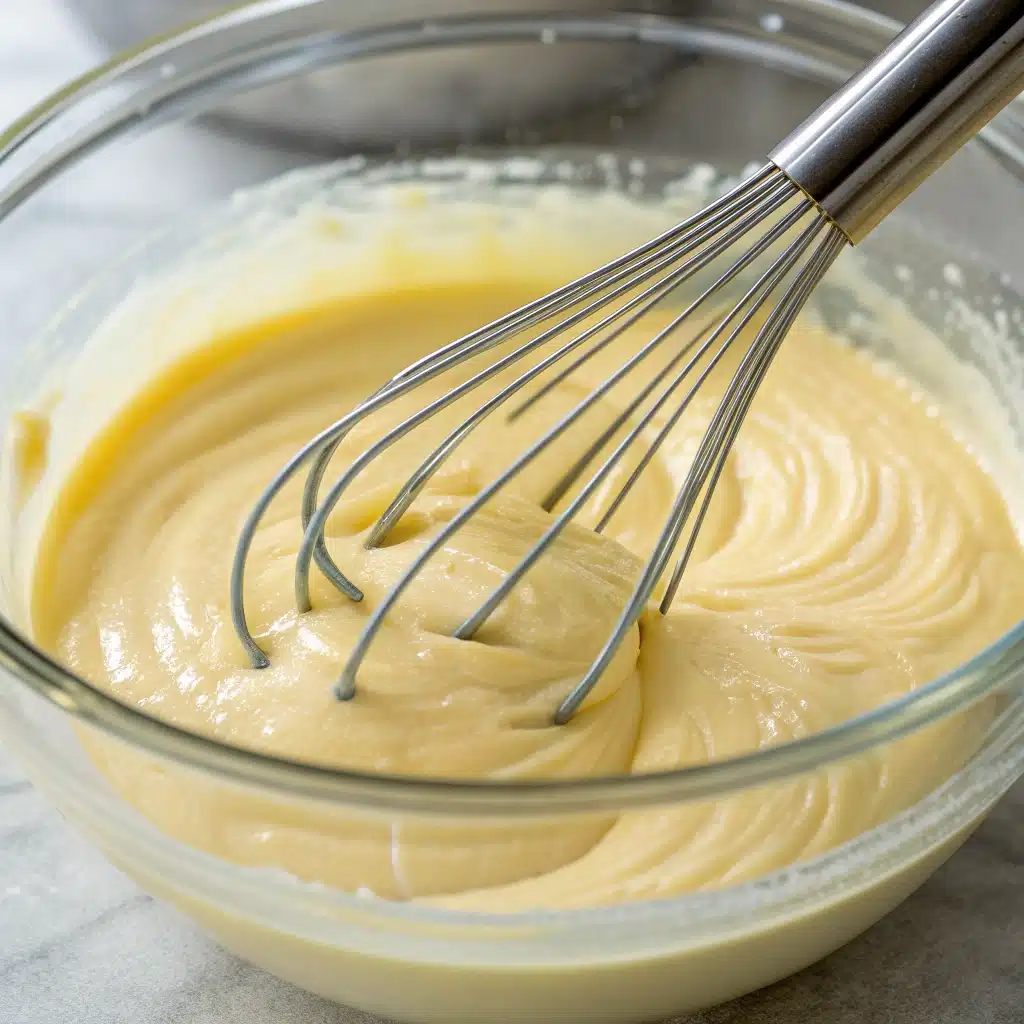
Grab a large mixing bowl. Crack in the eggs (or add your egg replacer). Add the granulated sugar, vanilla extract, and vegetable oil. Whisk this vigorously until the sugar starts to dissolve, and the mixture looks glossy.
2. Add dry ingredients
Dump in your gluten-free flour, extra xanthan gum (only if your blend needs it), baking powder, and salt. Mix this into the egg mixture. It will look clumpy and thick at first. That is okay.
3. Smooth it out
Pour in the milk. Stir gently but thoroughly until the batter is smooth. You want to remove any large pockets of dry flour, but don’t beat it to death. The batter should be pourable but thick.
Phase 2: Cook to Perfection
4. Prep the iron
Check your waffle iron. It should be hot (usually a light turns on). Lightly grease the grids with a brush of oil or spray.
Expert Tip: Do not skip greasing, even on non-stick irons. Gluten-free batter is stickier than wheat batter.
5. Pour and cook
Use a greased ice cream scoop or ladle to pour the batter onto the center of the hot iron. Let it spread slightly, but don’t overfill it (it expands!). Close the lid.
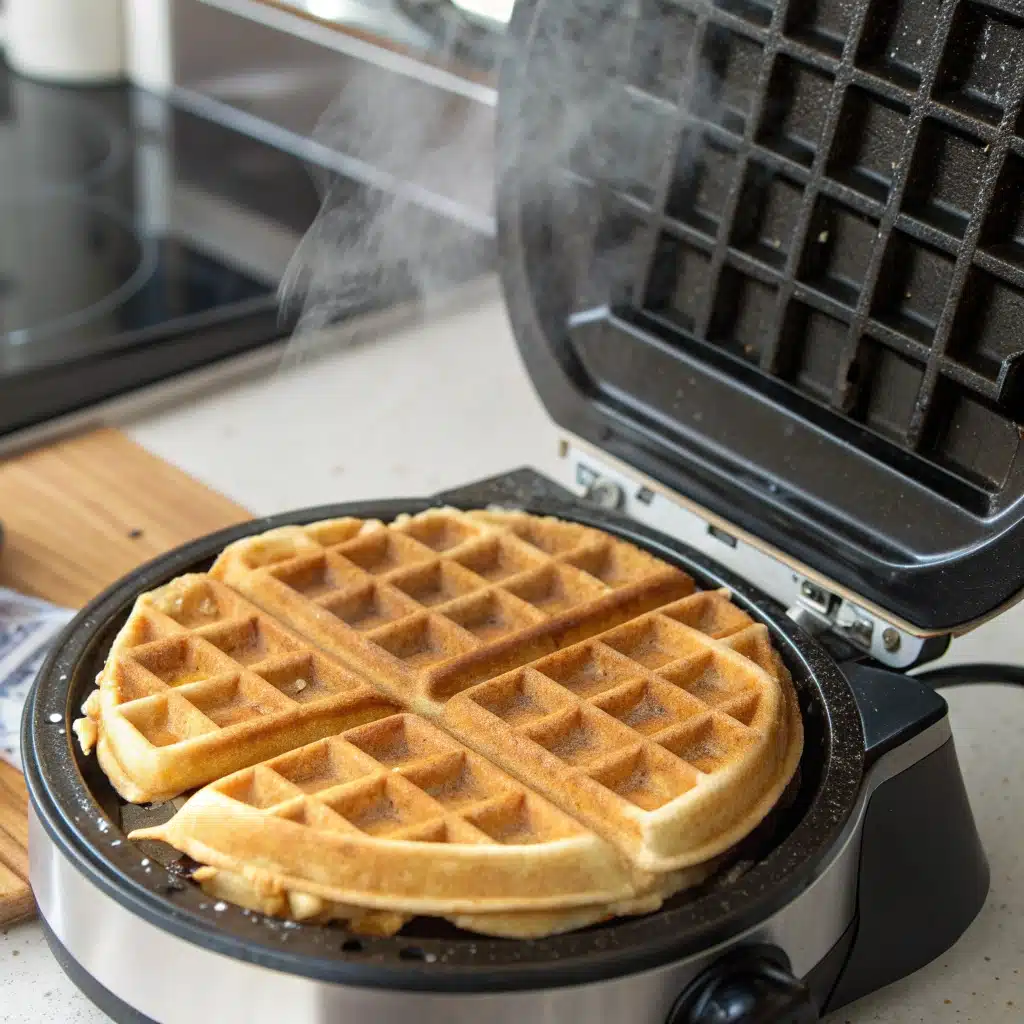
6. Watch for steam
Cook according to your machine’s timer. Usually, when the steam stops pouring out of the sides, the waffle is done. Open the lid carefully. The waffle should be golden brown and release easily.
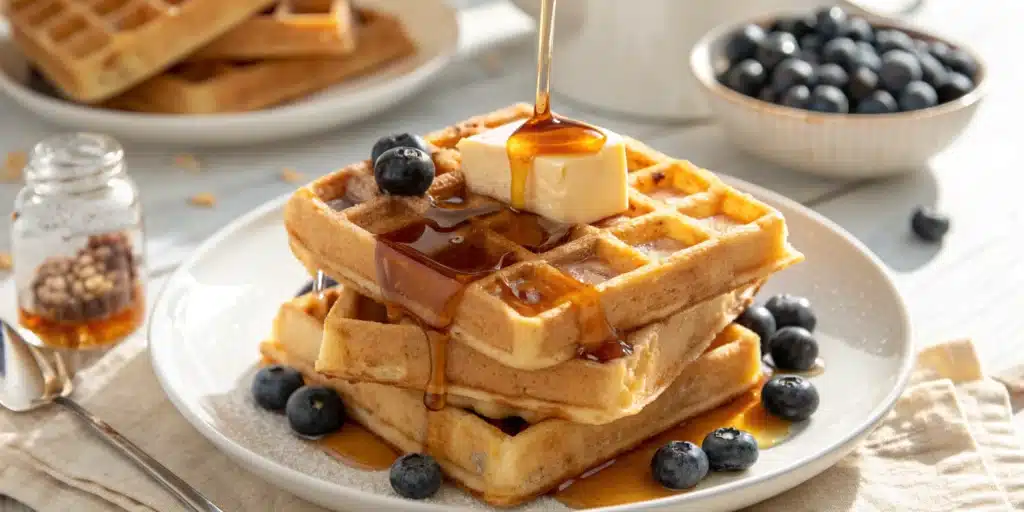
7. Serve
Top immediately with butter and syrup. If you are making a big batch, keep the cooked ones warm in a low oven (200°F) directly on the rack to keep them crisp.
Mastering the Dish: Pointers for Perfection & How to Store
Flour Matters
Not all blends bake the same. I have had great success with Pillsbury Gluten Free flour for this gluten free waffle recipe. If you use a blend without xanthan gum, you must add it manually, or the waffles will crumble.
Dairy & Egg Free Options
This recipe is very adaptable. I have used unsweetened almond milk and Bob’s Red Mill Egg Replacer with fantastic results. The texture remains surprisingly light.
Storage
Leftover waffles are a treasure. Store them in an airtight container in the fridge for 3 days.
The Toaster Trick
To freeze, place cooled waffles on a baking sheet and flash freeze for 10 minutes (so they don’t stick together). Then move them to a freezer bag. When you want breakfast, pop the frozen waffle directly into your toaster. It comes out crispy and hot, just like a store-bought frozen waffle!

Gluten Free Waffle Recipe (Crispy & Fluffy)
- Total Time: 12
- Yield: 6 1x
- Diet: Gluten Free
Description
This Gluten Free Waffle Recipe creates waffles that are crispy on the outside and fluffy on the inside. It uses simple pantry ingredients and is ready in under 15 minutes.
Ingredients
2 large eggs (or egg replacer)
1/4 cup granulated sugar
2 teaspoons pure vanilla extract
1/2 cup vegetable oil
2 cups gluten-free all-purpose flour (ensure it has xanthan gum)
1/2 teaspoon xanthan gum (leave out if your flour blend already has it)
4 teaspoons gluten-free baking powder
1/4 teaspoon salt
1 3/4 cup milk (dairy or unsweetened almond milk)
Instructions
1. Preheat your waffle iron.
2. In a large bowl, whisk the eggs, granulated sugar, pure vanilla extract, and vegetable oil together until combined.
3. Add the gluten-free flour, xanthan gum (if needed), baking powder, and salt to the egg mixture. Mix until fully combined and slightly thick.
4. Pour in the milk. Stir until the batter is smooth.
5. Grease the waffle iron. Using a scoop, pour the batter onto the hot iron.
6. Cook according to your machine’s instructions, or until the steam stops rising and the waffles are golden brown.
7. Remove carefully and top with butter and syrup. Enjoy!
Notes
**Flour Measurement:** Use the ‘spoon & level’ method. Spoon flour into the cup and level it off with a knife. Do not scoop directly from the bag.
**Freezing:** Flash freeze cooled waffles on a baking sheet for 10 minutes, then store in a bag. Reheat in a toaster for a quick breakfast.
**Dairy/Egg Free:** This recipe works perfectly with almond milk and Bob’s Red Mill Egg Replacer.
- Prep Time: 10
- Cook Time: 2
- Category: Breakfast
- Method: Waffle Iron
- Cuisine: American
Nutrition
- Serving Size: 1 waffle
- Calories: 403
- Sugar: 13
- Sodium: 168
- Fat: 23
- Saturated Fat: 16
- Carbohydrates: 44
- Fiber: 4
- Protein: 8
- Cholesterol: 77
If you want to add fresh flavors to your gluten-free cooking, these recipes are perfect:
Your Burning Questions Answered!
Why are my gluten free waffles soggy?
Sogginess usually comes from three things: 1) The iron wasn’t hot enough. 2) You used butter instead of oil (butter contains water). 3) You stacked them while hot, creating steam. Keep them in a single layer or on a wire rack!
Can I make the batter ahead of time?
You can, but gluten-free baking powder acts quickly. If you let the batter sit overnight, the waffles might not rise as much. I recommend mixing it fresh for this gluten free waffle recipe.
Can I add mix-ins?
Absolutely. Blueberries or chocolate chips work great. Fold them in at the very end. Just be aware that juicy fruits (like frozen berries) can add moisture, so you might need to cook them a minute longer.
Dig In & Enjoy!
There is no need to skip Sunday brunch just because you are gluten-free.
With this gluten free waffle recipe, you get the best of both worlds: a sweet, crunchy exterior and a soft, comforting middle. Pass the maple syrup!
Stay up-to-date with my latest projects and news by following me on Pinterest.