Gluten-Free Sopapilla Cheesecake: A fusion of creamy cheesecake and the cinnamon-dusted, honey-drizzled joy of a classic sopapilla, this dessert is a true crowd-pleaser. This guide will walk you through creating a gluten-free version that’s every bit as decadent and delicious as the original.
A Sweet History: The Story Behind Gluten-Free Sopapilla Cheesecake
While the exact origins of sopapilla cheesecake are a bit hazy, it’s believed to have emerged from the creative kitchens of the American Southwest. The dessert is a delightful blend of two beloved treats: the rich, tangy goodness of cheesecake and the warm, comforting flavors of sopapillas—a type of fried pastry with a history stretching back over 200 years in Albuquerque, New Mexico. Traditional sopapillas are light, puffy pillows of fried dough, often drizzled with honey and dusted with cinnamon. This cheesecake version cleverly captures that essence by sandwiching a creamy filling between layers of tender dough, all crowned with a buttery cinnamon-sugar topping.
My own journey with this dessert began years ago at a potluck. One bite of the flaky, creamy, cinnamon-kissed bar and I was hooked. When I later transitioned to a gluten-free lifestyle, I was determined not to leave this favorite behind. After much experimenting, this recipe was born—a testament to the fact that gluten-free desserts can be just as showstopping and satisfying.
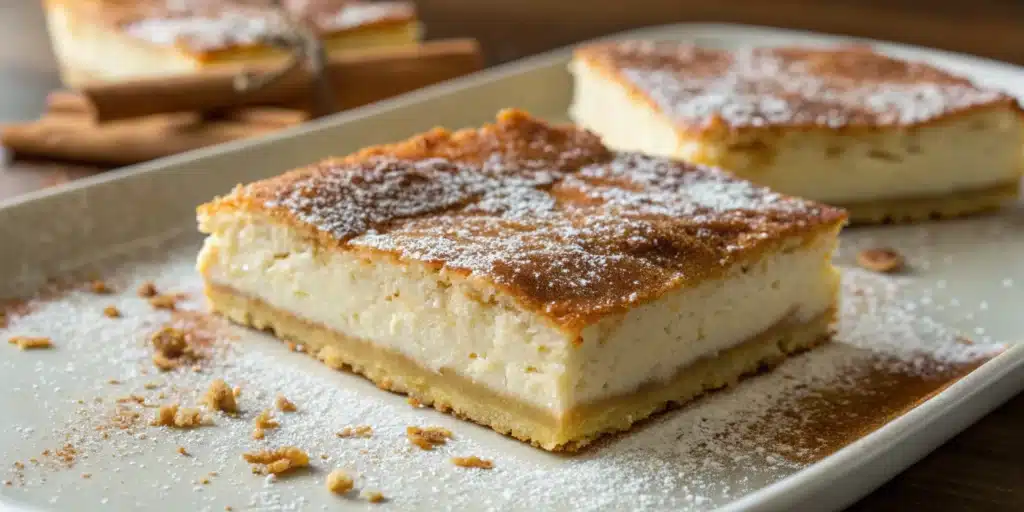
Table of Contents
Decoding the Ingredients: Your Gluten-Free Toolkit
Creating a successful gluten-free sopapilla cheesecake is all about understanding the role of each component.
The Topping: A simple mix of melted butter, granulated sugar, and cinnamon creates the irresistible, slightly crunchy topping that brings it all together.
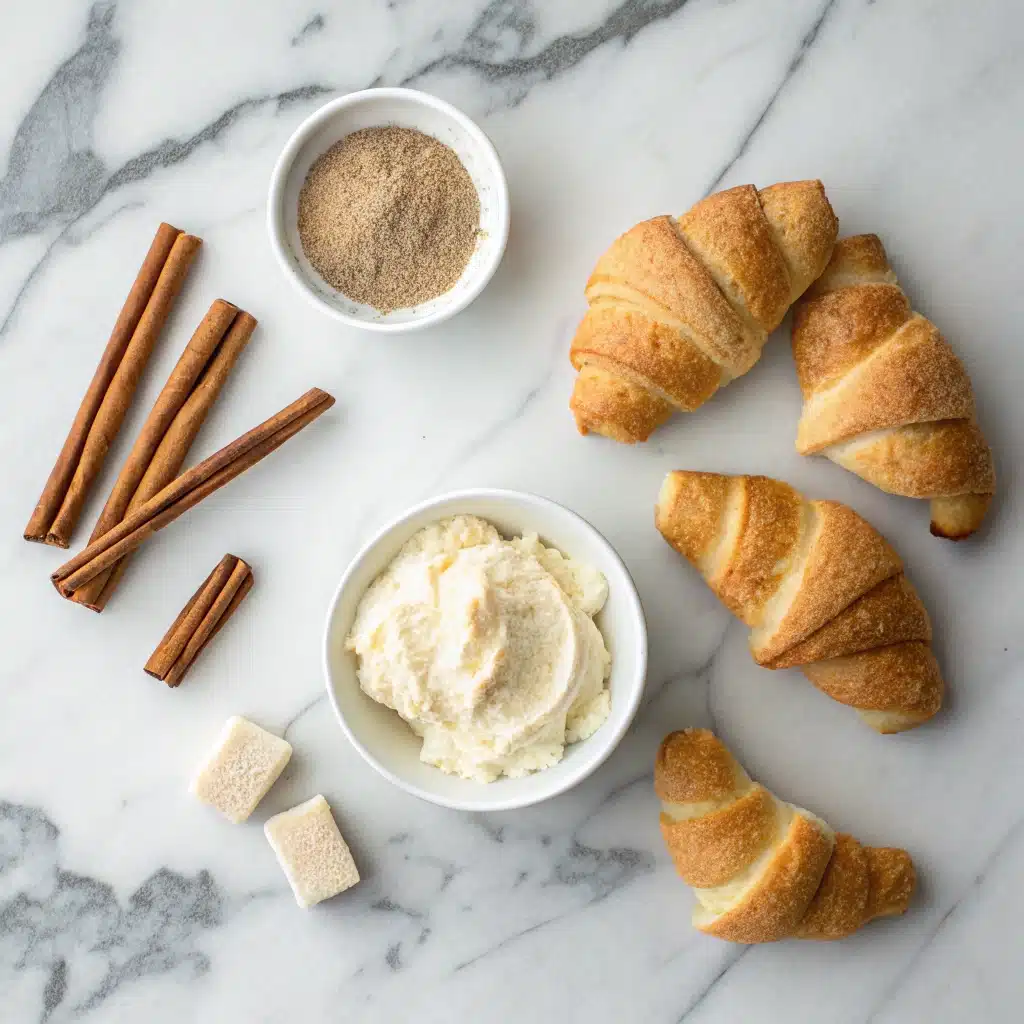
Gluten-Free Crescent Roll Dough: This is the heart of the flaky layers that mimic the sopapilla. While you can make your own, using a store-bought gluten-free crescent roll dough is a fantastic time-saver. If you can’t find crescent dough, gluten-free puff pastry or a gluten-free pie crust can also work as substitutes.
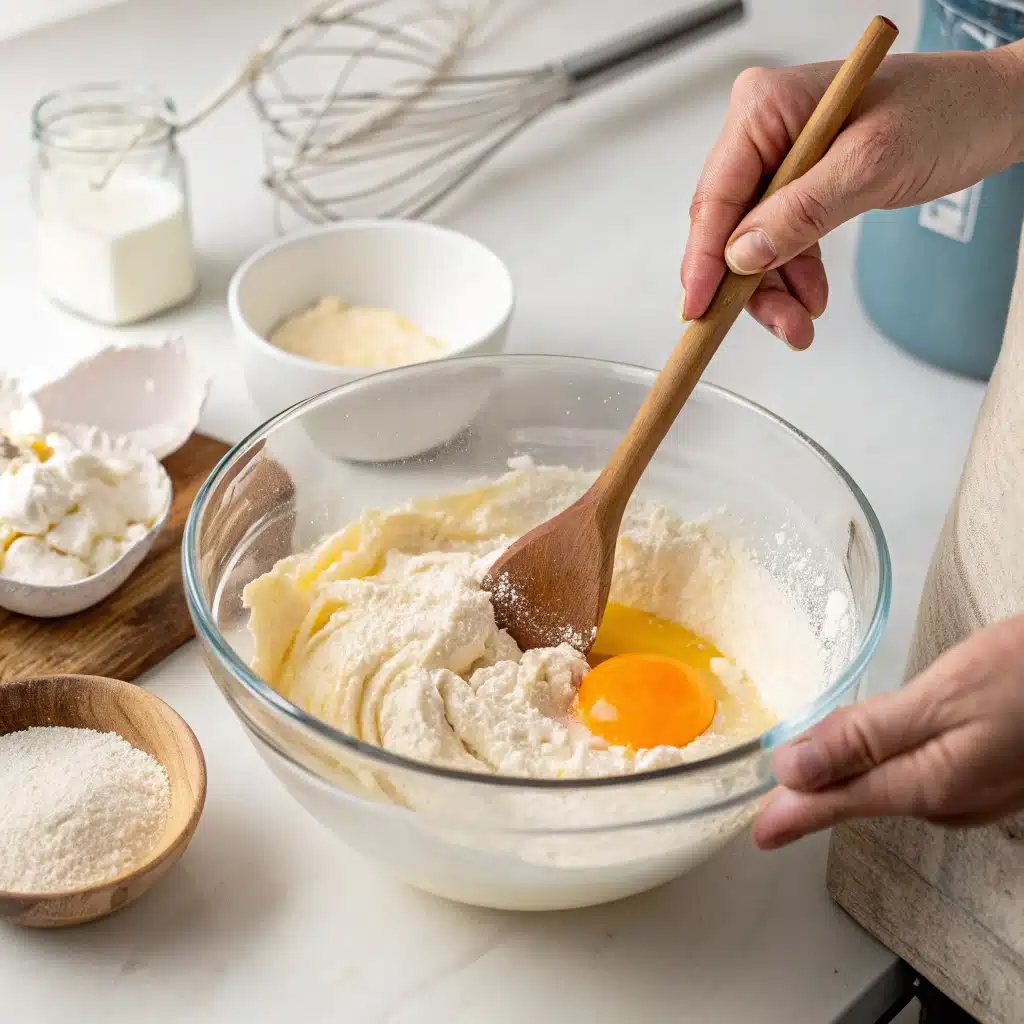
Cream Cheese: For the richest flavor and creamiest texture, opt for full-fat, block-style cream cheese and make sure it’s softened to room temperature.[1] This is crucial for a smooth, lump-free filling. For a dairy-free option, there are many excellent plant-based cream cheeses available; Kite Hill is a popular choice for baking.
The Binders: An egg helps to bind the filling, giving it that classic cheesecake structure.
Flavor Enhancers: Pure vanilla extract and a generous amount of ground cinnamon are key to achieving that authentic sopapilla taste.
For more pairing ideas, check out our Gluten-Free Potato Buns.
Mastering the Method: Step-by-Step to Perfection
This recipe is surprisingly quick and easy, with only about 10 minutes of active prep time.
Yields: 12 servings
Prep time: 10 minutes
Cook time: 30-35 minutes
Ingredients:
1 teaspoon ground cinnamon
2 (8-ounce) packages of gluten-free crescent roll dough
2 (8-ounce) packages of full-fat cream cheese, softened
1 cup granulated sugar, divided
1 large egg
1 teaspoon pure vanilla extract
1/4 cup unsalted butter, melted
Instructions:
Cool Completely: This is a crucial step! Allow the gluten-free sopapilla cheesecake to cool completely at room temperature before slicing and serving. This allows the filling to set properly. For best results, chill in the refrigerator for at least 4 hours.
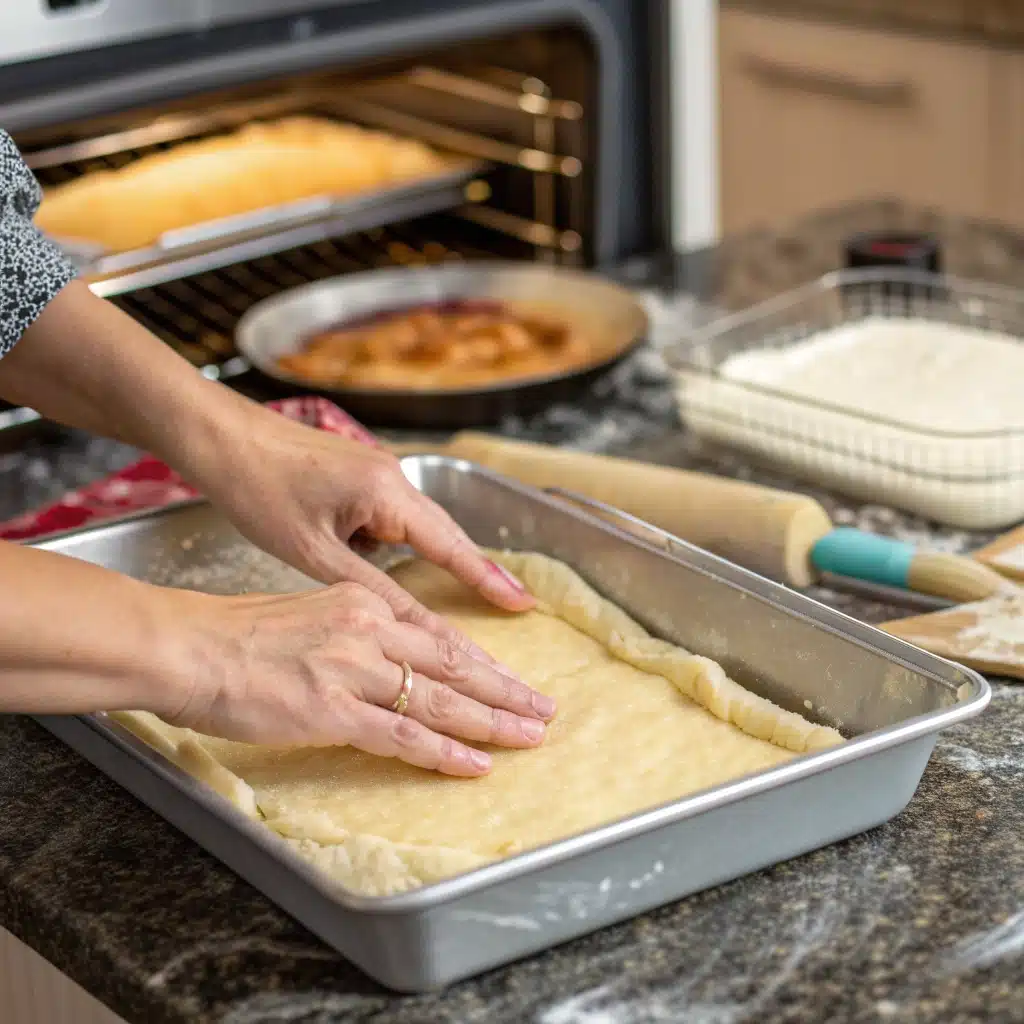
Prep and Preheat: Preheat your oven to 350°F (175°C). Lightly grease a 9×13 inch baking dish.
Create the Base: Gently unroll one package of the gluten-free crescent dough and press it into the bottom of the prepared dish, ensuring the seams are sealed.
Mix the Filling: In a large bowl, beat the softened cream cheese with 3/4 cup of the sugar using an electric mixer until smooth and creamy. Scrape down the sides of the bowl, then beat in the egg and vanilla extract until just combined. Be careful not to overmix, as this can cause the cheesecake to crack.
Layer the Cheesecake: Carefully spread the cream cheese mixture evenly over the dough base.
Add the Top Layer: Unroll the second package of crescent dough and place it over the cream cheese filling.
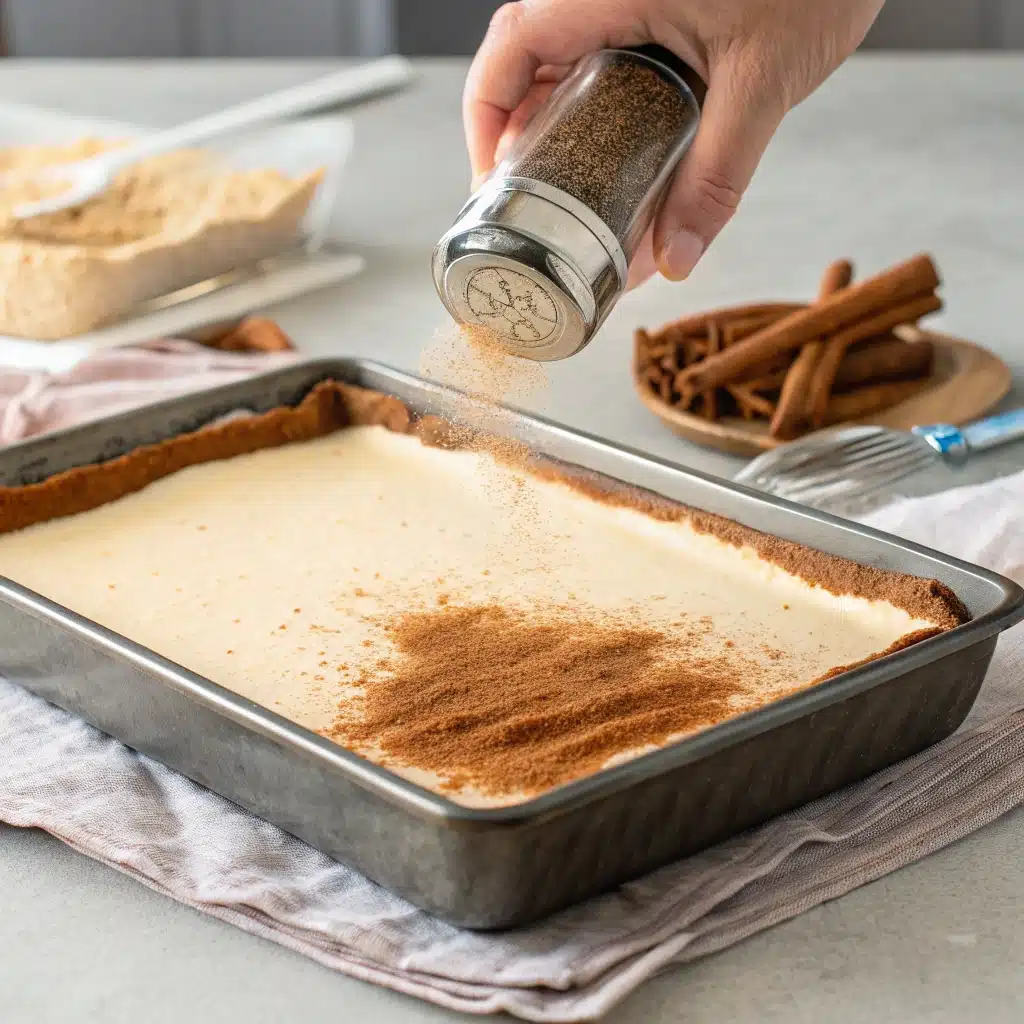
The Finishing Touch: In a small bowl, combine the remaining 1/4 cup of sugar and the ground cinnamon. Brush the melted butter over the top layer of dough, then sprinkle the cinnamon-sugar mixture evenly over the top.
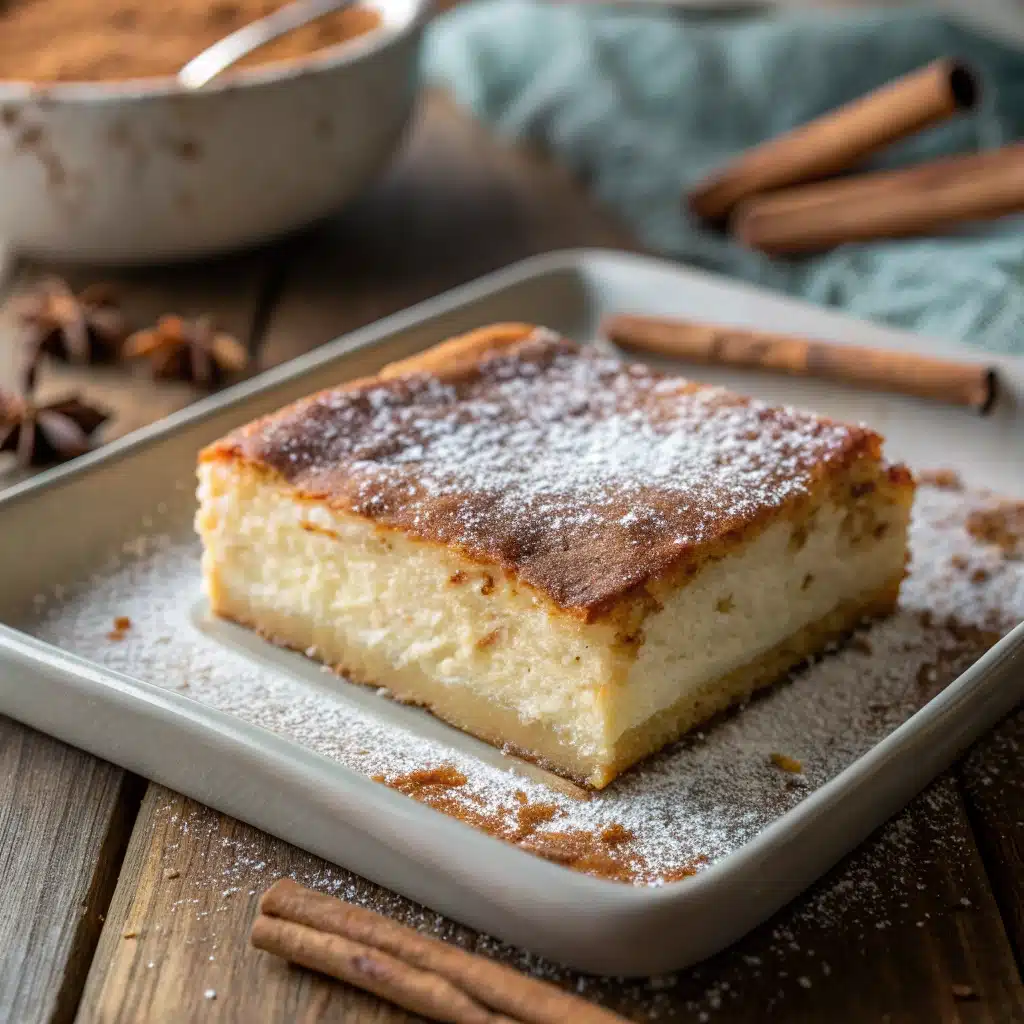
Bake to Golden Perfection: Bake for 30-35 minutes, or until the top is golden brown and the center is set.
If you enjoyed this recipe, don’t miss our Gluten Free Red Velvet Brownies for more sweet treats.
Pro-Tips for a Flawless Finish
Preventing a Soggy Bottom: For an extra layer of protection against a soggy crust, you can pre-bake the bottom layer of dough for about 5 minutes before adding the filling.
Here, you’ll find easy, flavorful gluten-free recipes that celebrate comfort foods like this Summer Gluten-Free Sourdough.
Creative Twists and Serving Suggestions
Serve with a scoop of plant-based vanilla ice cream for an extra decadent treat.
Flavor Variations:
A Hint of Citrus: Add a teaspoon of lemon juice to the cream cheese filling for a brighter, tangier flavor.
Warm Spice: Add a pinch of nutmeg or cardamom to the cinnamon-sugar topping for a warmer spice profile.
Serving Ideas:
Drizzle with honey or agave nectar just before serving for a classic touch.
Top with a dollop of dairy-free whipped topping or fresh berries.
Frequently Asked Questions (FAQs)
Can I make this sopapilla cheesecake dairy-free?
How do I prevent the cheesecake layer from cracking?
Store any leftover sopapilla cheesecake in an airtight container in the refrigerator for up to 5 days.
Can I freeze sopapilla cheesecake?
Yes, you can freeze it. For best results, freeze individual slices wrapped tightly in plastic wrap and then placed in a freezer-safe bag or container for up to 2 months. Thaw in the refrigerator before enjoying. Note that the texture of the dough may be slightly softer after freezing.
Why did my cheesecake crack?
Cracks are often caused by overmixing the batter or by a sudden change in temperature. Allowing the cheesecake to cool slowly and completely on the counter before refrigerating can help prevent this.
For more Gluten-Free recipes, follow me on Facebook and Pinterest.
Print
Gluten-Free Sopapilla Cheesecake That’s So Good, It Feels Sinful
- Total Time: 290
- Yield: 12 1x
Description
Indulge in this rich and creamy Gluten-Free Sopapilla Cheesecake — a delicious fusion of flaky layers, sweet cinnamon sugar, and smooth cheesecake filling. Easy to make and perfect for gatherings, this gluten-free dessert delivers all the flavor without compromise.
Ingredients
2 (8-oz) tubes refrigerated gluten-free crescent roll dough (16 oz total)
16 oz (450 g) cream cheese, softened
½ cup granulated sugar
2 tsp vanilla extract
1 large egg
½ cup (1 stick) unsalted butter, melted
1 cup granulated sugar
2 tsp ground cinnamon
Instructions
1. Preheat your oven to 350°F (175°C). Lightly grease a 9 × 13-inch baking pan.
2. Unroll one tube of crescent dough and press it into the bottom of the prepared pan, sealing any perforations.
3. In a medium bowl, beat together the softened cream cheese, ½ cup sugar, vanilla extract, and egg until smooth and creamy.
4. Spread the cheesecake mixture evenly over the dough layer in the pan.
5. Unroll the second tube of crescent dough and layer it on top of the cheesecake filling, again sealing perforations.
6. Pour the melted butter evenly over the top layer of dough.
7. In a small bowl, stir together 1 cup sugar and 2 tsp cinnamon, then sprinkle the mixture evenly over the buttered dough.
8. Bake for 25–30 minutes, or until the top is golden brown and the filling is set.
9. Remove from the oven and let cool completely at room temperature, then refrigerate for at least 2 hours before cutting into bars.
Notes
Advance prep: Assemble bars up to 24 hours ahead; keep covered in fridge.
Spice adjustment: Increase cinnamon by ½ tsp for a bolder flavor.
Sweetness tweak: Swap half the sugar for brown sugar to deepen caramel notes.
Pan alternatives: A glass dish may require an extra 5 minutes of baking time.
Serving tip: For clean cuts, dip knife in hot water and wipe between slices.
- Prep Time: 10
- Cook Time: 30
- Category: Dessert
- Method: Bake
- Cuisine: American
Nutrition
- Serving Size: 1 bar
- Calories: 320
- Sugar: 28
- Sodium: 320
- Fat: 20
- Saturated Fat: 11
- Unsaturated Fat: 6
- Trans Fat: 0
- Carbohydrates: 30
- Fiber: 0
- Protein: 5
- Cholesterol: 65