Table of Contents
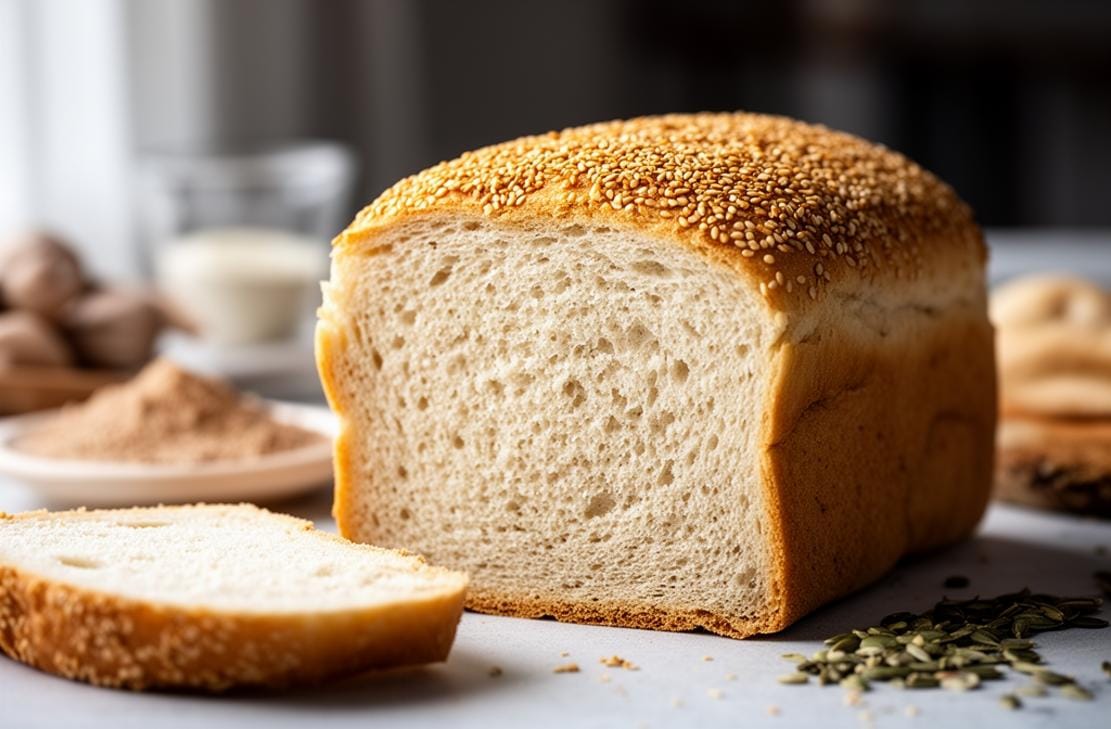
Discover the secret to making the perfect Legit Squishy Gluten Free Bread that’s soft, fluffy, and absolutely delicious. This recipe is a game-changer for anyone following a gluten-free diet.
As someone who has struggled with gluten intolerance, I know how challenging it can be to find a gluten-free bread that doesn’t crumble or taste like cardboard. This recipe is the result of countless trials and errors, and I’m thrilled to share it with you.
Get ready to cook up a storm with this amazing Legit Squishy Gluten Free Bread recipe.
What to Expect
- Time: Approximately 1 hour 30 minutes (including rising time)
- Difficulty: Moderate
Before You Begin
Before you start, make sure all your ingredients are at room temperature. This helps in achieving the perfect texture for your Legit Squishy Gluten Free Bread.
Ingredients You’ll Need
| Ingredient | Quantity |
|---|---|
| Gluten free all purpose flour | 3 cups (438 g) |
| Instant rapid rise yeast | 1 packet (2 ¼ tsp, 9 g) |
| Psyllium husk powder (optional) | 1 tablespoon (11 g) |
| Baking powder | 1 teaspoon |
| Salt | 1 teaspoon |
| Warm water (110°F) | 1 ½ cups (338 g) |
| Large eggs, room temperature | 2 |
| Honey | ¼ cup (85 g) |
| Vegetable oil | ¼ cup (55 g) |
Step-by-Step Guide
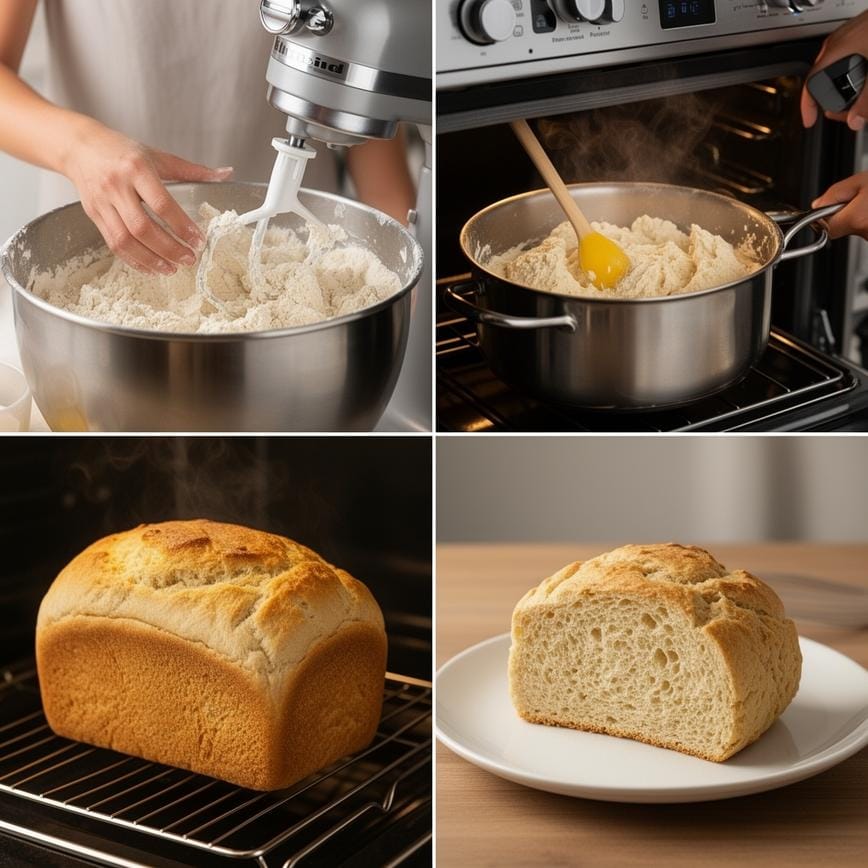
- Using a stand mixer with paddle attachment, mix together gluten free flour, yeast, optional psyllium husk powder, baking powder, and salt on low speed until combined.
- Add warm water, eggs, honey, and vegetable oil. Mix on low speed to let the dough come together, about 1 minute.
- Increase speed to medium and beat for 5 minutes, scraping down the paddle and bowl halfway through. The batter will be stiff, but sticky.
- Grease a 9X4 baking pan (recommended). Pour into the pan and smooth top evenly with a spatula.
- Spray a large piece of plastic wrap with nonstick cooking spray. Lay the plastic, greased side down, over the pan. Set in a warm, draft-free place to rise until the bread reaches two-thirds to the top of the pan (do not let it go over this point because it rises more in the oven). This should take about 30 minutes.
- Meanwhile preheat oven to 350°F. Remove plastic and bake bread on middle rack for 40-50 minutes, tenting a piece of foil loosely over the bread halfway through. The internal temperature of the bread should read 205°F.
- Allow the loaf to cool for 5 minutes in the pan and then remove to a cooling rack. Allow bread to cool completely, at least 2 hours, before slicing.
Pointers for Perfection & How to Store
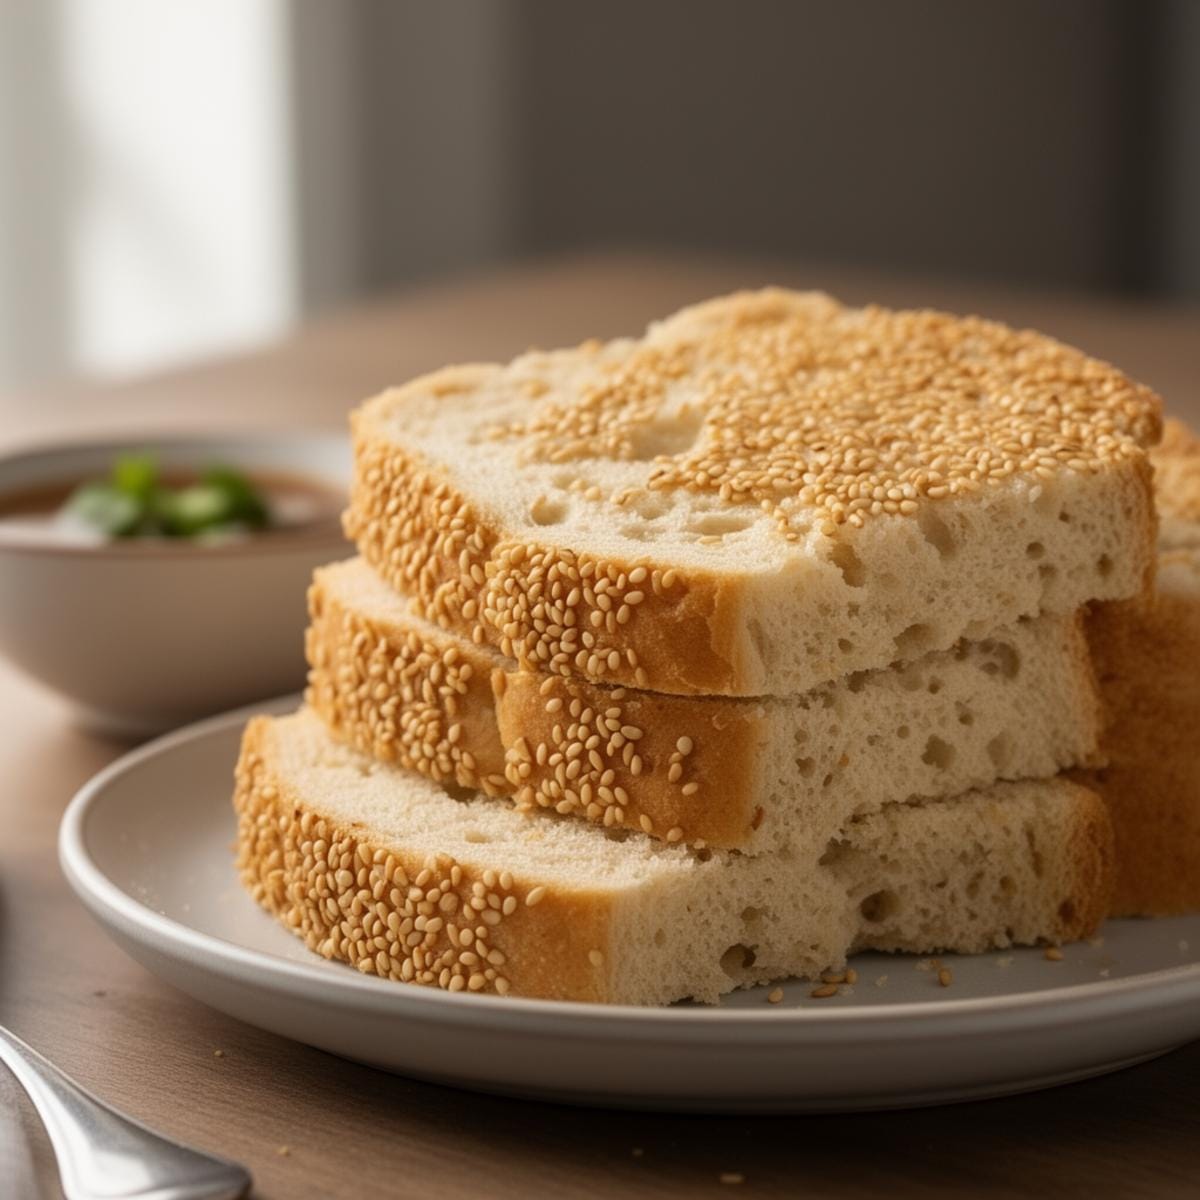
For the best results, serve the Legit Squishy Gluten Free Bread at room temperature, toasted, or grilled. Chilled, cold bread has an adverse effect on texture. To maintain freshness, slice and freeze the bread after it has completely cooled (at least 3 hours). Pull slices as needed from the freezer to defrost or toast from frozen.
For more delicious gluten-free recipes, check out this Gluten Free No Knead Bread Artisan Loaf.
Print
Legit Squishy Gluten Free Bread
- Total Time: 95
- Yield: 1 loaf (12 slices) 1x
- Diet: Gluten Free
Description
This ‘Legit Squishy’ Gluten-Free Bread lives up to its name. Soft, airy, and flexible, it bends without breaking and has that nostalgic white bread texture. The secret lies in a specific combination of ingredients—including baking powder for lift and apple cider vinegar for structure—that eliminates the dense, crumbly texture often found in gluten-free loaves.
Ingredients
— Dry Ingredients —
3 cups (approx. 440g) gluten-free all-purpose flour blend (Cup4Cup or Better Batter works best for the ‘squishy’ factor)
1/4 cup granulated sugar (or honey)
2 1/4 teaspoons (1 packet) instant rapid-rise yeast
1 teaspoon baking powder (the secret ingredient for extra fluffiness)
1 teaspoon salt
— Wet Ingredients —
1 1/2 cups warm water (110°F/43°C) – think warm bathwater
1/4 cup vegetable oil (or melted butter)
2 large eggs, room temperature
1 teaspoon apple cider vinegar
Instructions
1. Prepare the Pan: Grease a standard 9×5 inch loaf pan generously with non-stick spray or butter. (For a taller loaf, you can use a smaller 8×4 pan, but 9×5 is standard).
2. Mix Dry Ingredients: In the bowl of a stand mixer fitted with the paddle attachment, whisk together the gluten-free flour, sugar, instant yeast, baking powder, and salt.
3. Add Wet Ingredients: With the mixer on low, pour in the warm water, oil, eggs, and apple cider vinegar.
4. The ‘Squishy’ Beat: Increase the speed to medium-high and beat for 3–5 minutes. This is critical! Unlike wheat bread, you want to beat air into this batter to help it rise and create a fine structure. The dough will look like thick, sticky cake batter.
5. Transfer & Smooth: Scrape the dough into the prepared loaf pan. Dip a spatula or your fingers in warm water and smooth the top of the loaf into a nice dome shape.
6. Rise: Cover loosely with greased plastic wrap or a shower cap. Place in a warm, draft-free spot for 30–45 minutes. The dough should rise just above the rim of the pan. (Do not let it over-rise, or it might collapse in the oven).
7. Preheat: While the bread rises, preheat your oven to 350°F (175°C).
8. Bake: Bake for 30–40 minutes. The top should be golden brown and the internal temperature should reach 205°F–210°F (96°C–99°C).
9. Cool (Patience required!): Remove from the oven and let cool in the pan for 5 minutes. Then, turn it out onto a wire rack to cool COMPLETELY before slicing. Cutting it while warm will release the steam and make the bread gummy.
Notes
Flour Choice: The ‘squishy’ texture depends heavily on the flour. Blends containing milk powder (like Cup4Cup) often yield the softest results. If you are dairy-free, ensure your blend has xanthan gum.
Yeast: Use Instant/Rapid Rise yeast for the most reliable results. If you only have Active Dry, proof it in the warm water and sugar for 5 minutes before adding.
Storage: Store airtight at room temperature for 2-3 days. For longer storage, slice and freeze the loaf.
Troubleshooting: If the bread sinks in the middle, it likely over-proofed (rose too long) or the oven wasn’t fully preheated.
- Prep Time: 15
- Cook Time: 35
- Category: Bread
- Method: Baking
- Cuisine: American
Nutrition
- Serving Size: 1 slice
- Calories: 180
- Sugar: 4
- Sodium: 210
- Fat: 6
- Saturated Fat: 1
- Unsaturated Fat: 4
- Trans Fat: 0
- Carbohydrates: 28
- Fiber: 2
- Protein: 3
- Cholesterol: 35
Your Burning Questions Answered!
- Can I use a different type of flour?
- While you can experiment with different gluten-free flours, Cup4Cup gluten-free flour is highly recommended for the best results.
- What if I don’t have psyllium husk powder?
- The psyllium husk powder is optional but helps maintain moisture and prevents the bread from becoming crumbly. If you don’t have it, you can still make the bread, but it might be slightly less soft.
Can I make this bread in a bread machine?
Yes, several readers have had great results using a bread machine with a gluten-free setting. Add all the wet ingredients to the bottom of the bread baking pan, then add the dry ingredients over that. Start the bread machine and set it to the “gluten-free” setting.
Dig In & Enjoy!
Now that you have the perfect Legit Squishy Gluten Free Bread recipe, it’s time to dig in and enjoy! This bread is exceptionally soft and fluffy, making it a delightful treat for any meal. For more delicious ideas, follow me on Pinterest.