Hello, Food Lovers! If you are searching for the perfect gluten-free pie crust, you know the struggle is real. Finding a crust that doesn’t crumble, crack, or taste like cardboard can feel like an impossible task.
Table of Contents

But your search ends today. I am thrilled to share my foolproof gluten-free pie crust recipe that delivers a tender, flaky texture every single time. This is the recipe that will make you forget you are baking without gluten.
This dough is surprisingly easy to handle and incredibly versatile. It creates the perfect foundation for any sweet or savory pie you can imagine. Get ready to bake with confidence, knowing you have the best gluten-free pie crust recipe in your hands.
A Little Story About This Crust
When I first went gluten-free, pie was the one dessert I missed the most. I recall one particularly frustrating holiday season when every attempt at a gluten-free pie crust was a complete failure. They were either too dry to roll or baked into a tough, unappetizing shell.
I almost gave up, believing a truly great gluten-free pie crust was just a baker’s myth. However, I was determined to reclaim that cherished dessert for my family and myself.
After countless hours in the kitchen, experimenting with flour blends and techniques, I finally cracked the code. The result is the easy, buttery, and flaky gluten-free pie crust I’m sharing with you. It’s more than just a recipe; it’s a delicious victory.

Get Ready to Cook! (A Quick Overview)
What to Expect
Making this gluten-free pie crust is a surprisingly simple process. You will be surprised at just how fast this is to make. Expect about 15 minutes of hands-on prep time, followed by a mandatory 30-minute chill in the refrigerator. In less than an hour, your dough will be ready to roll out for your favorite pie. This recipe is absolutely beginner-friendly, so don’t be intimidated.
Before You Begin
For the best results with your gluten-free pie crust, a little preparation goes a long way. It’s a good idea to review all the instructions before you get started. This helps you understand the flow and prevents any surprises. Most importantly, make sure your butter and sour cream are very cold, straight from the fridge. This is the key to getting that amazing flaky texture everyone enjoys.
The Heart of the Dish: Ingredients You’ll Need
To create the perfect gluten-free pie crust, you need a few key ingredients working together. Here is the precise list of what you need to begin.

| Ingredient | Amount | Notes |
| All-Purpose Gluten-Free Flour | 1 ½ cups (210 g) | Ensure your blend is a 1:1 substitute for baking. |
| Xanthan Gum | ¾ teaspoon | Omit if your flour blend already contains it. |
| Baking Powder | ¼ teaspoon | Adds a slight lift for a tender crumb. |
| Kosher Salt | ½ teaspoon | Balances the flavors. |
| Unsalted Butter | 6 tablespoons (84 g) | Must be very cold and roughly chopped. |
| Sour Cream | ½ cup (120 g) | Full-fat is best, and make sure it’s chilled. |
| Ice Water | As needed | Use by the teaspoonful only if necessary. |
| Egg White | Optional | For brushing, to get a golden-brown finish. |
The Ultimate Gluten-Free Pie Crust: Flaky, Buttery, and Incredibly Easy
- Total Time: 60
- Yield: 1 9-inch pie crust 1x
Description
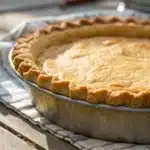
This foolproof gluten-free pie crust is incredibly flaky, buttery, and surprisingly easy to make. It creates a tender, workable dough that serves as the perfect foundation for any sweet or savory pie you can dream of. Say goodbye to crumbly, disappointing crusts forever!
Ingredients
1 ½ cups (210 g) all purpose gluten free flour blend
¾ teaspoon xanthan gum, omit if your blend already contains it
¼ teaspoon baking powder
½ teaspoon kosher salt
6 tablespoons (84 g) unsalted butter, roughly chopped and chilled
½ cup (120 g) sour cream, full fat, chilled
Ice water by the teaspoonful, as necessary
1 Egg white, for brushing (optional)
Instructions
1. In a large bowl, place the flour, xanthan gum, baking powder and salt, and whisk to combine well.
2. Add the chopped and chilled butter, and toss to coat it in the dry ingredients. Flatten each chunk of butter between your thumb and forefinger to make flat shards.
3. Create a well in the center of the dry ingredients, add the sour cream, and mix until the dough is shaggy and somewhat crumbly.
4. If there are any very dry portions, drizzle ice water by the teaspoon only on those parts and mix to moisten them.
5. Knead the dough together gently with clean hands until it begins to come together.
6. Turn the dough out onto a sheet of plastic wrap, and press into a disk as you close the plastic wrap around the dough.
7. Place the dough in the refrigerator to chill for at least 30 minutes.
8. Preheat your oven to 375°F. Grease a 9-inch metal pie plate generously. The crust is now ready to be rolled out and used in your favorite recipe.
Notes
Keep Ingredients Cold: For the flakiest possible crust, your butter and sour cream must be very cold, directly from the refrigerator.
Do Not Overwork: Mix the dough just until it comes together. Overworking it will result in a tough crust.
Parchment Paper is Your Friend: Roll the dough between two sheets of parchment paper to prevent sticking and make it easy to transfer to the pie plate.
Storage: Unbaked dough can be refrigerated for up to 2 days or frozen for up to 3 months.
- Prep Time: 15
- Cook Time: 15
- Category: Dessert, Basics
- Method: Baking
- Cuisine: American
Nutrition
- Serving Size: 1 slice (1/8th of crust)
- Calories: 250
- Sugar: 1 g
- Sodium: 180 mg
- Fat: 15 g
- Saturated Fat: 9 g
- Unsaturated Fat: 5 g
- Trans Fat: 0 g
- Carbohydrates: 25 g
- Fiber: 1 g
- Protein: 3 g
- Cholesterol: 40 mg
Let’s Get Cooking! Step-by-Step Guide
Follow these simple steps carefully to assemble your flawless gluten-free pie crust dough.
Step 1: Combine Your Dry Ingredients
First, grab a large mixing bowl. First, combine the gluten-free flour, xanthan gum (if needed), baking powder, and kosher salt. Then, use a whisk to mix everything together thoroughly, ensuring all the ingredients are evenly distributed. This step is crucial for the final texture of the crust.
Step 2: Work in the Cold Butter
Then, put the cold, chopped butter into your dry ingredient mixture. Toss the butter pieces lightly with the flour mixture until they are fully coated. Take each piece of butter and press it into a thin, flat piece with your thumb and forefinger. This method creates pockets of fat, which results in a wonderfully flaky gluten-free pie crust.

Step 3: Mix in the Wet Ingredients
Now, create a small well in the center of your flour and butter mixture. Add the chilled sour cream right into the middle of the ingredients.
Gently mix it in until the dough becomes shaggy and slightly crumbly. If you notice any very dry spots, add a teaspoon of ice water directly to those areas and mix again. Be careful not to add too much water; your dough should just barely come together.
Step 4: Form and Chill the Dough
Once the dough is mostly combined, use clean hands to gently knead it together inside the bowl. Place the somewhat rough dough on a big sheet of plastic wrap. While you wrap the dough tightly, press it down into a 1-inch thick circle. Finally, place your wrapped gluten-free pie crust dough in the refrigerator to chill for at least 30 minutes. This rest is essential for a tender crust.

Step 5: Prepare for Baking
As your dough finishes chilling, preheat your oven to 375°F. While the oven heats up, generously grease a 9-inch metal pie plate. This preparation ensures your crust won’t stick and will bake evenly. Now, you are ready to roll out your dough and fill your pie.
Mastering the Dish: Pointers for Perfection & How to Store
Let’s talk about the small details that make a huge difference. Temperature is the most important factor for a flaky gluten-free pie crust. Your butter and sour cream must be ice-cold to create those delicious, airy layers.
Handle the dough with a light touch. Overmixing develops the glutens (even in gluten-free flour!), which can make your crust tough. Only mix until the dough starts to come together, then stop.
To make rolling a breeze, use a baker’s secret weapon: parchment paper. Placing the dough disk between two sheets prevents sticking and makes transferring it to the pie plate incredibly simple.
Planning ahead is easy. You can prepare this dough, wrap it tightly, and keep it in the fridge for two days. If you need to keep it longer, you can freeze it for as long as three months.
If you have a leftover baked shell, let it cool completely on a wire rack. Then, cover it lightly and store it at room temperature for up to two days.

If you want to try auther gluten-fre recipes try Gluten-Free Sausage Rolls Recipe and Easy Gluten-Free Angel Food Cake or Gluten Free Peach Cobbler
Your Burning Questions Answered! (FAQ)
Is Pillsbury pie crust gluten-free?
Unfortunately, the classic Pillsbury pie crusts contain wheat flour, making them unsuitable for a gluten-free diet. Always double-check labels for GF certification.
Does Trader Joe’s sell a gluten-free pie crust?
You are in luck at Trader Joe’s! They often carry a gluten-free pie crust in their frozen goods section, particularly around the holidays. It is a solid choice in a pinch.
What is the best gluten-free flour to use for pie crust?
For the most reliable results, reach for a gluten-free flour blend specifically labeled “1-to-1” or “measure for measure.” Blends from King Arthur or Bob’s Red Mill are designed for this purpose and work wonderfully.
What is the best gluten-free crust?
While store-bought options are convenient, nothing compares to the flavor and texture of a homemade gluten-free pie crust. This recipe is designed to be that perfect, reliable option that will impress everyone.
Dig In & Enjoy!
Armed with this recipe, you are ready to tackle any pie with confidence. Say goodbye to crumbly, disappointing crusts and hello to buttery, flaky perfection. This gluten-free pie crust is more than just a recipe; it is your ticket back to enjoying one of life’s simplest pleasures. Enjoy baking this crust, fill it with things you love, and share it with your favorite people.
For more Gluten-Free recipes, follow me on Facebook and Pinterest.
For a two crust pie do you double the recipe?
Based on the recipe, you do not need to double it for a two-crust pie.
The recipe is written to make enough dough for either one double-crust pie or two single-crust pies. In the instructions, you’ll notice a step that directs you to “Divide the dough into 2 equal parts and form each into a ball.” One of those balls is for your bottom crust, and the other is for the top crust.