Table of Contents
Discover the perfect gluten free oat flour pie crust that’s easy to make and delicious every time. This recipe is a game-changer for your baking needs!
I remember the first time I tried making a gluten free oat flour pie crust. It was a challenge, but the result was worth every effort. Now, it’s my go-to recipe for all my pies.
Get ready to cook up something amazing with this simple and tasty recipe.
What to Expect
- Time: Approximately 25 minutes
- Difficulty: Easy
Before You Begin
Make sure you have all your ingredients measured and ready to go. This will make the process smoother and more enjoyable.
Ingredients You’ll Need
| Ingredient | Quantity |
|---|---|
| Gluten free oat flour | 1 ½ cups |
| Salt | ½ tsp. |
| Virgin coconut oil (or any coconut oil that is solid at room temp) | ¼ cup |
| Cold water | ¼ cup |

Step-by-Step Guide
- Add the oat flour, salt, and coconut oil to a large mixing bowl.
- Add in the water and knead the mixture.
- If the dough is still too crumbly, add more water, 1 tbsp. at a time, kneading well between each addition.
- Once the dough is smooth and soft but firm, place it on a piece of parchment paper.
- Add another piece of parchment over the dough and roll it flat.
- Remove the top layer of parchment, and turn the dough over into your pie pan.
- Carefully peel off the second piece of parchment.
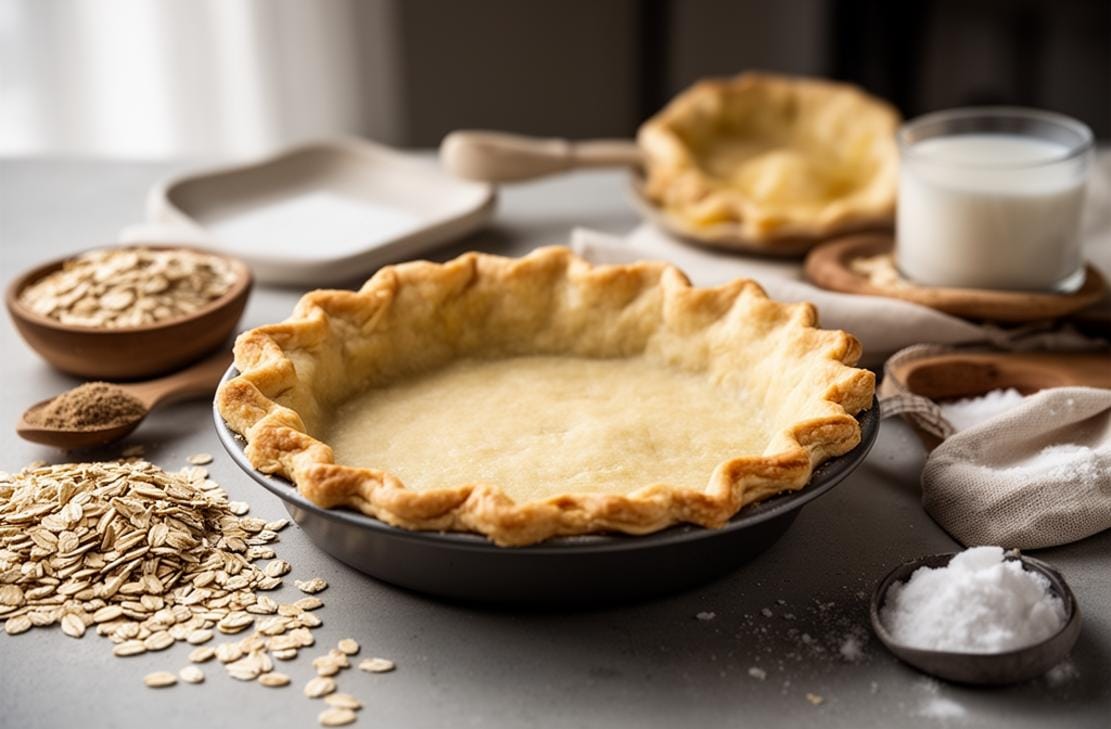
- Press the dough into the pie pan, working it with your fingers until you have nice, even coverage.
- Use raw for pre-baked or no-bake pies, or bake in the oven at 350°F for about 15 minutes just to get a light toast.
Pointers for Perfection & How to Store
For the best results, make sure your coconut oil is solid at room temperature. This will help the dough hold together better.
You can store the dough in the refrigerator for up to 3 days or freeze it for up to a month.
For more delicious recipes, check out Oatmeal Pie Crust Recipe.

Gluten Free Oat Flour Pie Crust
- Total Time: 60
- Yield: 1 pie crust (9-inch) 1x
- Diet: Gluten Free
Description
This Gluten-Free Oat Flour Pie Crust is a rustic, flavorful alternative to traditional pastry. With a hint of nuttiness and a tender, biscuit-like texture, it pairs beautifully with fruit fillings like apple or berry, as well as savory quiches. It is naturally whole grain and much easier to handle than many gluten-free doughs.
Ingredients
1 ½ cups certified gluten-free oat flour (store-bought or homemade)
½ cup tapioca flour (or cornstarch) – essential for binding the crust
1 tablespoon granulated sugar (omit for savory pies)
½ teaspoon salt
½ cup (1 stick) cold unsalted butter, cubed
4–6 tablespoons ice-cold water
1 teaspoon apple cider vinegar (helps tenderize the dough)
Instructions
1. Prepare the Dry Mix: In a food processor (or large bowl), pulse the oat flour, tapioca flour, sugar, and salt just to combine.
2. Cut in Butter: Add the cold, cubed butter. Pulse a few times (or use a pastry blender) until the mixture resembles coarse wet sand with some pea-sized chunks of butter remaining.
3. Add Liquid: Sprinkle in the apple cider vinegar and 4 tablespoons of the ice water. Pulse or mix gently.
4. Test the Dough: Pinch a small amount of dough between your fingers. If it holds together, it’s ready. If it crumbles apart, add more ice water, 1 tablespoon at a time, until it comes together. (Do not make it too wet/sticky).
5. Form & Chill: Gather the dough into a ball and flatten it into a thick disc. Wrap tightly in plastic wrap and refrigerate for at least 30 minutes. (Oat flour needs time to absorb the moisture).
6. Roll Out: Remove the dough from the fridge. Place it between two large sheets of parchment paper. Roll the dough out into a 12-inch circle. (Using parchment is crucial as oat dough can be sticky).
7. Transfer: Peel off the top layer of parchment. Invert the pie dish over the dough, flip the whole thing over, and gently peel off the remaining parchment layer. Press the dough gently into the pan.
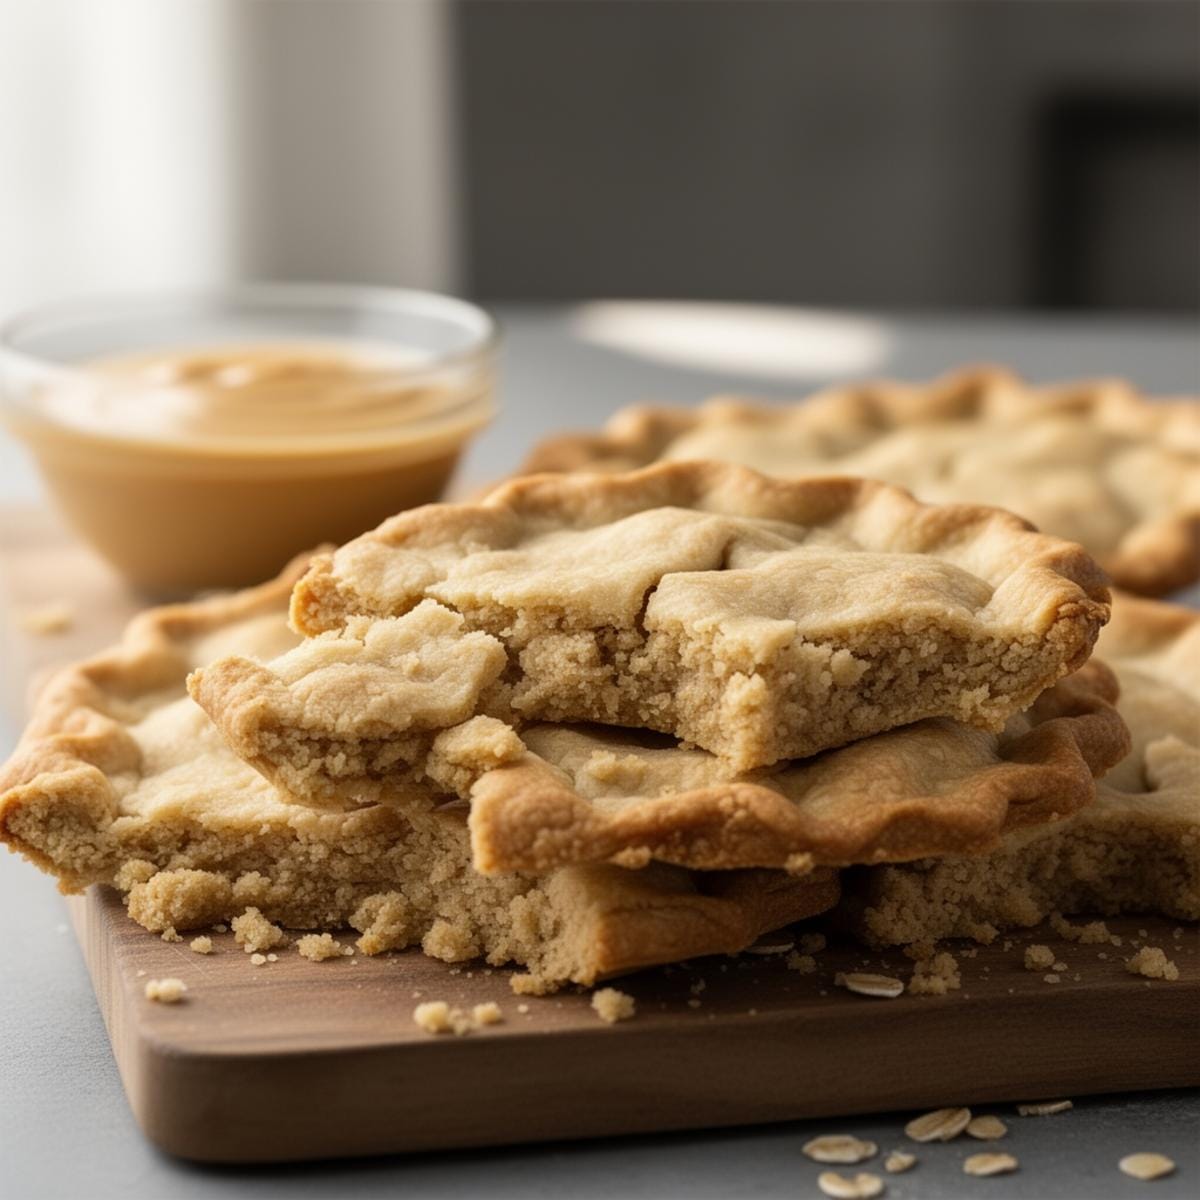
8. Finish Edges: Oat flour dough can be crumbly, so crimping might be difficult. Instead, use the tines of a fork to press a decorative pattern around the rim.
9. Blind Bake (Optional): If making a custard pie or quiche, prick the bottom with a fork and bake at 375°F (190°C) for 10–12 minutes before filling. If making a fruit pie, fill and bake according to your pie recipe.
Notes
Oat Safety: Oats are naturally gluten-free but are highly cross-contaminated in processing. You MUST use oats labeled ‘Certified Gluten-Free’ to ensure this recipe is safe.
Homemade Flour: You can make your own oat flour by blending certified GF rolled oats in a high-speed blender until fine. Measure the flour *after* blending.
Texture: This crust is more tender and ‘short’ (like shortbread) than flaky wheat crusts. It has a delicious flavor that complements autumn pies perfectly.
Freezing: The raw dough disc can be frozen for up to 2 months. Thaw in the fridge overnight before rolling.
- Prep Time: 15
- Cook Time: 15
- Category: Dessert
- Method: Baking
- Cuisine: American
Nutrition
- Serving Size: 1 slice
- Calories: 140
- Sugar: 2
- Sodium: 150
- Fat: 8
- Saturated Fat: 5
- Unsaturated Fat: 2
- Trans Fat: 0
- Carbohydrates: 16
- Fiber: 2
- Protein: 3
- Cholesterol: 20
Your Burning Questions Answered!
- Can I use a different type of flour?
- Yes, but the texture and taste may vary.
- How do I know when the crust is done?
- The crust should be lightly golden and firm to the touch.
Can I make this recipe ahead of time?
Absolutely! Just store it properly and bake when needed.
Dig In & Enjoy!
Now that you have your gluten free oat flour pie crust ready, it’s time to enjoy your delicious creation. For more delicious ideas, follow me on Pinterest.