Table of Contents
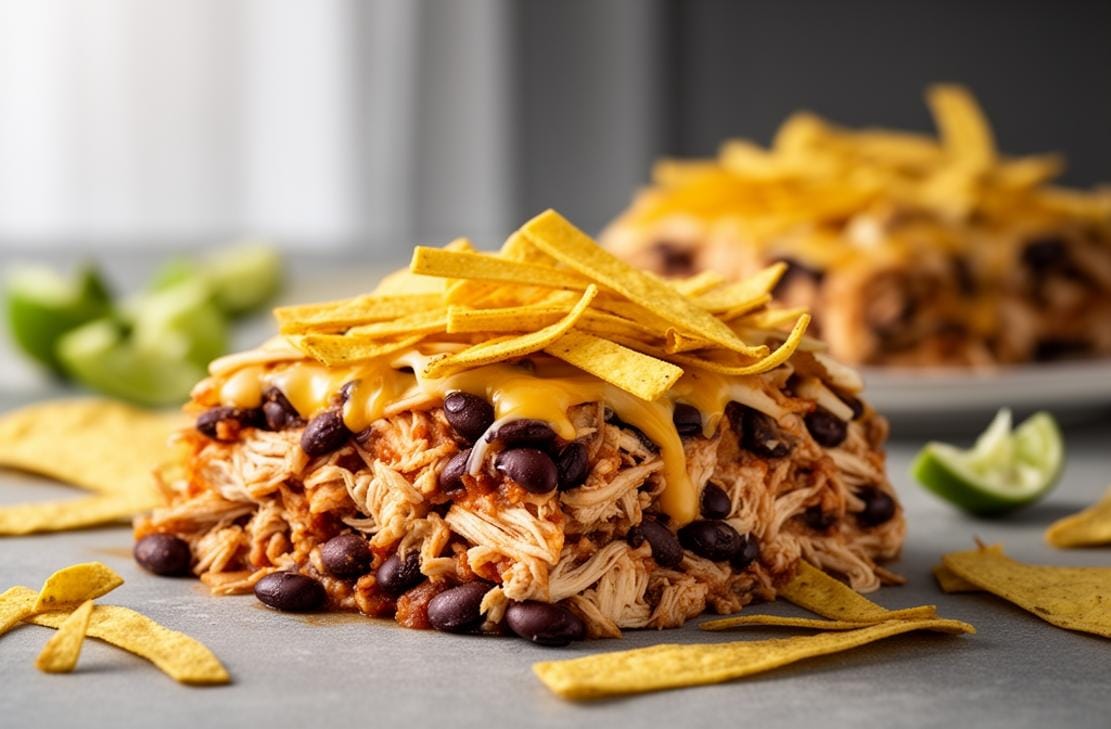
Looking for a hearty, flavorful dish that brings the best of Mexican cuisine right to your dinner table? This Chicken Burrito Casserole is the ultimate comfort food, packed with tender ground meat, savory spices, and gooey melted cheese. Perfect for busy weeknights or a cozy family dinner, this casserole is easy to make and even easier to love!
I first discovered this recipe on a chilly evening when I needed something warm and satisfying. The aroma of smoked paprika and cumin filling the kitchen instantly made it a family favorite. Now, it’s a go-to dish whenever I want to bring a little fiesta to our meal!
Get ready to cook up a storm with this delicious Chicken Burrito Casserole!
What to Expect
- Time: Approximately 1 hour (including prep and baking)
- Difficulty: Easy – perfect for beginners and seasoned cooks alike!

Before You Begin
Before diving into this recipe, make sure you have an oven-safe skillet or a baking dish ready. Prepping your ingredients in advance—like dicing the onion and mincing the garlic—will make the cooking process smoother. Also, feel free to customize the ground meat based on your preference—chicken, turkey, or beef all work beautifully!
Ingredients You’ll Need
| Ingredient | Quantity |
|---|---|
| Olive oil | 1 tablespoon |
| Sweet onion, diced | 1/2 |
| Garlic cloves, minced | 3 |
| Onion powder | 1/4 teaspoon |
| Smoked paprika | 1/2 teaspoon |
| Dried oregano | 1/2 teaspoon |
| Ground cumin | 1/2 teaspoon |
| Ground meat of choice (chicken, turkey, or beef) | 1 lb |
| Black beans, rinsed | 10–15 ounces |
| Mild salsa | 1 cup |
| Uncooked rice | 1 cup |
| Chicken broth or beef broth | 1 1/2 cup |
| Cheddar cheese, shredded | 1 heaping cup |
| For serving – tortillas, tortilla chips | |
| Topping ideas – guacamole, shredded lettuce, sour cream, diced tomatoes, cilantro, jalapeños |
Step-by-Step Guide
- Preheat your oven to 375 degrees F.
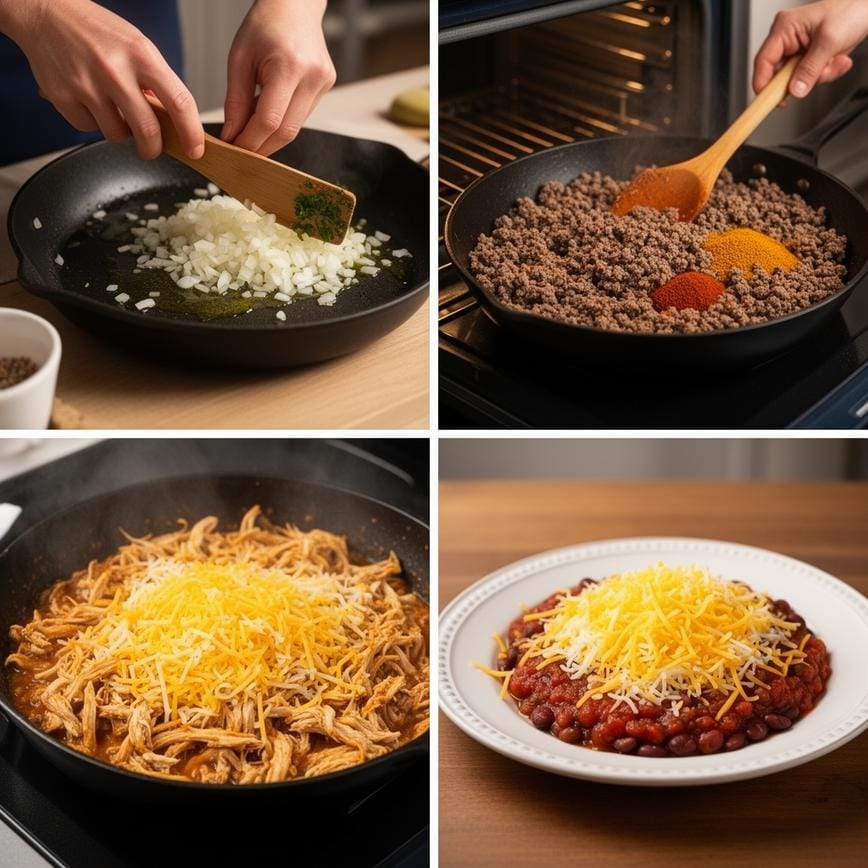
- Heat a large oven-safe skillet with olive oil over medium heat. Add the diced onion and minced garlic, sautéing for 3-4 minutes until slightly browned.
- Add the ground meat of your choice to the skillet. Break it up with a wooden spoon and sauté for 4-5 minutes.
- Stir in the onion powder, smoked paprika, dried oregano, and ground cumin. Cook until the meat is fully browned.
- If there’s excess fat, strain it out. Then, add the black beans, uncooked rice, salsa, and broth. Stir everything together.
- Cover the skillet with foil and bake in the preheated oven for 40-45 minutes, or until the rice is tender and most of the liquid is absorbed.
- Remove the foil and bake uncovered for an additional 10 minutes to let any remaining liquid evaporate.
- Sprinkle the shredded cheddar cheese on top and bake for another 5-6 minutes, or until the cheese is melted and bubbly. For extra browning, you can broil for a minute or two (optional).
- Serve warm with tortillas or tortilla chips and your favorite toppings like guacamole, sour cream, or diced tomatoes.
Pointers for Perfection & How to Store
For the best results, make sure your rice is fully cooked before adding the cheese. If you prefer a crispier top, broiling for a minute or two will give it that perfect golden finish. Leftovers can be stored in an airtight container in the refrigerator for up to 3 days. Simply reheat in the oven or microwave before serving.
If you loved this Chicken Burrito Casserole, you might also enjoy this Chicken Tzatziki Casserole Easy Weeknight Meal for another delicious twist!
Print
Chicken Burrito Casserole
- Total Time: 50
- Yield: 8 servings 1x
- Diet: Gluten Free
Description
This Chicken Burrito Casserole is a deconstructed version of your favorite Mexican dish, baked into gooey, cheesy perfection. Layers of soft corn tortillas, seasoned shredded chicken, black beans, and zesty enchilada sauce create a lasagna-style meal that is naturally gluten-free. It’s an easy, hearty weeknight dinner that freezes beautifully and feeds a crowd.
Ingredients
— The Filling —
3 cups cooked chicken breast, shredded (rotisserie chicken works perfectly)
1 can (15 oz) black beans, drained and rinsed
1 cup corn kernels (frozen, canned, or fresh)
1 cup plain Greek yogurt (or sour cream)
1 can (4 oz) diced green chiles
1 teaspoon ground cumin
1 teaspoon chili powder
½ teaspoon garlic powder
— The Layers —
10–12 corn tortillas, halved (corn is naturally gluten-free)
1 ½ cups gluten-free red enchilada sauce
2 cups shredded Mexican cheese blend (cheddar and Monterey Jack)
— Toppings (Optional) —
Green onions, cilantro, diced avocado, or extra sour cream
Instructions
1. Preheat Oven: Preheat your oven to 375°F (190°C). Lightly grease a 9×13 inch baking dish.
2. Make Chicken Mixture: In a large bowl, combine the shredded chicken, black beans, corn, Greek yogurt (or sour cream), green chiles, cumin, chili powder, and garlic powder. Mix until creamy and well combined.
3. Layer 1 (Base): Pour about ¼ cup of enchilada sauce onto the bottom of the baking dish to prevent sticking. Arrange a layer of halved corn tortillas to cover the bottom (overlap them slightly).
4. Layer 2 (Filling): Spread half of the creamy chicken mixture over the tortillas. Sprinkle with ⅓ of the shredded cheese.
5. Layer 3 (Middle): Add another layer of tortillas. Top with the remaining chicken mixture and another ⅓ of the cheese.
6. Layer 4 (Top): Top with a final layer of tortillas. Pour the remaining enchilada sauce evenly over the top, saturating the edges. Sprinkle with the final portion of cheese.
7. Bake: Cover the dish with foil (to keep moisture in) and bake for 20 minutes. Remove the foil and bake for another 10–15 minutes, or until the cheese is bubbly and slightly browned.
8. Serve: Let the casserole rest for 10 minutes before slicing (this helps it hold its shape). Garnish with fresh cilantro and green onions.
Notes
Tortillas: Corn tortillas are recommended over gluten-free flour tortillas, as they hold their texture better in casseroles and don’t become gummy.
Enchilada Sauce: Many store-bought enchilada sauces contain wheat flour as a thickener. Double-check the label to ensure it is certified gluten-free.
Make Ahead: You can assemble this casserole up to 24 hours in advance and keep it in the fridge. Add 10 minutes to the baking time if cooking from cold.
Freezing: This freezes excellently. Bake it, let it cool completely, slice into squares, and freeze in individual containers for quick lunches.
- Prep Time: 15
- Cook Time: 35
- Category: Dinner
- Method: Baking
- Cuisine: Mexican-American
Nutrition
- Serving Size: 1 square
- Calories: 390
- Sugar: 4
- Sodium: 680
- Fat: 16
- Saturated Fat: 8
- Unsaturated Fat: 5
- Trans Fat: 0
- Carbohydrates: 32
- Fiber: 5
- Protein: 30
- Cholesterol: 85
Your Burning Questions Answered!
- Can I make this Chicken Burrito Casserole ahead of time?
- Absolutely! You can assemble the casserole up to the baking step, cover it, and refrigerate for up to 24 hours. When ready, bake as directed, adding a few extra minutes if needed.
- Is this recipe gluten-free?
- Yes! As long as you use gluten-free broth and ensure your toppings are gluten-free, this dish is naturally gluten-free.
Can I freeze this casserole?
Yes, you can freeze it before or after baking. If freezing before baking, assemble the casserole, cover tightly, and freeze. Thaw in the refrigerator before baking. If freezing after baking, let it cool completely, then wrap and freeze for up to 3 months.
Dig In & Enjoy!
This Chicken Burrito Casserole is a crowd-pleaser that’s as easy to make as it is delicious. Whether you’re feeding a hungry family or meal prepping for the week, this dish is sure to become a staple in your kitchen. Don’t forget to customize it with your favorite toppings and enjoy every cheesy, flavorful bite!
For more delicious ideas, follow me on Pinterest.