Table of Contents
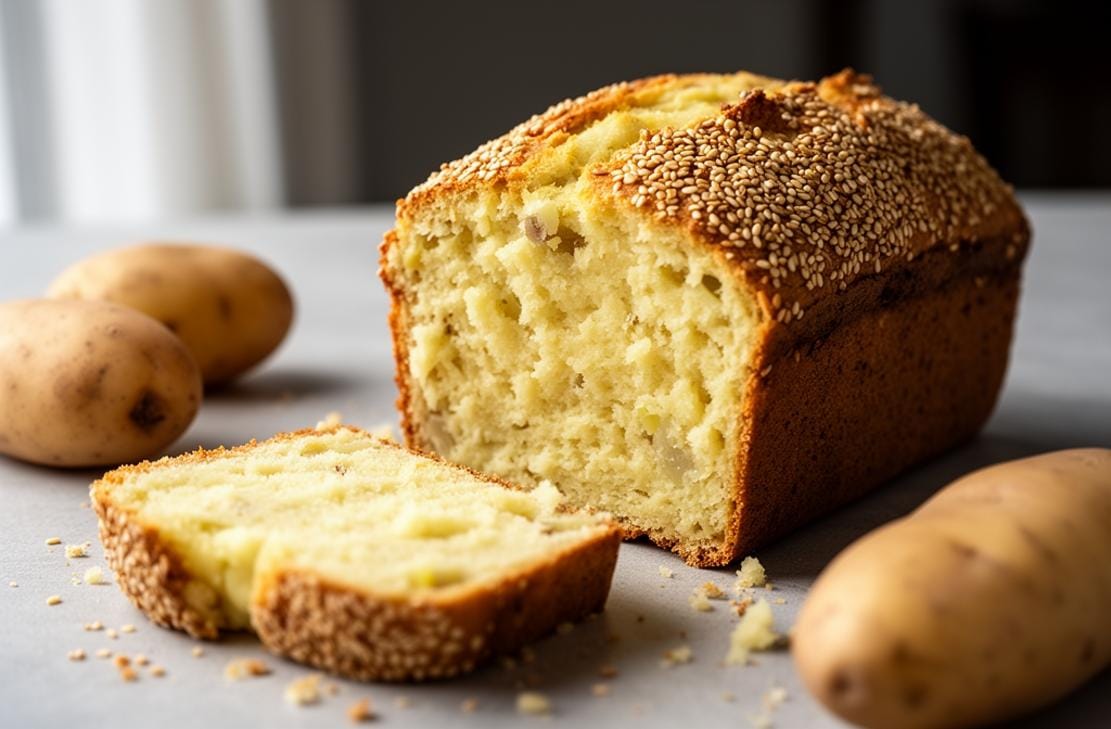
Discover the joy of baking with this moist and fluffy Gluten Free Potato Bread. Perfect for sandwiches or toast, this recipe is a game-changer for anyone avoiding gluten but still craving that classic bread texture.
I remember the first time I tried making Gluten Free Potato Bread. It was a chilly afternoon, and I wanted something warm and comforting. The aroma of freshly baked bread filled my kitchen, and I knew I had found a winner. This recipe has since become a staple in my home.
Get ready to cook up a loaf of Gluten Free Potato Bread that will impress everyone at your table!
What to Expect
- Time: Approximately 2 hours (including rising and baking time)
- Difficulty: Moderate

Before You Begin
Before you start, make sure all your ingredients are at room temperature. This helps in achieving the perfect texture for your Gluten Free Potato Bread. Also, ensure your loaf pan is well-greased to prevent sticking.
Ingredients You’ll Need
| Ingredient | Quantity |
|---|---|
| Steamed, peeled, and cubed white potatoes (Russet, red-skin, Yukon gold, or mini) | 1 cup (160 g) |
| Lukewarm milk | 1 cup (8 fluid ounces) |
| Eggs, at room temperature | 2 (100 g (weighed out of shell)) |
| All purpose gluten free flour blend | 2 cups (280 g) |
| Xanthan gum, omit if your blend already contains it | 1 teaspoon |
| Tapioca starch/flour | 10 tablespoons (75 g) |
| Granulated sugar | 2 tablespoons (25 g) |
| Instant yeast, also called rapid-rise or breadmaker yeast | 2 teaspoons (6 g) |
| Kosher salt | ¾ teaspoon |
| Unsalted butter, melted and cooled | 4 tablespoons (56 g) |
| Cooking oil spray |
Step-by-Step Guide
- Grease a standard 1-pound loaf pan and set it aside.
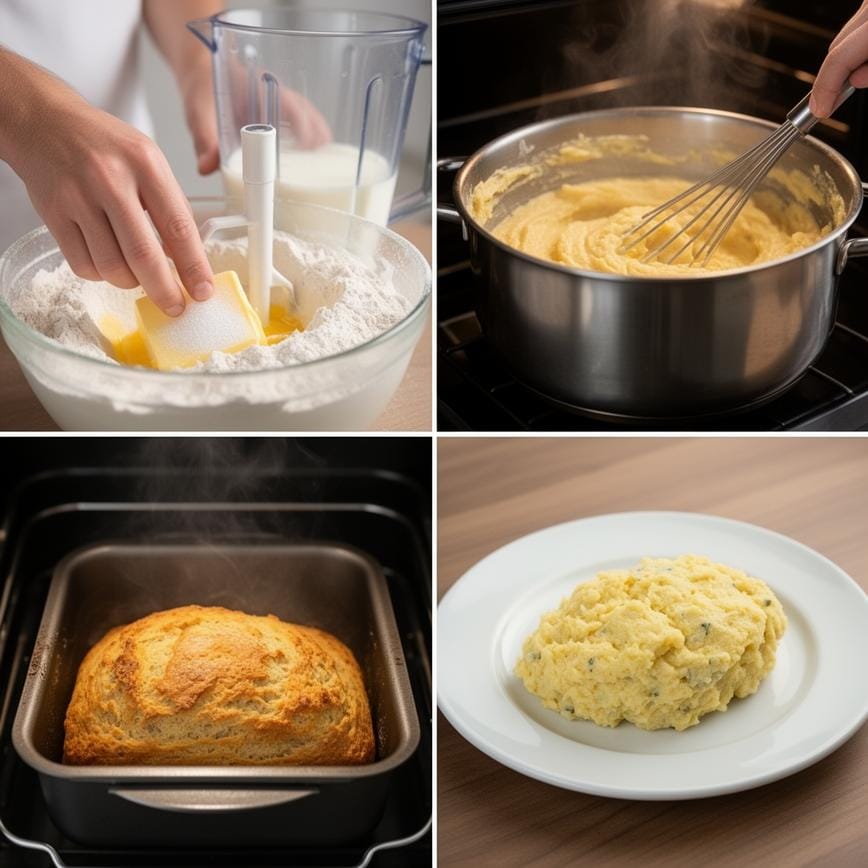
- Place the potatoes, milk, and eggs in a blender, and blend on high speed just until smooth. Don’t blend very long or you’ll activate the starch too much and your mixture will become glue-like. Set the potato mixture aside.
- In the bowl of a stand mixer fitted with the paddle attachment, place the flour blend, xanthan gum, tapioca starch/flour, sugar, and instant yeast. Whisk to combine well.
- Add the salt, and whisk again to combine.
- Create a well in the center of the dry ingredients, and add the potato mixture, and the melted butter.
- Beat in a stand mixer fitted with the paddle attachment until well-combined.
- Continue to beat until the mixture begins to take on a whipped appearance, 3 to 4 minutes. The bread dough will be thick but soft.
- Transfer the dough to the prepared 1 pound loaf pan. Smooth the top into an even layer with a moistened spatula.
- Cover the loaf pan, and set in a warm, draft-free location to rise. Allow the dough to rise until about 150% of its original size.
- Remove the cover on the risen dough, and spray the top with cooking oil spray until it glistens.
- Place the pan in the center of the preheated oven. Bake at 350°F for 45 minutes.
- Reduce the oven temperature to 325°F and continue to bake until the internal temperature of the bread is about 210°F on an instant read thermometer, the bread is golden brown all over, and the center feels firm when pressed with the tip of your finger. That should take about another 20 minutes, but may take longer.
- Remove the loaf in the baking pan from the oven and place it on a wire rack to cool for 10 minutes.
- Try the loaf out of the pan and onto the wire rack, and allow the bread to cool completely before slicing and serving.
Pointers for Perfection & How to Store
For the best results, ensure your yeast is fresh and active. Store your Gluten Free Potato Bread in an airtight container at room temperature for up to 3 days, or freeze for longer storage. If you’re looking for another delicious gluten-free recipe, check out this Gluten Free Cinnamon Pull Apart Bread Recipe.
Print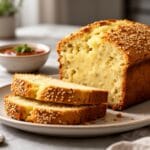
Gluten Free Potato Bread
- Total Time: 125
- Yield: 1 loaf (12 slices) 1x
- Diet: Gluten Free
Description
This Gluten-Free Potato Bread is famous for its ‘Perfect Crust’—a thick, golden exterior that crackles when you slice it, hiding a remarkably soft and moist crumb inside. The secret is incorporating real mashed potatoes into the dough, which improves moisture retention and structure, making it indistinguishable from traditional wheat bread.
Ingredients
— The Yeast Mixture —
1 cup warm milk (approx. 110°F), dairy or plant-based
2 tablespoons granulated sugar (or honey)
2 ¼ teaspoons (1 packet) instant yeast
— The Dough —
1 cup mashed potatoes (approx. 1 medium Russet potato, peeled, boiled, and mashed until very smooth)
2 cups gluten-free all-purpose flour blend (Measure for Measure, ensure it has xanthan gum)
⅓ cup tapioca flour (starch) – essential for that chewy texture
2 large eggs, room temperature
¼ cup unsalted butter, melted (or vegetable oil)
1 teaspoon apple cider vinegar
1 teaspoon salt
— The Crust Finish —
1 egg white (whisked with 1 tsp water) for egg wash
1 tablespoon melted butter (for brushing after baking)
Instructions
1. Prep the Potatoes: Boil and mash your potato beforehand. It needs to be completely smooth (no lumps!) and cooled to room temperature before adding to the dough.
2. Activate Yeast: In the bowl of a stand mixer, combine the warm milk, sugar, and yeast. Let it sit for 5–10 minutes until it becomes frothy and bubbly.
3. Mix Wet Ingredients: Add the mashed potatoes, eggs, melted butter, and apple cider vinegar to the yeast mixture. Mix on low speed with the paddle attachment until combined.
4. Add Dry Ingredients: Add the gluten-free flour blend, tapioca flour, and salt. Beat on medium speed for 3–5 minutes. (Gluten-free dough needs more mixing than wheat dough). The batter will be thick and sticky, not like a kneadable dough ball.
5. First Rise (Optional but recommended): Cover the bowl and let the dough rise in a warm spot for 30 minutes to develop flavor.
6. Shape: Grease a standard 9×5 inch loaf pan. Scrape the dough into the pan. Wet your spatula (or fingers) with water to smooth the top into a nice dome shape.
7. Second Rise: Cover the pan lightly with oiled plastic wrap. Let it rise in a warm place for 40–60 minutes, or until the dough has risen just above the rim of the pan.
8. Preheat: While rising, preheat your oven to 375°F (190°C).
9. The Crust Secret: Gently brush the top of the risen loaf with the egg white wash. This promotes browning and creates that signature ‘perfect crust’.
10. Bake: Bake for 40–45 minutes. The top should be deep golden brown and the loaf should sound hollow when tapped. (Internal temp should be around 205°F).
11. Cool: Remove from the oven and brush immediately with the tablespoon of melted butter for a soft sheen. Let it cool in the pan for 10 minutes, then transfer to a wire rack to cool COMPLETELY before slicing.
Notes
Cooling is Key: Do not slice this bread while hot! Gluten-free bread needs to cool completely to set its internal structure. If you cut it too early, the texture will be gummy.
Potato Type: Starchy potatoes like Russets work best for a fluffy texture. Waxy potatoes can make the bread too dense.
Storage: Store at room temperature in an airtight container for 2-3 days. For longer storage, slice and freeze the loaf.
Dairy-Free: Use almond/oat milk and vegan butter (or oil) to make this recipe dairy-free.
- Prep Time: 20
- Cook Time: 45
- Category: Bread
- Method: Baking
- Cuisine: American
Nutrition
- Serving Size: 1 slice
- Calories: 180
- Sugar: 3
- Sodium: 240
- Fat: 6
- Saturated Fat: 3
- Unsaturated Fat: 2
- Trans Fat: 0
- Carbohydrates: 28
- Fiber: 2
- Protein: 4
- Cholesterol: 35
Your Burning Questions Answered!
- Can I use a different type of potato?
- Yes, you can use Russet, red-skin, Yukon gold, or mini potatoes.
- Can I make this bread without a stand mixer?
- Yes, you can mix the ingredients by hand, but it will require more effort to achieve the right consistency.
Can I substitute the milk with a non-dairy alternative?
Yes, you can use almond milk or any other non-dairy milk as a substitute.
Dig In & Enjoy!
There you have it—a delicious loaf of Gluten Free Potato Bread that’s sure to become a favorite in your household. Enjoy it fresh out of the oven or toasted with your favorite spread. For more delicious ideas, follow me on Pinterest.