Table of Contents
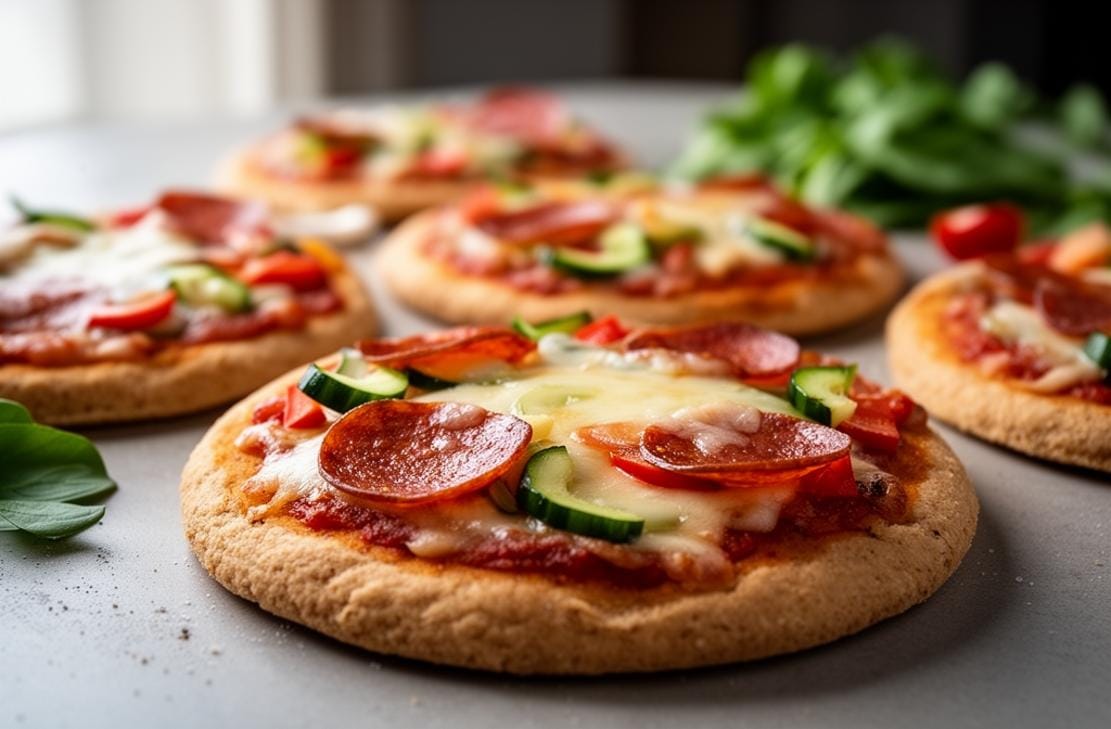
Looking for a delicious and easy-to-make snack or meal? These Gluten-free Mini Pizzas are the perfect solution! They’re crispy, cheesy, and packed with flavor, making them a hit with both kids and adults. Plus, they’re gluten-free, so everyone can enjoy them without worry.
I first discovered the joy of making Gluten-free Mini Pizzas when I was looking for a fun and healthy alternative to traditional pizza. As someone who loves to experiment in the kitchen, I was thrilled to find a recipe that was not only delicious but also catered to my gluten-free lifestyle. These mini pizzas have since become a staple in my home, and I’m excited to share the recipe with you!
Get ready to cook up a storm with this fantastic recipe for Gluten-free Mini Pizzas. It’s time to roll up your sleeves and get started!
What to Expect
- Time: Approximately 30 minutes
- Difficulty: Easy
Before You Begin
Before you start making your Gluten-free Mini Pizzas, make sure you have all your ingredients measured and ready to go. This will make the process smoother and more enjoyable. Also, preheat your oven to 400°F (200°C) to ensure it’s ready when you are.
Ingredients You’ll Need
| Ingredient | Quantity |
|---|---|
| Almond flour | 1 1/2 cups |
| Tapioca flour | 1 cup |
| Warm water | 1/4 cup |
| Egg | 1 |
| Olive oil | 2 tbsp |
| Baking soda | 1/2 tsp |
| Salt | 1/2 tsp |
| Marinara or pizza sauce | 1/2 cup |
| Shredded cheese of choice | 1 cup |
Step-by-Step Guide
- Preheat the oven to 400°F (200°C).
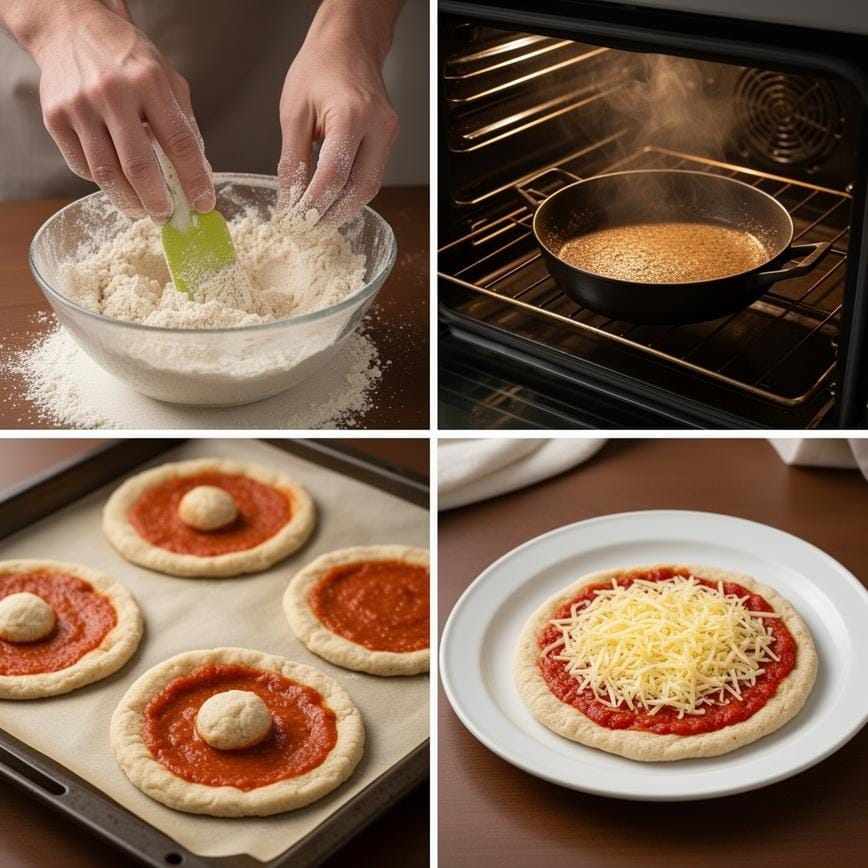
- In a large bowl, combine the almond flour, tapioca flour, salt, and baking soda. Mix well.
- Add in the egg, oil, and water and combine well using a rubber spatula, then knead with your hands for 2 minutes until the dough is well combined. The batter may feel stickier than flour-based dough.
- With oiled hands, scoop out a golf ball-sized piece of dough and flatten into a circle onto a parchment paper-lined tray. Repeat with the remaining dough.
- Pre-bake the crust for 7 minutes.
- Remove the crust from the oven and top with your sauce and shredded cheese.
- Bake again for another 7-8 minutes, until the cheese is melted.
- Top with your favorite pizza toppings.
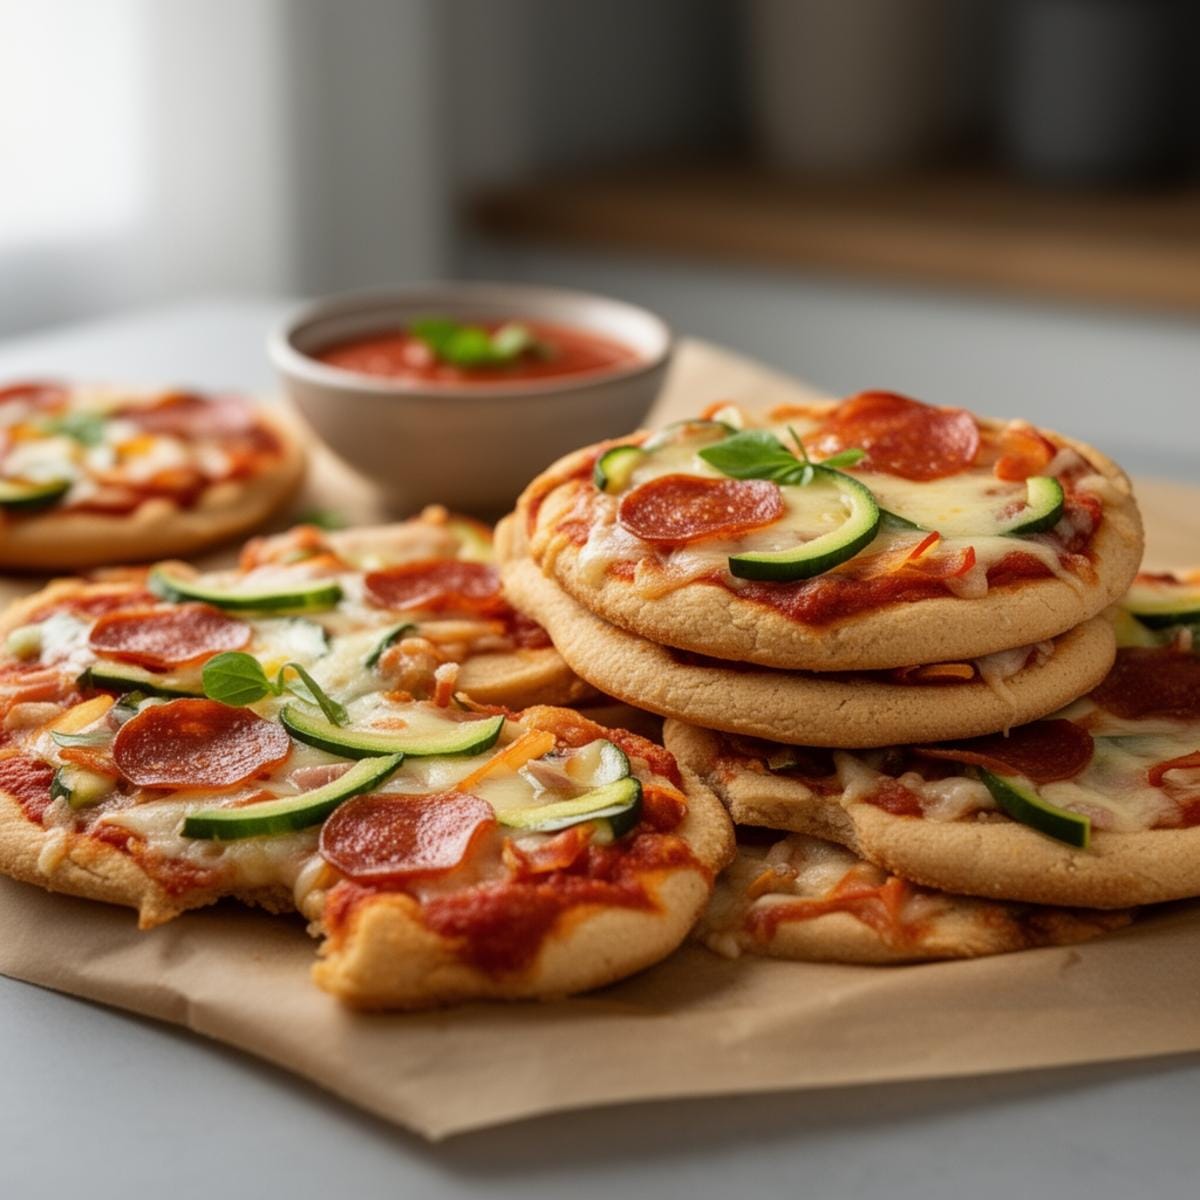
- The pizzas can be baked and frozen for up to 3 months, then reheated in the oven.
Notes
You must buy a certified Gluten-Free brand.
- Safe Brands: Schar (Pizza Crusts), Canyon Bakehouse (English Muffins), or O’Doughs (Bagel Thins).
- Alternative: If using Tortillas as a thin base, ensure they are 100% Corn or labeled “Gluten Free” (Mission GF), not “Wheat & Corn blend.”
Look for the “Gluten Free” label on the package (Brands like Hormel or Applegate are usually safe). If buying from a deli counter, ask if the slicer has been cleaned (cross-contamination is 100% guaranteed on shared slicers). Buy pre-packaged to be safe.
Read the label. Ingredients should be: Tomatoes, Oil, Salt, Herbs. If you see “Modified Food Starch” without a source (corn/tapioca), avoid it. Rao’s and Muir Glen are consistently safe choices.
ALWAYS bake on a baking sheet lined with parchment paper or foil. Never place GF food directly on a shared oven rack.
Pointers for Perfection & How to Store
For the perfect Gluten-free Mini Pizzas, make sure to knead the dough well to ensure it’s well combined. Also, don’t forget to pre-bake the crust before adding your toppings. This will help to ensure a crispy base. If you’re looking for more delicious gluten-free recipes, check out this Garlic Gluten Free Pizza Bread Recipe.

Gluten-free Mini Pizzas: Quick Gluten-Free Dinners
- Total Time: 35
- Yield: 8 mini pizzas 1x
- Diet: Gluten Free
Description
These Gluten-Free Mini Pizzas are the ultimate quick dinner or lunchbox savior. Made with a simple, rapid-rise dough that doesn’t require hours of proving, they bake up with crispy edges and a soft, chewy center. Customizable, kid-friendly, and ready in under 45 minutes from start to finish.
Ingredients
— The Quick Dough —
2 ½ cups gluten-free all-purpose flour blend (bread-friendly blend like Caputo Fioreglut or King Arthur is best)
1 packet (2 ¼ teaspoons) instant rapid-rise yeast (crucial for speed)
1 teaspoon sugar or honey (to feed the yeast)
1 cup warm water (110°F/45°C)
2 tablespoons olive oil
1 teaspoon salt
1 teaspoon xanthan gum (omit if your flour blend already contains it)
— The Toppings —
¾ cup pizza sauce or marinara
1 ½ cups shredded mozzarella cheese
½ cup mini pepperoni slices (optional)
Dried oregano or Italian seasoning (for sprinkling)
Instructions
1. Preheat your oven to 400°F (200°C). Line two large baking sheets with parchment paper.
2. Activate the Yeast: In a small measuring cup, stir the warm water and sugar together. Sprinkle the yeast on top and let it sit for 5 minutes until frothy. (If using instant yeast, you can skip this, but it ensures a better rise).
3. Make the Dough: In a large mixing bowl (or stand mixer), combine the gluten-free flour, xanthan gum, and salt. Pour in the yeast mixture and the olive oil.
4. Mix on medium speed for 2-3 minutes. The dough will be sticky and softer than traditional wheat dough—more like a thick batter. Do not add extra flour.
5. Shape the Pizzas: Lightly oil your hands or use a spoon dipped in water. Scoop about ¼ cup of dough at a time onto the parchment paper.
6. Using wet fingers or the back of a spoon, press and flatten each mound into a 4-inch circle. Create a slightly thicker rim around the edges to hold the sauce.
7. Par-Bake (The Secret Step): Bake the plain crusts for 8–10 minutes, or until they are set and just starting to turn pale gold. This prevents them from getting soggy when you add the sauce.
8. Top the Pizzas: Remove from the oven. Spread about 1 tablespoon of pizza sauce on each crust. Sprinkle generously with mozzarella cheese and add your favorite toppings (pepperoni, veggies, etc.).
9. Final Bake: Return the pizzas to the oven and bake for another 8–10 minutes, until the cheese is melted and bubbly and the crust edges are golden brown.
10. Cool slightly before serving (the cheese will be like molten lava!).
Notes
Flour Choice: For the chewiest, most ‘real pizza’ texture, Caputo Fioreglut (gluten-free wheat starch based) is the gold standard. For a wheat-free option, King Arthur Measure for Measure works well.
Storage: These freeze amazingly well. Bake them fully, let them cool, then freeze in a ziplock bag. Reheat in a toaster oven or air fryer from frozen for a quick snack.
Topping Ideas: Keep it fun! Try BBQ chicken, ham and pineapple, or just extra cheesy garlic butter.
Muffin Tin Method: For deeper ‘deep dish’ bites, you can press the dough into the bottom of a greased muffin tin instead of a baking sheet.
- Prep Time: 15
- Cook Time: 20
- Category: Dinner
- Method: Oven
- Cuisine: Italian-American
Nutrition
- Serving Size: 1 mini pizza
- Calories: 180
- Sugar: 2
- Sodium: 320
- Fat: 8
- Saturated Fat: 3
- Unsaturated Fat: 4
- Trans Fat: 0
- Carbohydrates: 24
- Fiber: 2
- Protein: 6
- Cholesterol: 15
Your Burning Questions Answered!
- Can I use a different type of flour?
- While almond flour and tapioca flour work best for this recipe, you can experiment with other gluten-free flours. However, the texture and taste may vary.
- Can I make these pizzas ahead of time?
- Yes! You can bake and freeze the pizzas for up to 3 months. Simply reheat in the oven when you’re ready to enjoy them.
What toppings can I use?
The sky’s the limit! Feel free to use your favorite pizza toppings, such as vegetables, meats, or even more cheese.
Dig In & Enjoy!
Now that you have all the information you need, it’s time to get cooking! These Gluten-free Mini Pizzas are sure to be a hit with your family and friends. So, what are you waiting for? Get in the kitchen and start creating your own delicious masterpieces. For more delicious ideas, follow me on My Pinterest.