This is the only gluten free gravy recipe you will ever need.
Forget about making a complex roux. Forget about panic-whisking while your turkey gets cold.
Table of Contents
This method breaks every rule of traditional French cooking, and it works perfectly every single time. It is glossy, rich, and completely safe for your gluten-free guests.
A Little Story About This Dish
I used to dread gravy duty.
My first attempt at a gluten-free version was a disaster. It was pale, gummy, and full of strange lumps that wouldn’t dissolve.
Then I learned the “cold start” secret.
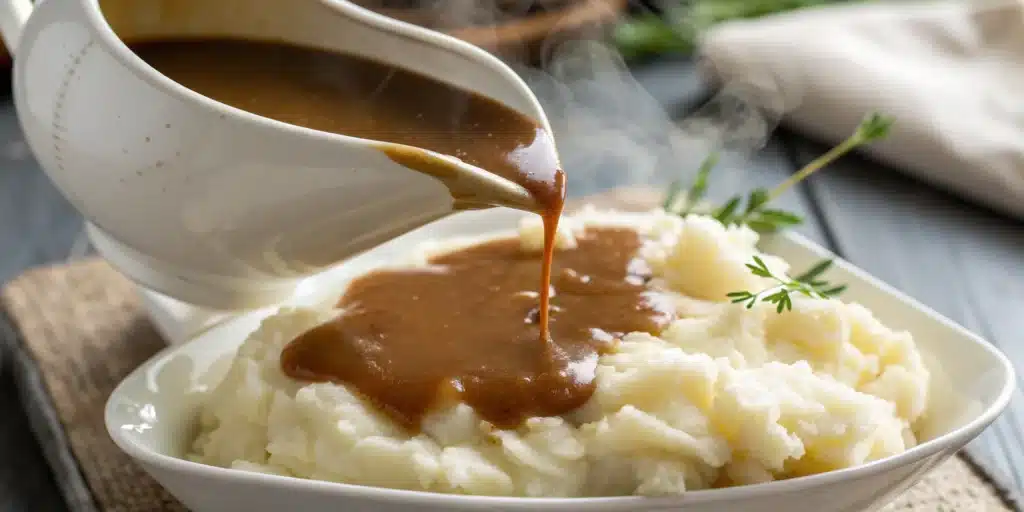
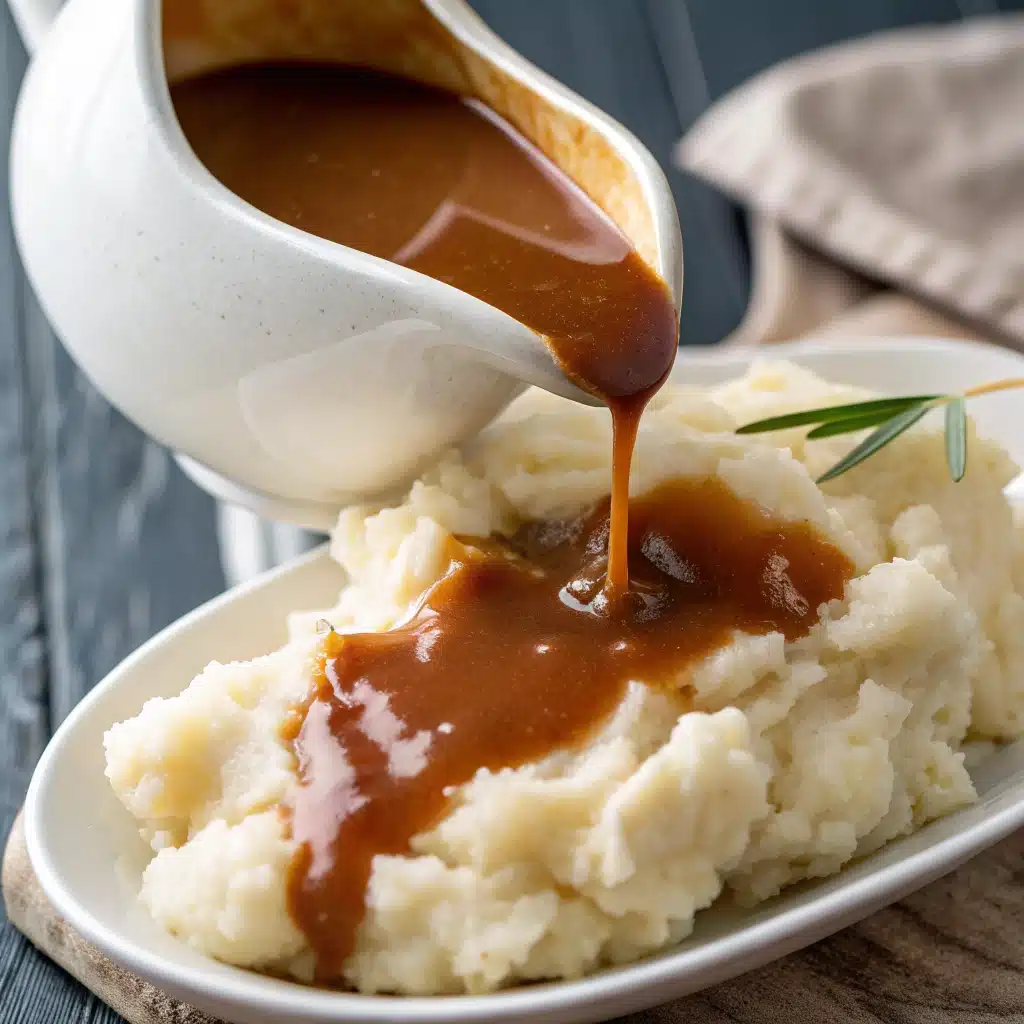
By combining everything cold before adding heat, you eliminate the risk of lumps. It feels like cheating. But when you pour this smooth, savory gluten free gravy over your mashed potatoes, you won’t care.
Get Ready to Cook!
What to Expect:
This is barely a recipe. It takes 5 minutes total. You put ingredients in a pot, you heat them up, and you are done.
Before You Begin:
Temperature matters. Make sure your broth or drippings are cool or at room temperature. If they are hot, the flour will clump immediately.
The Heart of the Dish: Ingredients You’ll Need
Simple pantry staples create magic here.
| Quantity | Ingredient | Note |
| 2 cups | Broth or Drippings | Chicken, beef, or turkey |
| 1/4 cup | GF Flour Blend | Or 3 tbsp cornstarch |
| 1/4 cup | Unsalted Butter | Use dairy-free if needed |
| To taste | Sea Salt & Pepper | Fresh cracked is best |
Let’s Get Cooking! Step-by-Step Guide
Follow this weird “dump and stir” method for the perfect gluten free gravy.
Phase 1: The Cold Start
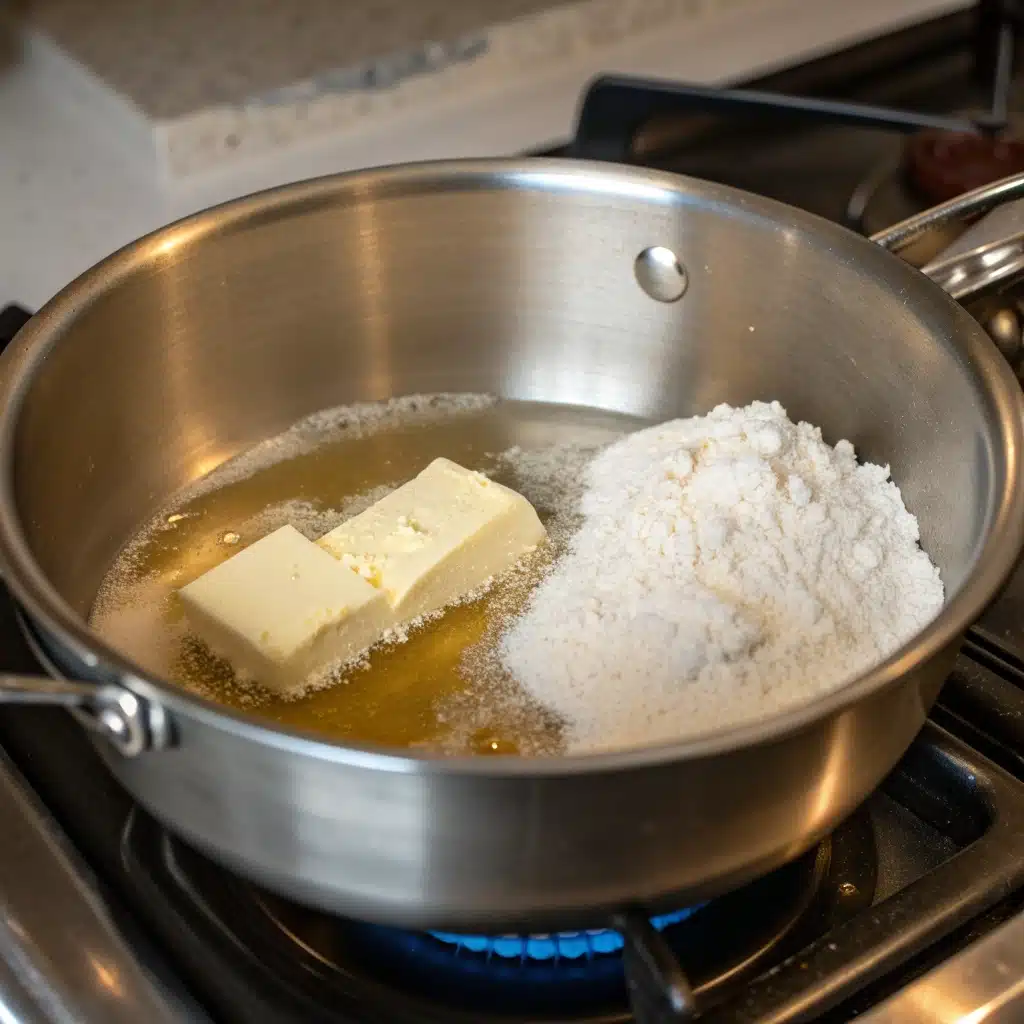
1. Combine everything cold
Grab a small saucepan. Do not turn the stove on yet. Add your cold broth (or cooled drippings), the gluten-free flour, and the butter.
2. Start whisking
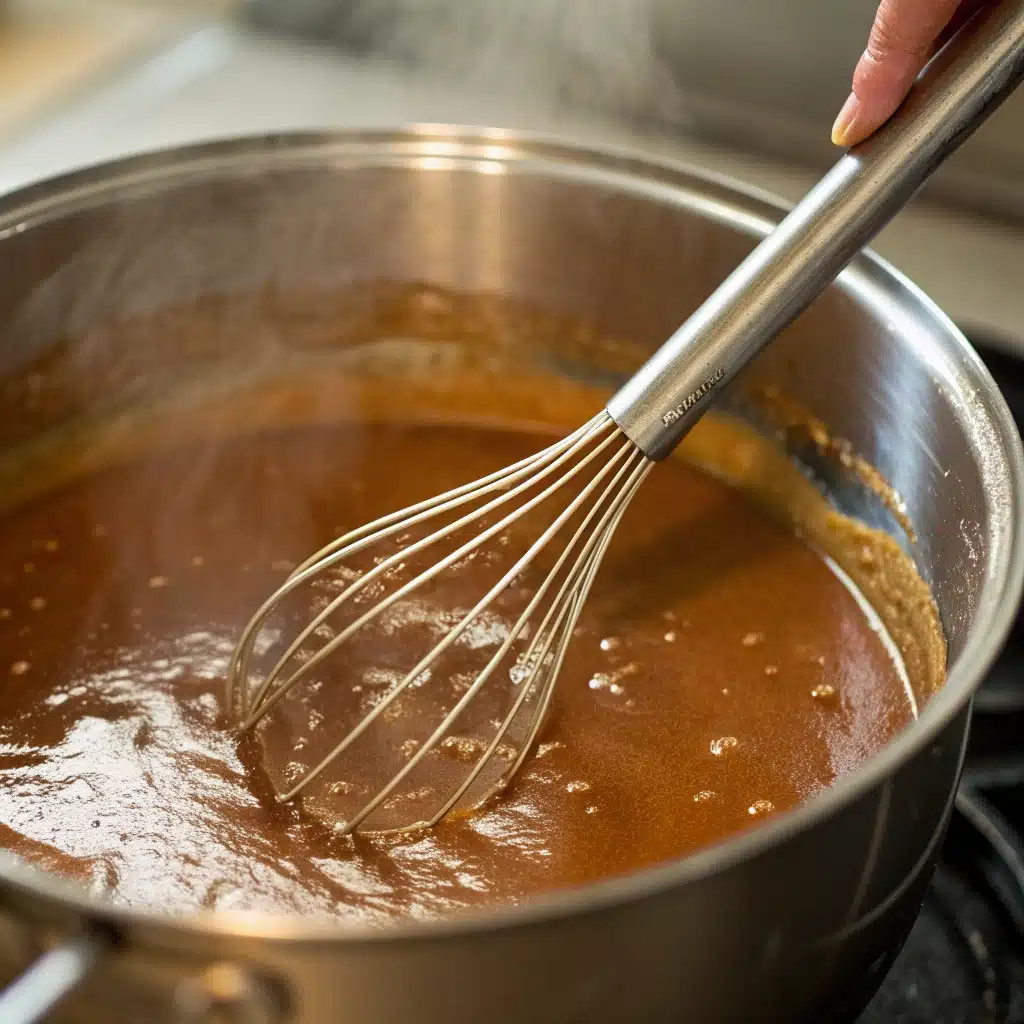
Turn the heat to medium. Start whisking immediately. You want to break up the flour and butter as they melt into the liquid.
Phase 2: Heat and Thicken
3. Bring to a boil
Keep whisking. Do not walk away. As the butter melts and the liquid gets hot, it will start to bubble.
4. Smooth it out
Once it hits a boil, the magic happens. The sauce will suddenly thicken and turn glossy. Whisk for another minute or so until it is completely smooth and coats the back of a spoon.
5. Cool and serve
Remove the pan from the heat. It will thicken a little more as it cools. Pour it into your gravy boat and serve immediately.
Mastering the Dish: Pointers for Perfection & How to Store
The Flour Matters
Not all blends are created equal. I recommend a high-quality “measure-for-measure” blend (often in a blue bag). Avoid blends made primarily of bean flour (often in red bags), as they can leave a gritty texture and strange aftertaste in delicate sauces.
Using Turkey Drippings
If you just roasted a bird, use those drippings! However, let them cool down first. If they are scorching hot, the starch will seize up. You may also need to add a splash of water if the drippings are very salty/concentrated.
Storage
This gluten free gravy stores beautifully. Keep it in an airtight container in the fridge for up to a week.
Freezing
Yes, you can freeze gravy! Store it for up to 3 months. When you reheat it, give it a vigorous whisk to bring the texture back together.

Gluten Free Gravy (5 Minutes, No Lumps)
- Total Time: 5
- Yield: 10 1x
- Diet: Gluten Free
Description
This 5-minute Gluten Free Gravy uses a ‘cold start’ method to guarantee no lumps. It is rich, savory, and works with chicken, beef, or turkey broth.
Ingredients
2 cups broth, stock, or cooled turkey drippings (chicken, turkey, veggie, or beef)
¼ cup gluten-free all-purpose flour blend (or 3 tbsp cornstarch)
¼ cup unsalted butter (use dairy-free butter for DF option)
Sea salt and fresh cracked pepper to taste
Instructions
1. Place all ingredients (broth, flour, butter) into a small saucepan. Do not turn the heat on yet.
2. Turn the heat to medium. Whisk constantly as the butter melts and the flour incorporates.
3. Bring the mixture to a boil. Continue whisking vigorously until the gravy is smooth and thickened.
4. Remove from heat. The gravy will thicken slightly more as it cools. Serve immediately.
Notes
**Flour Choice:** Use a high-quality blend (like Bob’s Red Mill 1-to-1 in the blue bag). Bean-based blends (often red bags) can create a gritty texture.
**No Lumps Rule:** Always start with cold or room temperature ingredients. If you add flour to hot liquid, it will clump immediately.
**Drippings:** If using turkey drippings, let them cool first. Taste them before adding salt, as they can be very salty.
**Storage:** Store in an airtight container in the fridge for up to a week. Freeze for up to 3 months.
- Prep Time: 1
- Cook Time: 4
- Category: Sauce
- Method: Stovetop
- Cuisine: American
Nutrition
- Serving Size: 1/4 cup
- Calories: 211
- Sugar: 1
- Sodium: 257
- Fat: 8
- Saturated Fat: 4
- Unsaturated Fat: 4
- Trans Fat: 0
- Carbohydrates: 22
- Fiber: 1
- Protein: 11
- Cholesterol: 41
These recipes are great for sparking new ideas in your gluten-free kitchen:
- Sticky Apple Cider Chicken with Crisp Autumn Slaw (Gluten-Free)
- Gluten Free Lasagna Soup (In One Pot!)
- Gluten Free Cheeseburger Soup
Your Burning Questions Answered!
Which gravy is gluten-free?
Most store-bought jars and packets contain wheat flour as a thickener. You must look for “Certified Gluten-Free” labels. Homemade is always safest because you control the thickener.
How to make a quick gluten-free gravy?
Use the “cold start” method. Combine cold broth, cornstarch (or GF flour), and fat in a pot. Boil it while whisking. It takes less than 5 minutes and saves you from washing extra bowls.
What is a gluten-free substitute for flour in gravy?
Cornstarch is the classic substitute. It makes a shiny, clear gravy. For a more opaque, traditional look, use a rice-flour-based All-Purpose Gluten Free blend.
Dig In & Enjoy!
There is no reason to have a dry Thanksgiving turkey or a sad Sunday roast.
With this fool-proof gluten free gravy, you can cover everything on your plate in savory, liquid gold.
You can follow me on Pinterest to make sure you don’t miss any of my new content.